Launch Code::Blocks IDE on Windows
Overview
In this tutorial, we will learn to access and Launch the Code::Blocks IDE tool on Windows. You will first need to install the Code::Blocks IDE. Steps to install Code::Blocks on Windows:
https://www.testingdocs.com/download-and-install-codeblocks/
First Launch
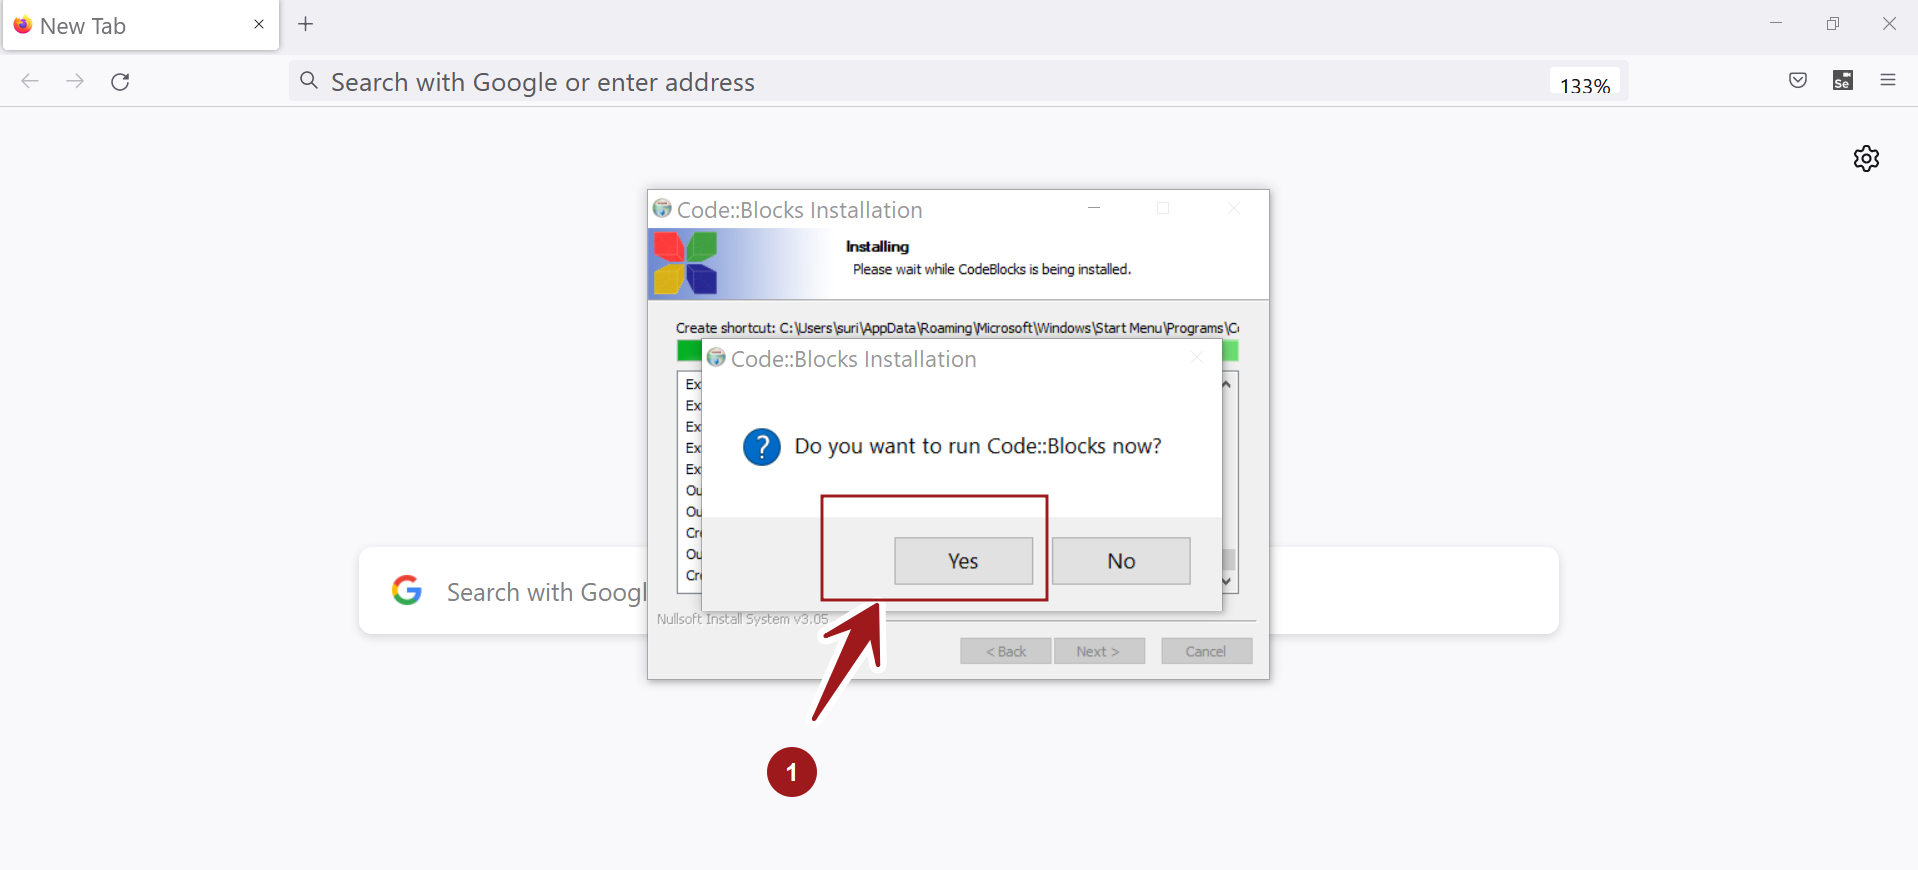
The installer wizard will prompt you to run Code::Blocks IDE after the installation. Click on the Yes button to run Code::Blocks IDE for the first time.
Desktop Shortcut
Double-click on the Code::Blocks desktop shortcut icon to launch the IDE tool.
Start Menu
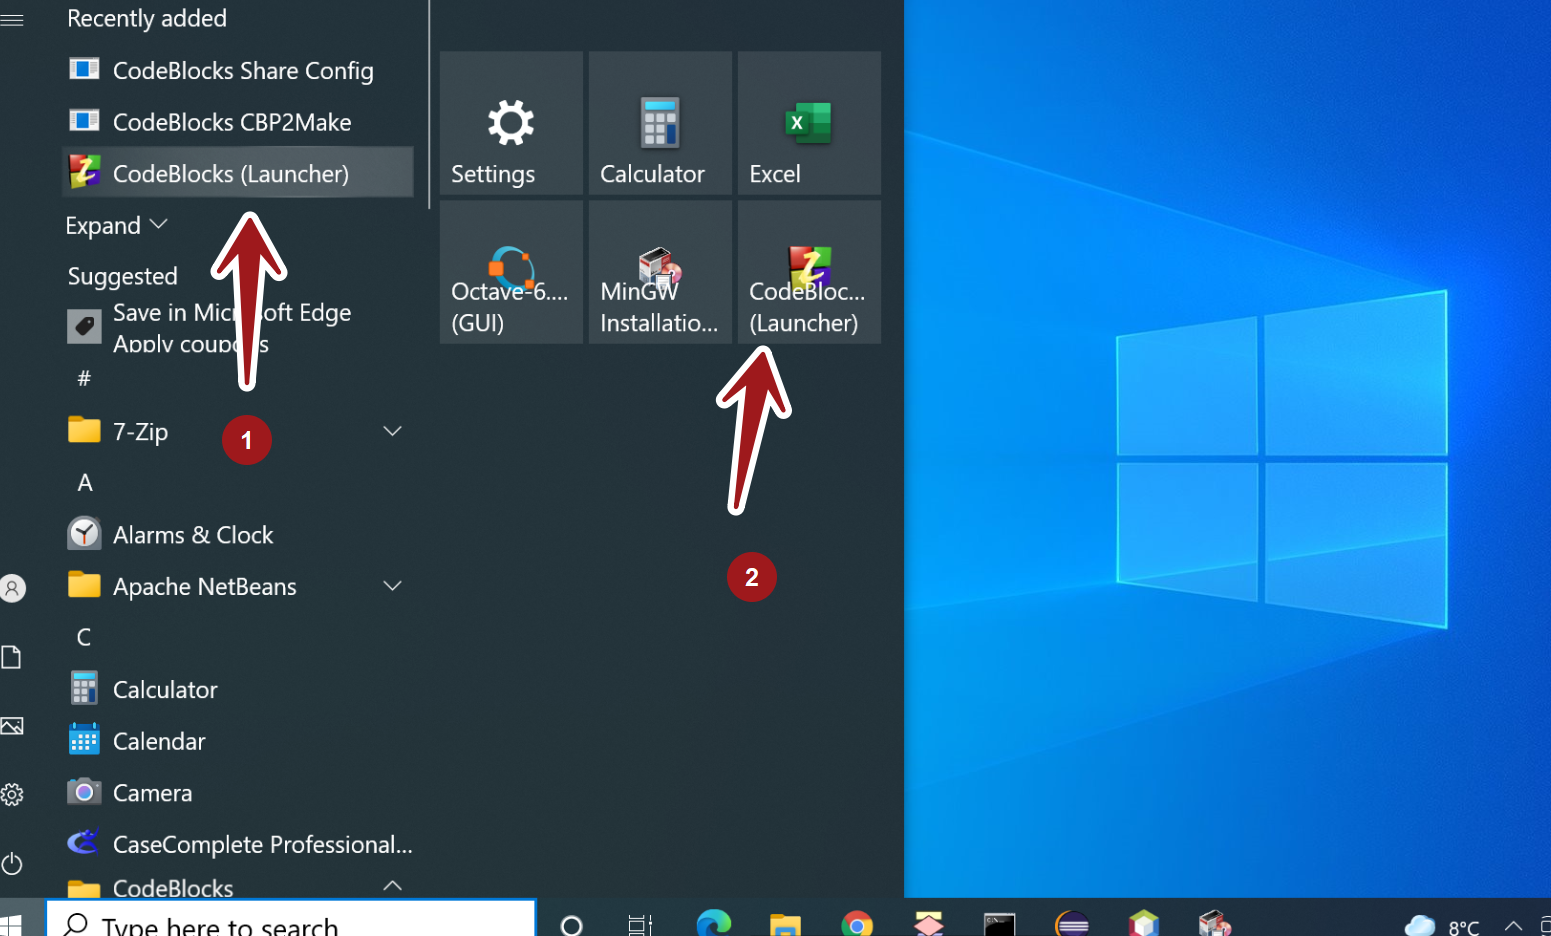
We can access the IDE from the Windows Start Menu.
Open the Start Menu, and click on the Windows icon in the left bottom corner.
Select the CodeBlocks(Launcher) entry to launch Code::Blocks IDE.
Search
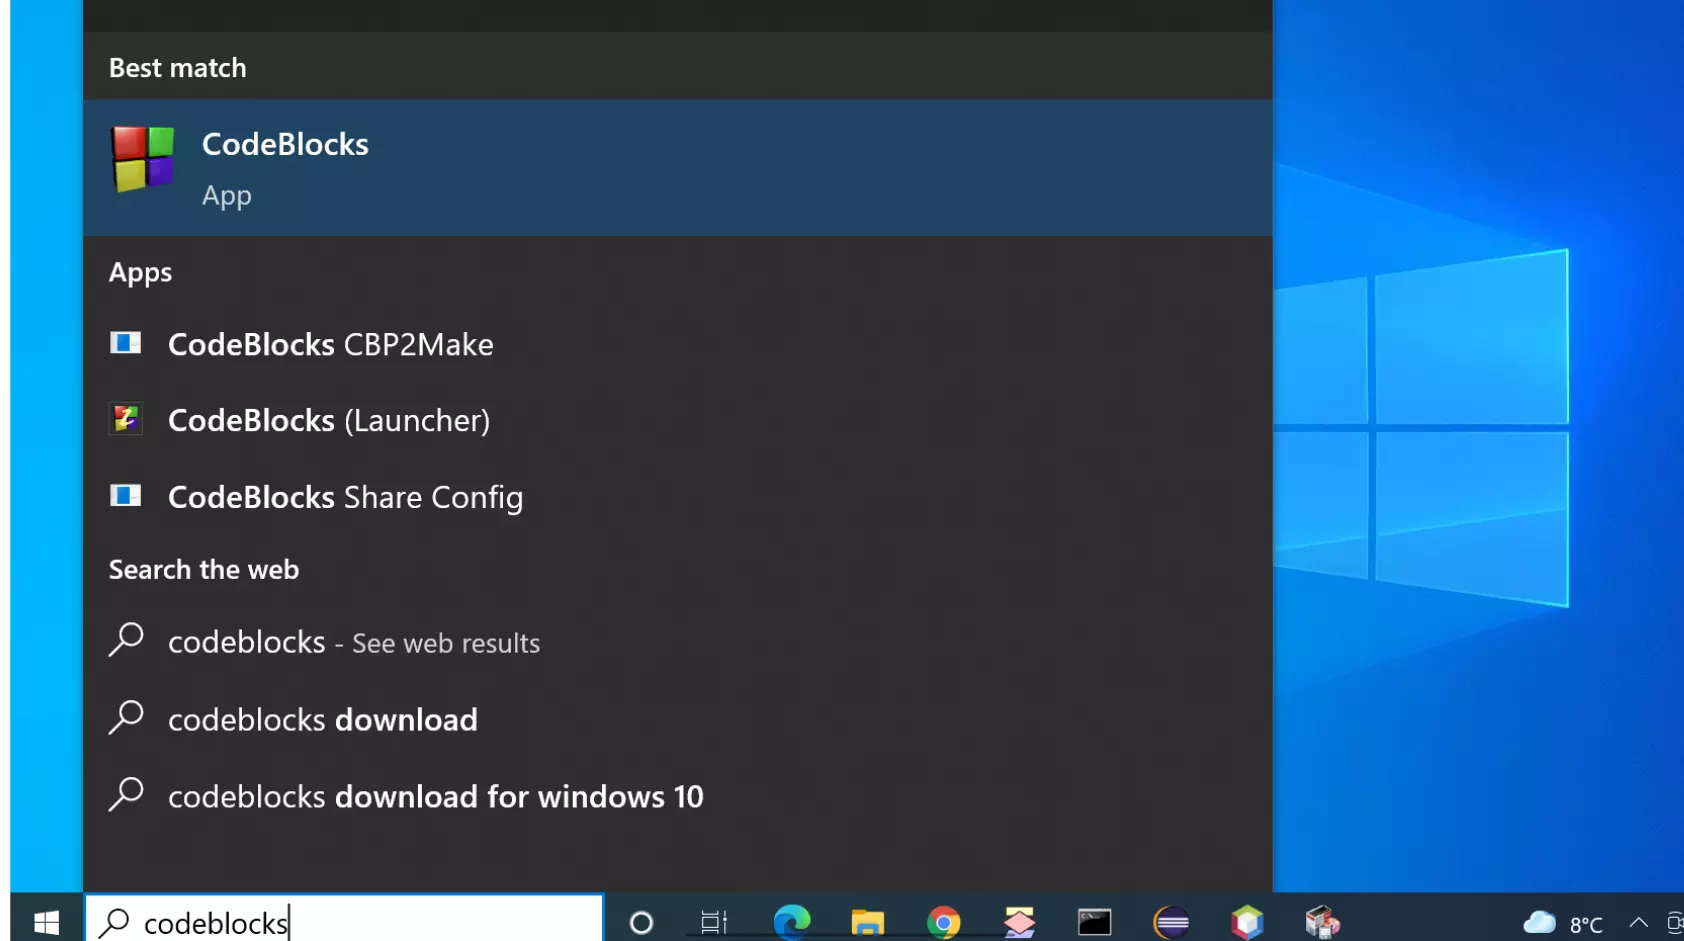
Alternatively, search for codeblocks in the Search text box. Click on the CodeBlocks App to open it.
Install Folder
Navigate to the installation folder using File Explorer and double-click on codeblocks.exe to start the IDE.
The default install folder on a 64-bit machine:
C:\Program Files (x86)\CodeBlocks\
or
C:\Program Files\CodeBlocks\
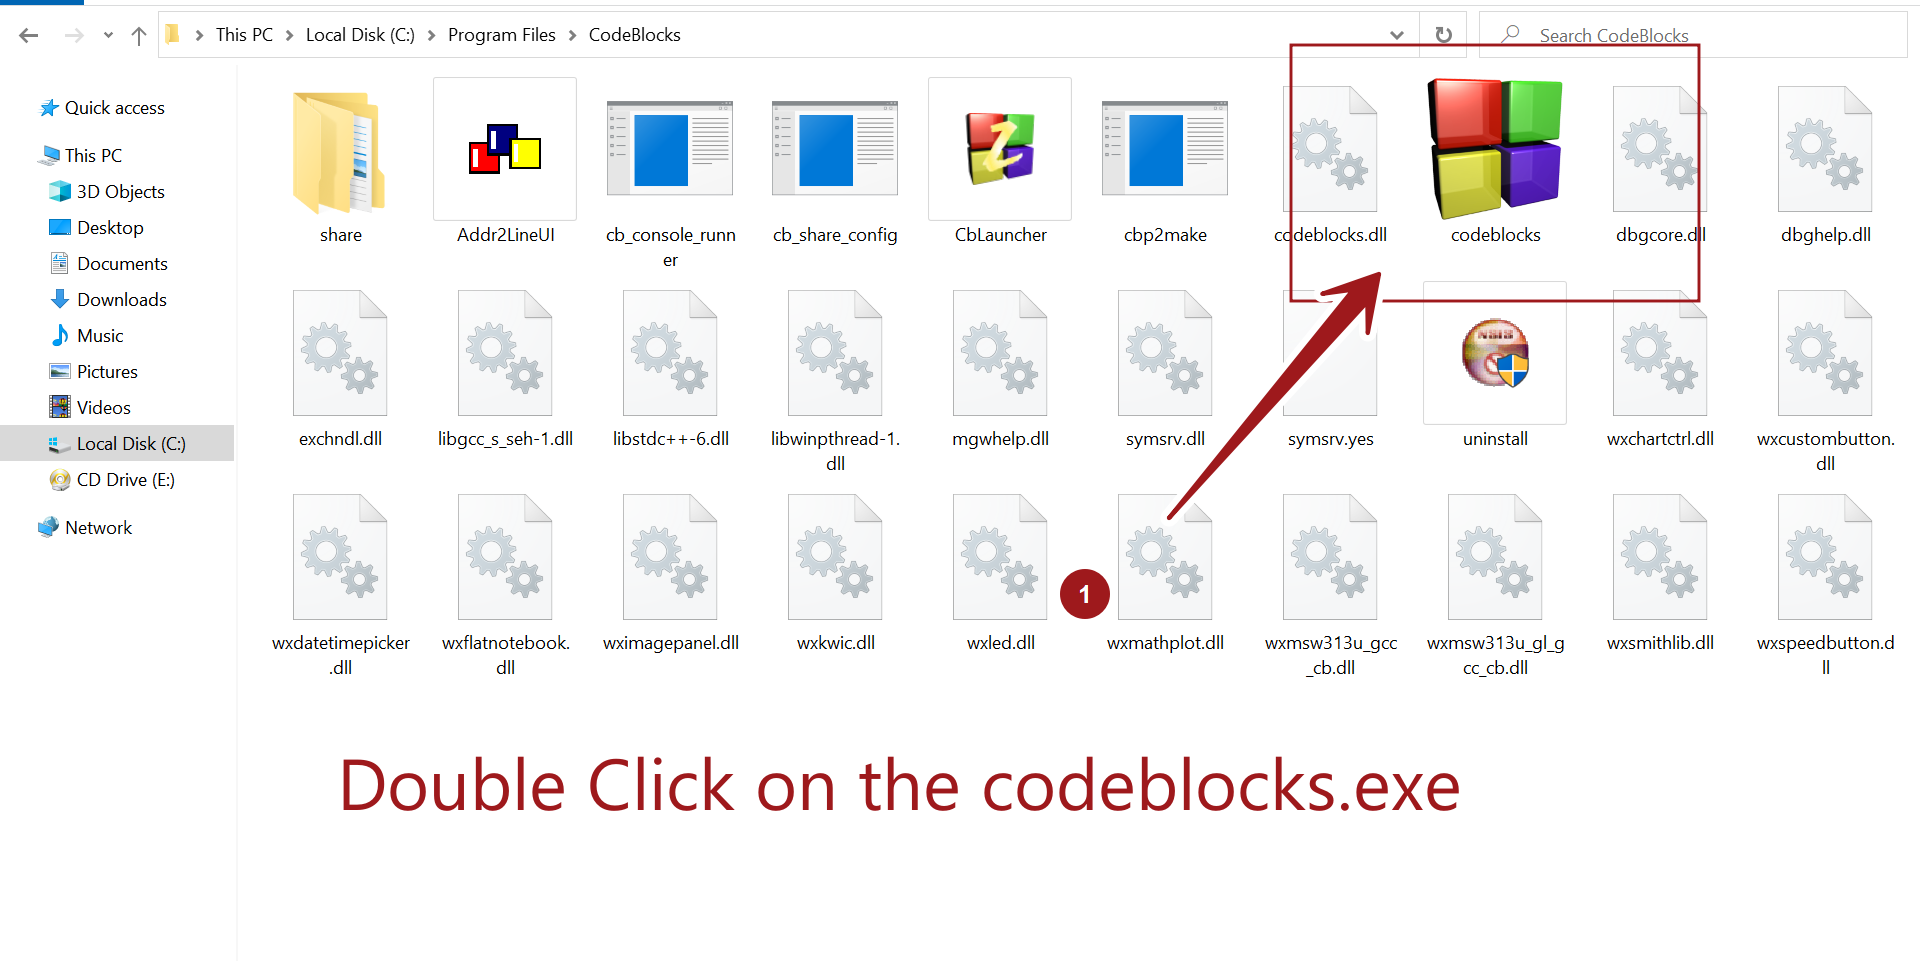
We can opt to create a desktop shortcut for easy access. This option will create a desktop shortcut for the IDE.
Navigate to the install folder and right-click on the codeblocks.exe
Choose Send to >> Desktop (create shortcut ) context menu option.
This will create a desktop shortcut for the IDE. Double-click on the desktop shortcut to launch the IDE tool.
File association
Associate C/C++ source code file types with Code::Blocks IDE application. This will make the Code::Blocks as the default application for the C/C++ source code files.
Once done, we can simply double-click on the C++ source code files to launch them in the IDE code editor.
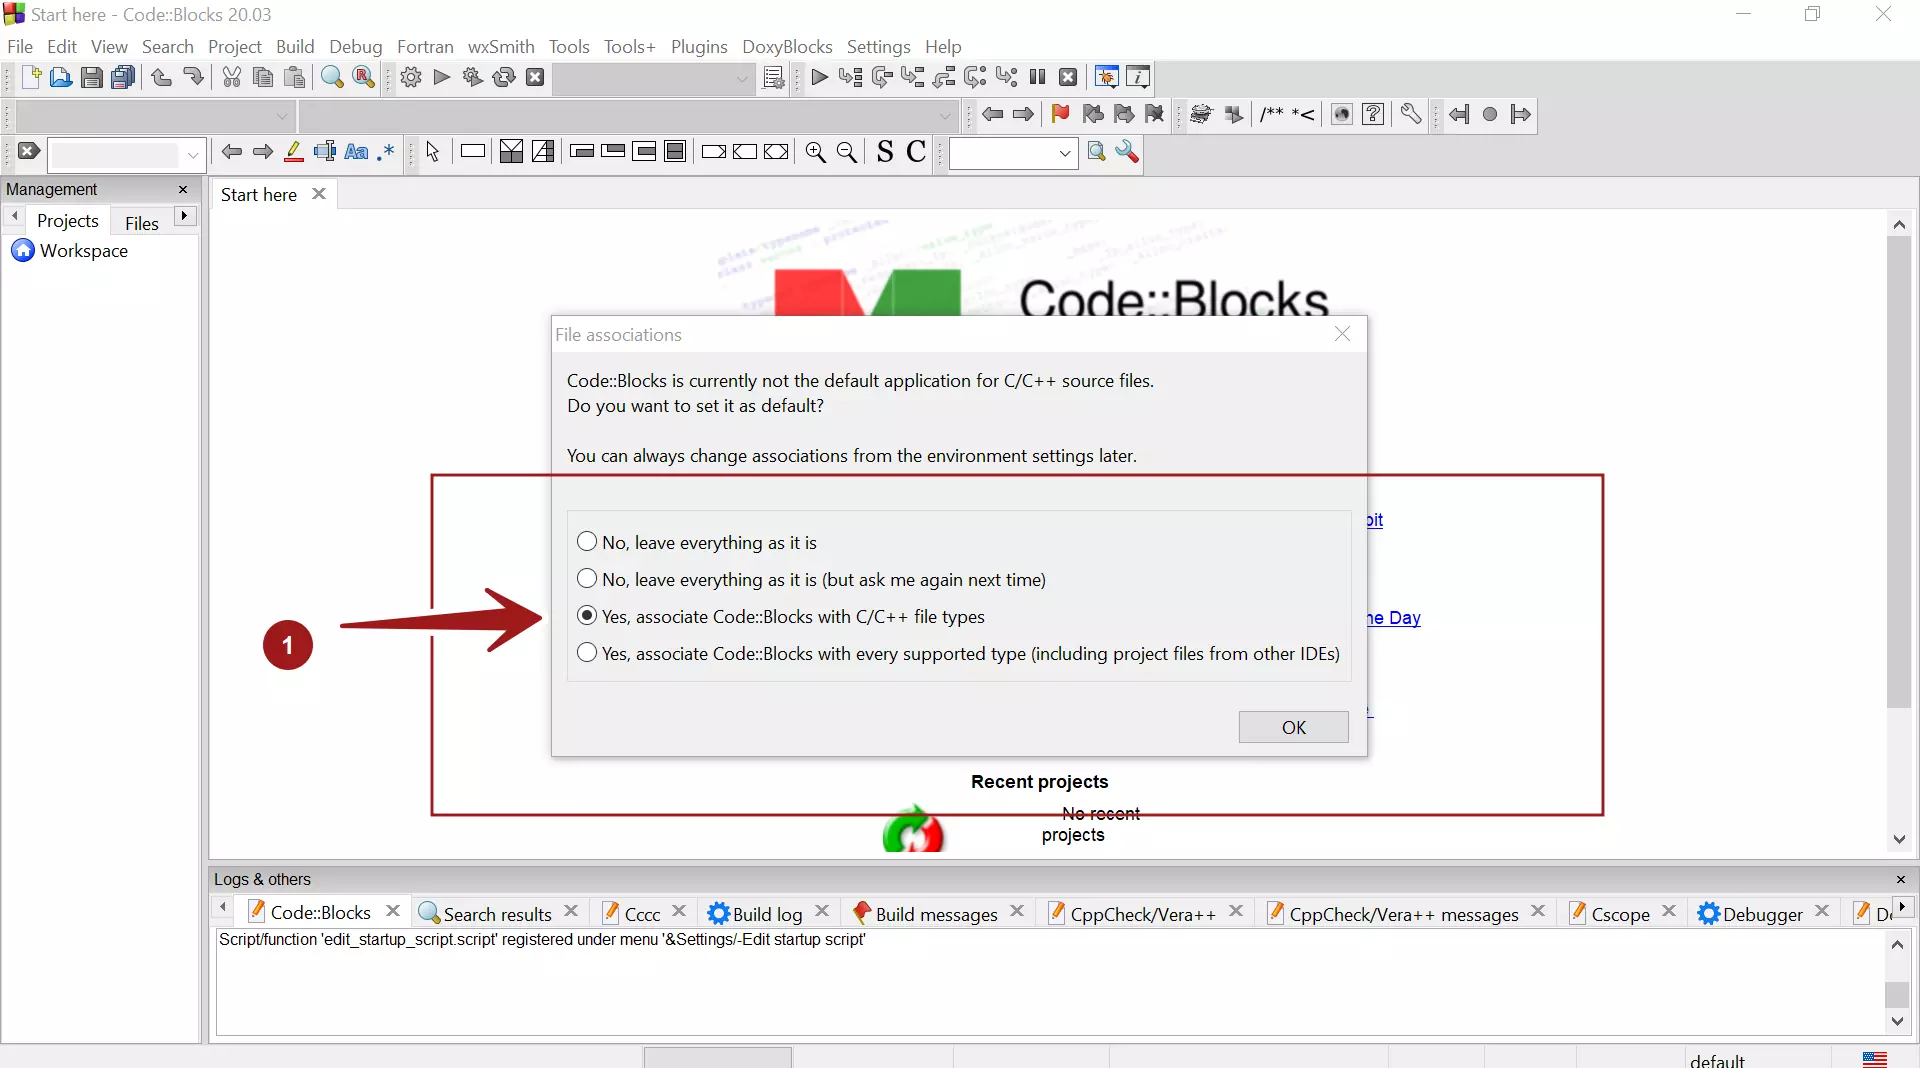
That’s it. We can also pin the IDE to the Taskbar for easy access.
Create New C++ Project
https://www.testingdocs.com/create-new-project-in-codeblocks-ide/
—
Code::Blocks Tutorials
Code::Blocks Tutorials on this website can be found at:
https://www.testingdocs.com/code-blocks-tutorials/
For more information on Code::Blocks IDE, visit the official website:


