Working with Code::Blocks IDE
Overview
In this tutorial, we will learn some steps working with Code::Blocks IDE. Let’s start by creating a new project.
Create a New Project
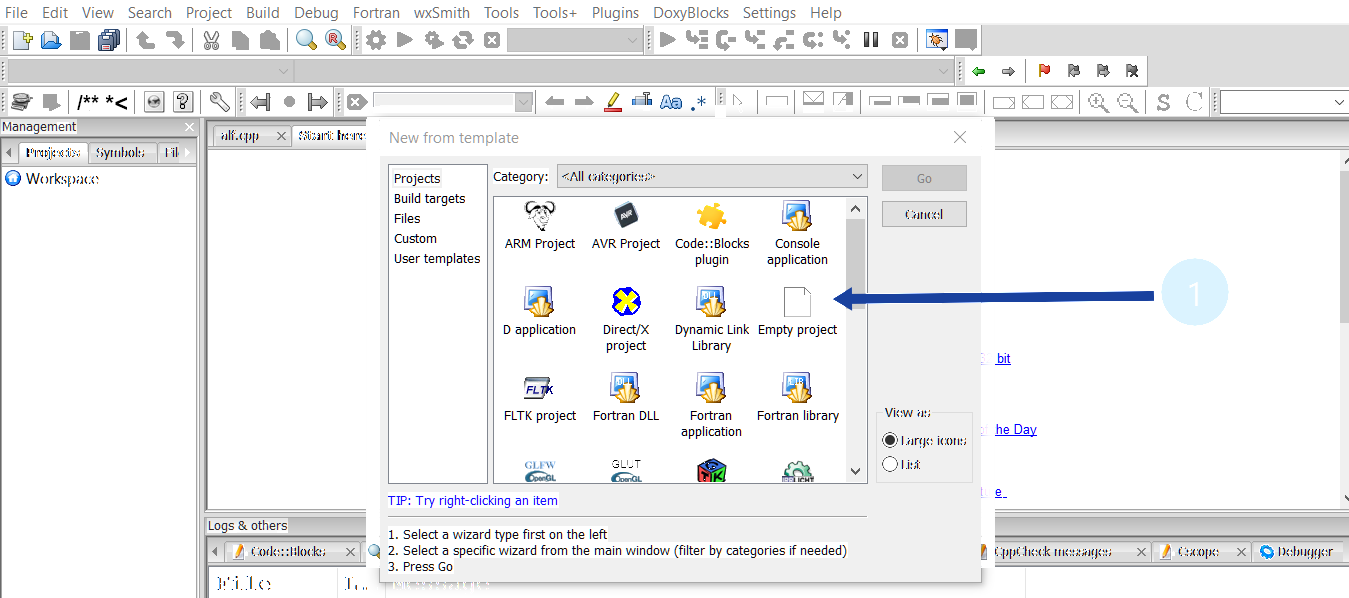
It is always better to create a project for each of your applications. A project contains related files such as source files, header files, input files, etc. You can create a new project in Code:: Blocks IDE by clicking
File >> New >> Project…

You can choose your project from several categories as shown above.
Choose a category, for example, Empty Project and click on Next.
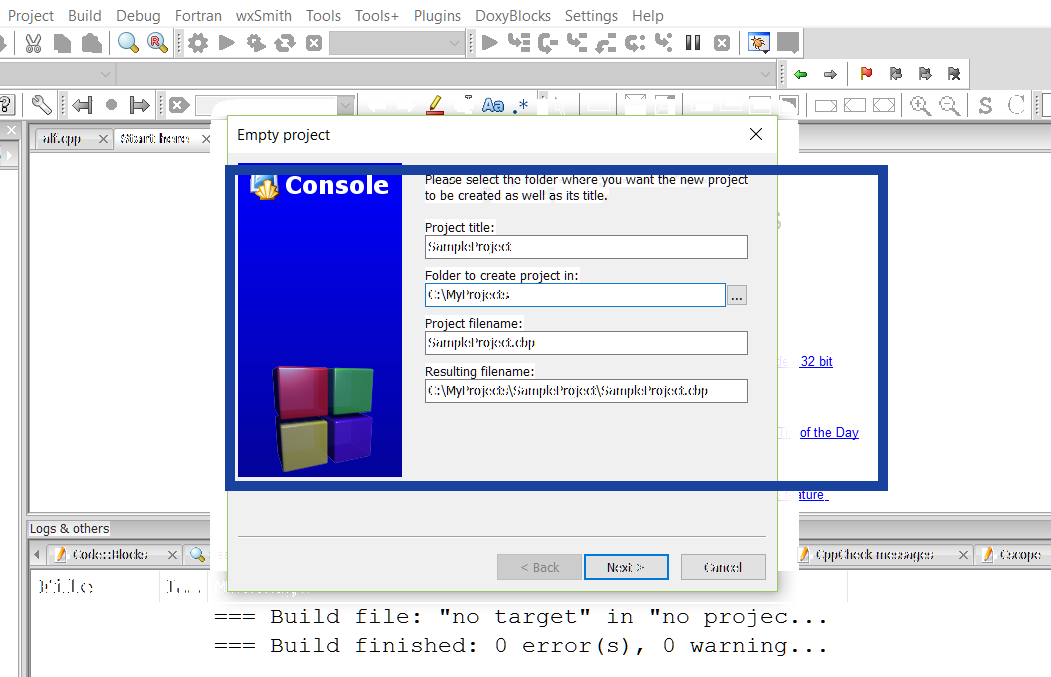
In “Project Title”, enter “SampleProject”. In “Folder to create project in”, set to your working directory, e.g., “C:\MyProjects”. Click on the Next> button.

A project directory SampleProject will be created under C:\MyProjects, with a project configuration filename of SampleProject.cbp as shown above. You could later create more projects under this working directory C:\MyProjects. cbp stands for CodeBlocks-Project.
In the Compiler field, Choose GNU GCC Compiler.
Check both the Debug and Release configuration checkboxes.
Click on the Finish button to create the Project.
Create a C/C++ File
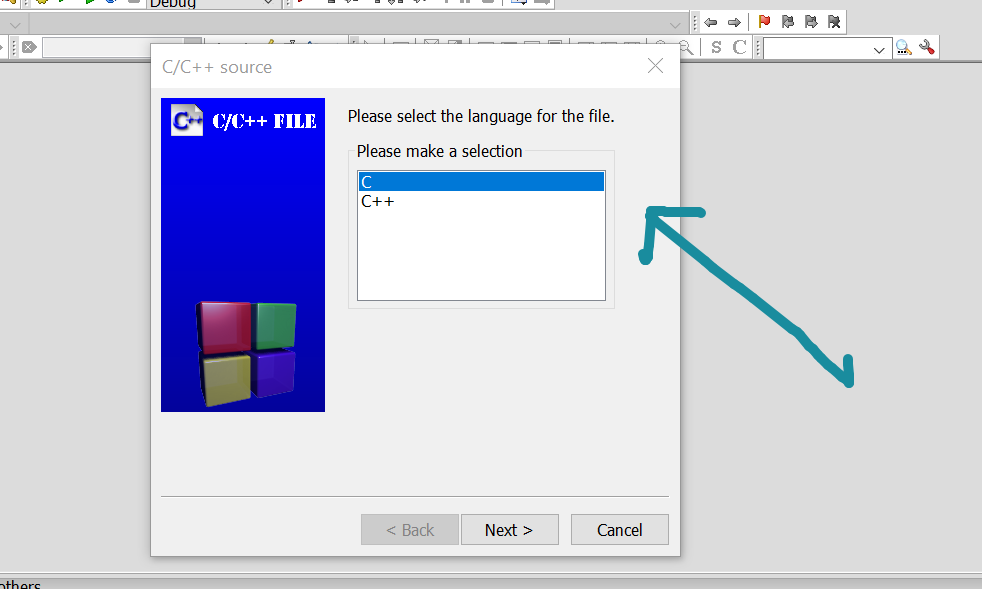
To create a source file under the project choose
File >> New File… >> Select C/C++ source.

In Filename with full path >> Click the Navigate (…) button to navigate to the project directory and enter the new file name.
How to Build and to Run the Project
To Build the program, choose to Build >> Build.
You can run the program, by selecting Build >> Run.
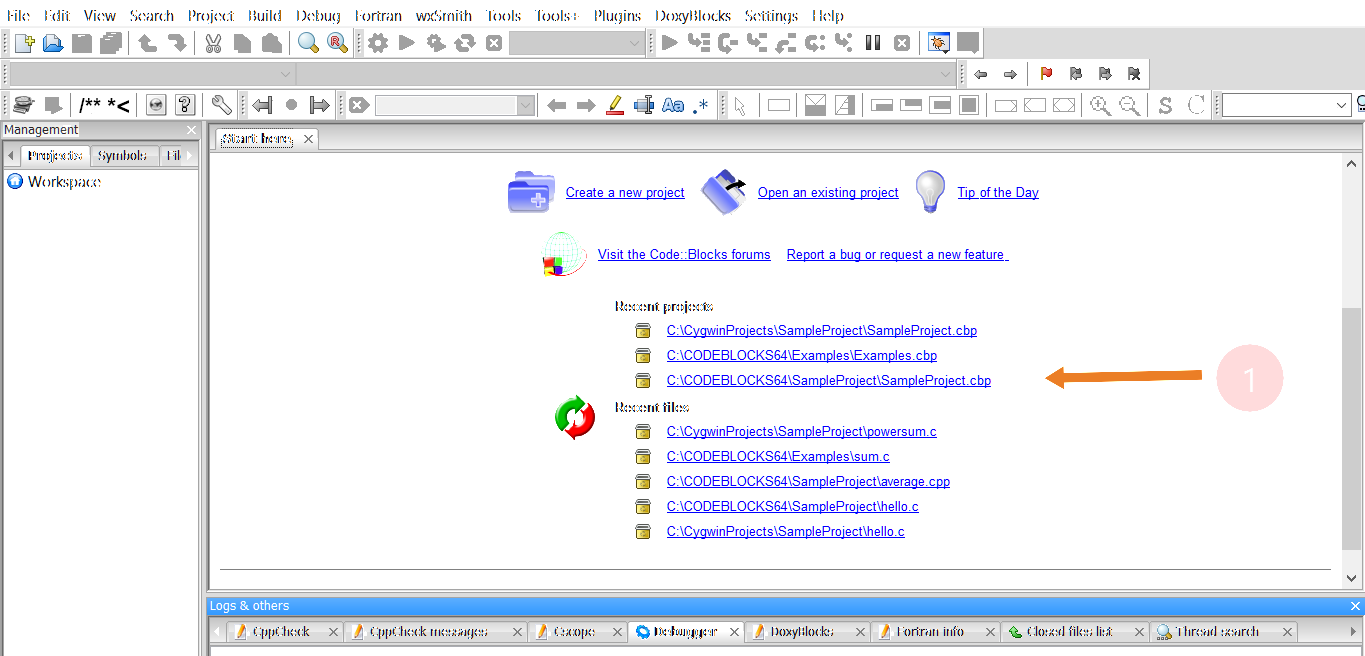
Open an existing project
From File menu >> Recent Projects >> Choose the desired project.
File menu >> Open… >> Navigate to your project directory. For example choose SampleProjectName.cbp

The IDE used in the program is Code:: Blocks. To download and install Code Blocks follow the link:
https://www.testingdocs.com/download-and-install-codeblocks/
For more information on Code Blocks IDE, visit the official website of Code blocks IDE:
http://www.codeblocks.org/


