Execute Tests in TestLink
Overview
Execute Tests page is where users can execute test cases and write test results. In this tutorial, we will learn to execute test cases in TestLink. Test Execution setup allows testers to execute the assigned test cases. The usual workflow for the Test Execution setup is as follows:
- Create Project
- Create Test Plan
- Create a Build
- Add and map the test cases to the Test Plan and Build.
Execute Tests
To launch the Execute Tests page:
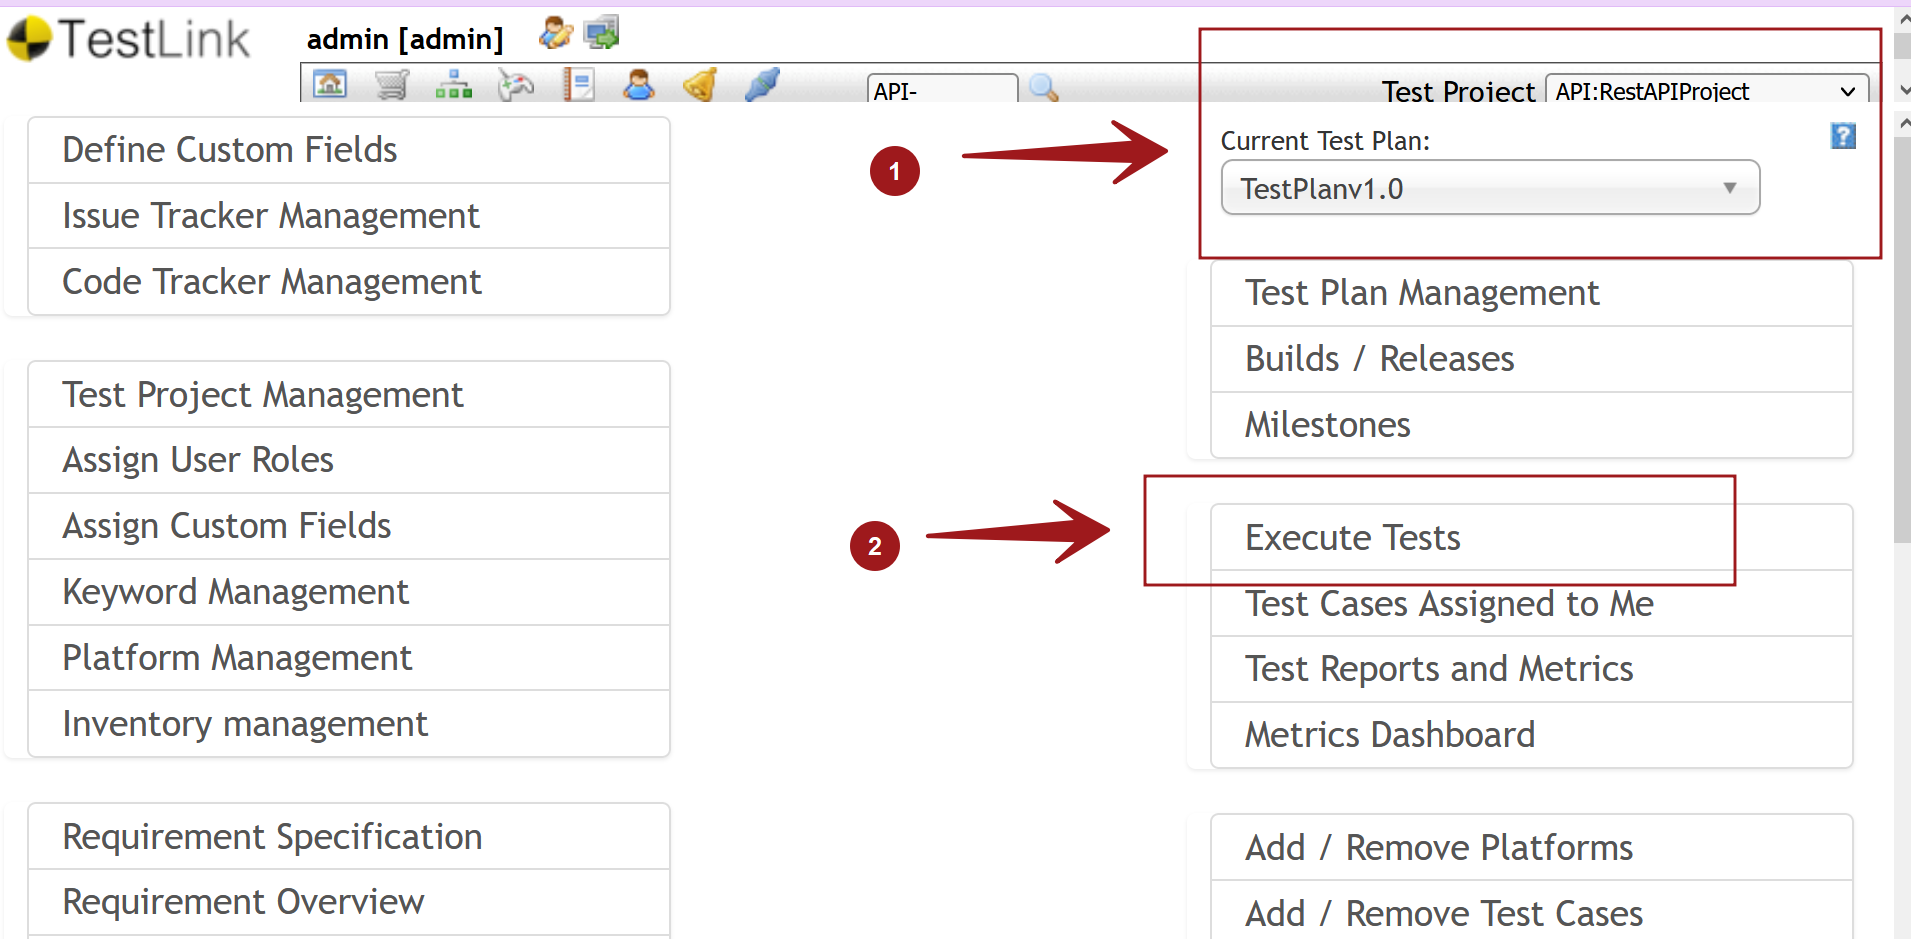
Select the Project and the Test Plan and click on the Execute Tests link on the dashboard.

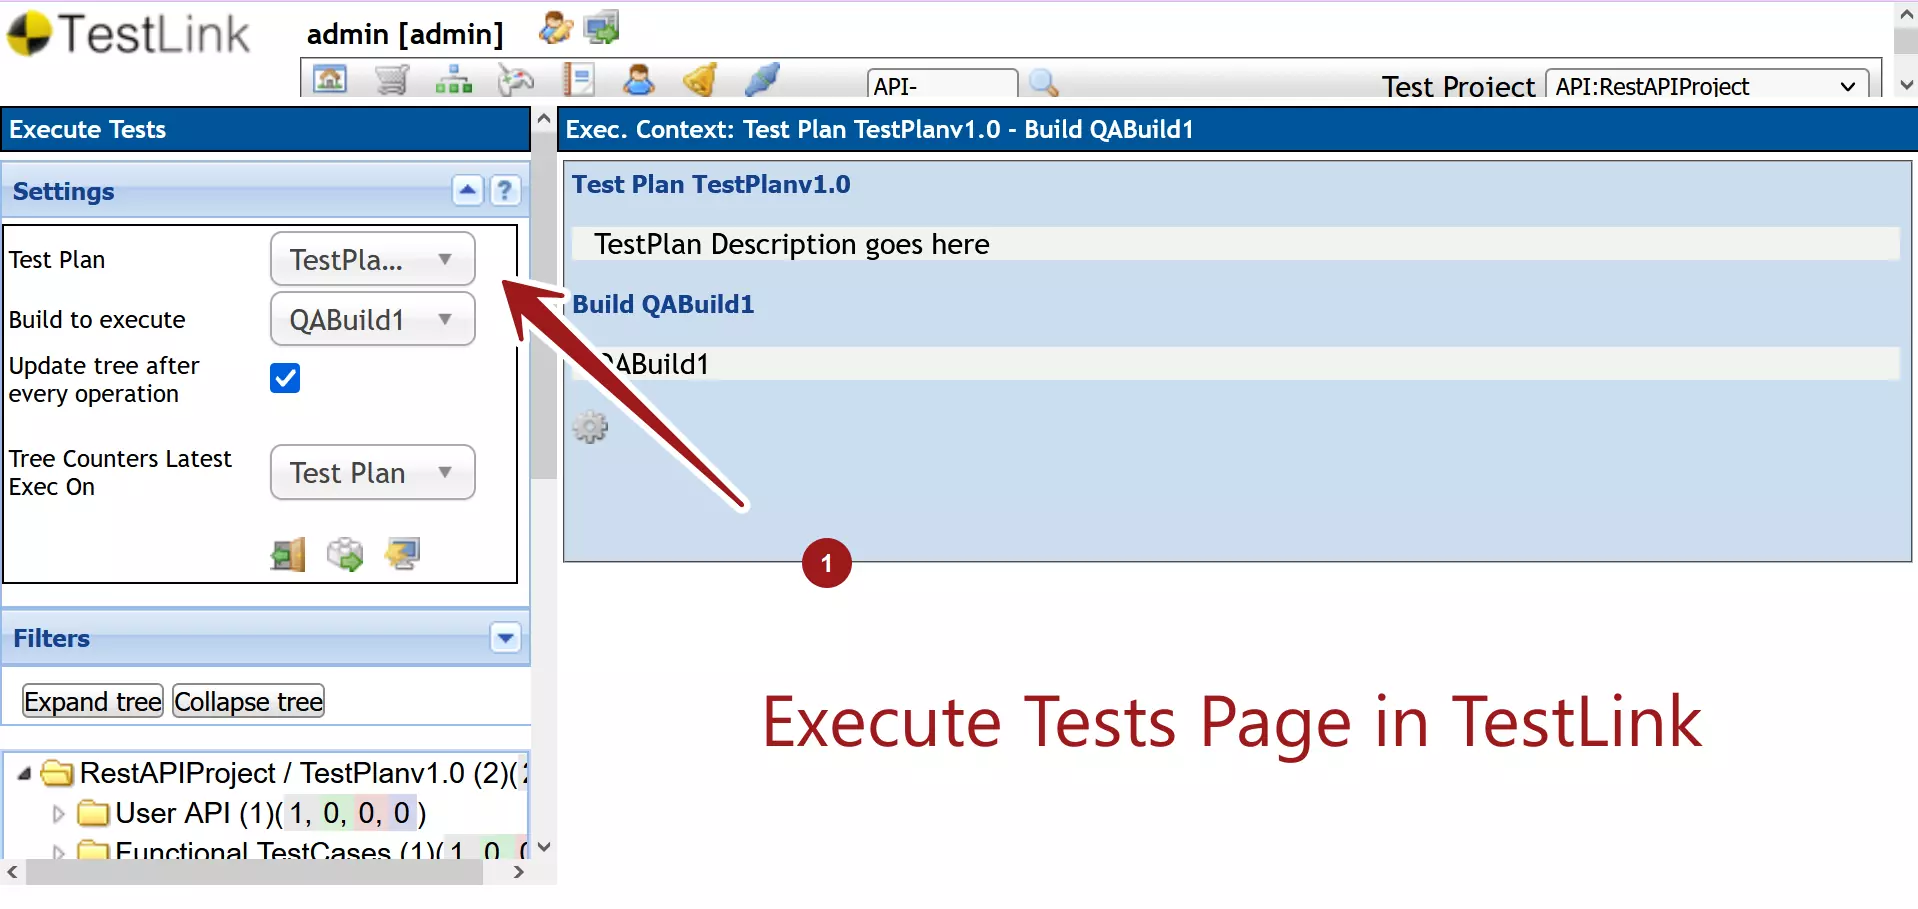
This will launch the Execute Tests page. In the Settings box, we can select the Test Plan and the Build to execute from the drop-down lists. The page will auto-refresh with the selection.

Below the Settings, we can find Filters. Filters allow to search and narrow down the test case display results.
Initially, the test cases would be Not Run state. Testers can test and execute the test case on the application. Based on the result, they can mark or update the test case in Test Link.
To know more about different Test Case Status: Testcase Status in TestLink
—
TestLink Tutorials
TestLink Tutorial on this website can be found at:
https://www.testingdocs.com/testlink-tutorials/
For more updates please like our Facebook page:


