Write JUnit Test using BlueJ IDE
Write JUnit Test using BlueJ IDE
In this post, you will learn how to write a simple JUnit test using BlueJ IDE. BlueJ is a free Java Development Environment designed for beginners.
It is used by millions worldwide. Let us create a simple class and write a JUnit test using BlueJ IDE.
DVD class
Create a DVD class with title and price. We will set the title and price for the DVD and test the method.
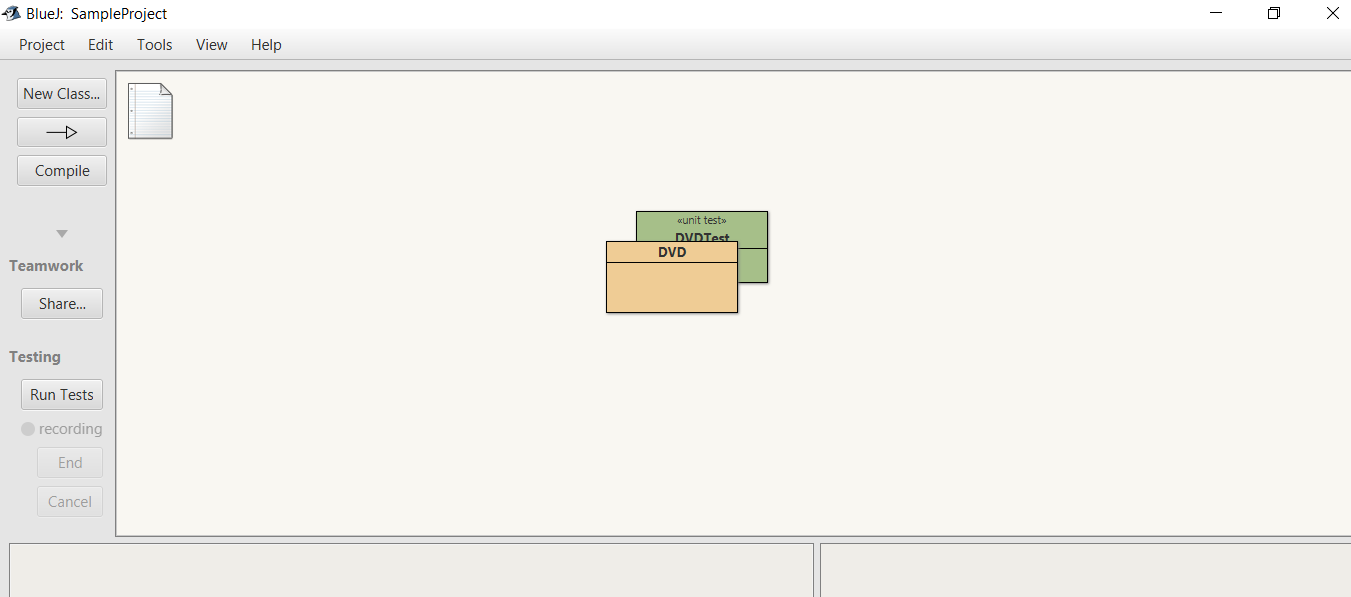
Create a new class
Launch BlueJ >> click on the New Class button. Add/Modify the pre-populated code for the DVD class.
For example, as shown below:
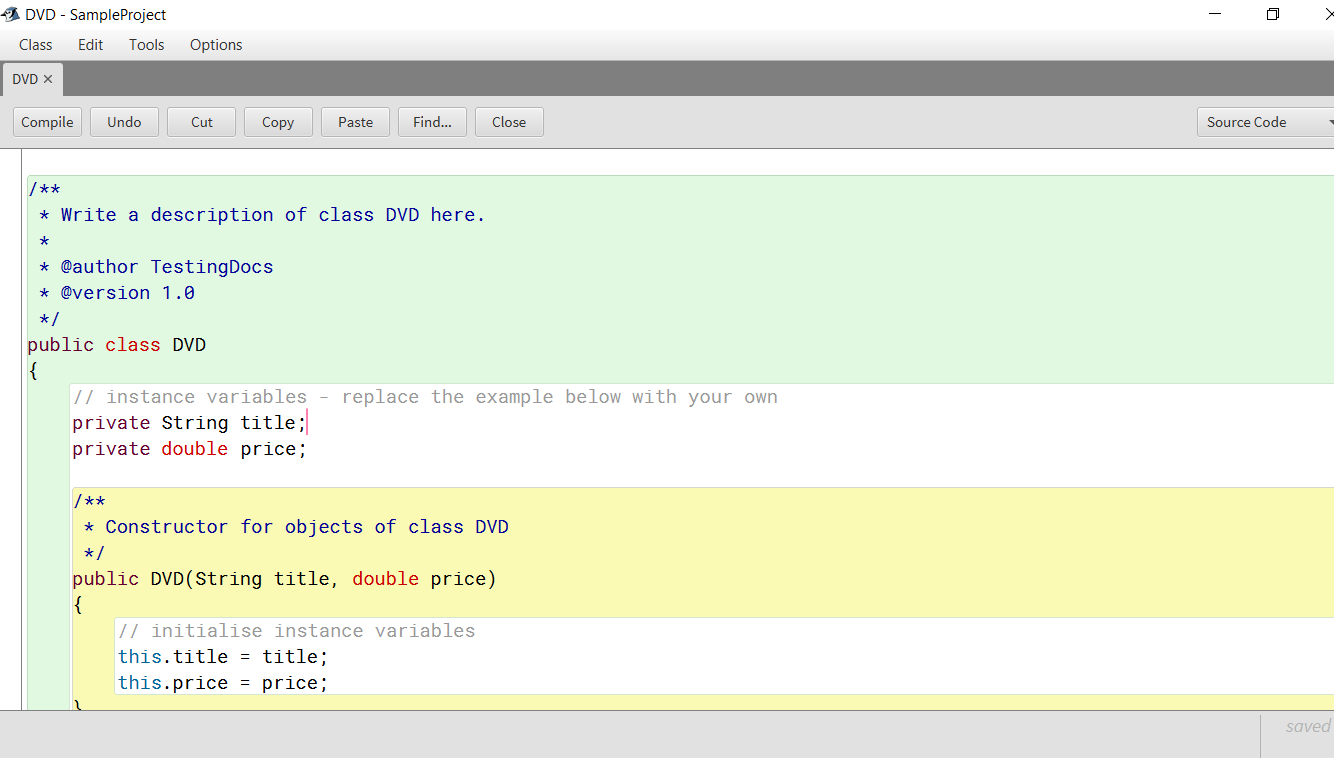
Code
/**
 * Write a description of class DVD here.
 *
 * @author TestingDocs
 * @version 1.0
 */
public class DVD
{
 // instance variables - replace the example below with your own
 private String title;
 private double price;

/**
 * Constructor for objects of class DVD
 */
 public DVD(String title, double price)
 {
 // initialise instance variables
 this.title = title;
 this.price = price;
 }

/**
 * An example of a method - replace this comment with your own
 *
 * @param
 * @return price of DVD
 */
 public double getPrice()
 {
 // put your code here
 return price;
 }
}
Right-click on the class and choose Create Test Class. Enter DVDTest as the class name. Add a @Test method as shown below:
DVDTest Class
import static org.junit.Assert.*;
import org.junit.After;
import org.junit.Before;
import org.junit.Test;

/**
 * The test class DVDTest.
 *
 * @author TestingDocs
 * @version 1.0
 */
public class DVDTest
{
 DVD dvd;

 /**
 * Default constructor for test class DVDTest
 */
 public DVDTest()
 {
 }

/**
 * Sets up the test fixture.
 *
 * Called before every test case method.
 */
 @Before
 public void setUp()
 {
 dvd= new DVD("IronMan3",6.50);
 }

@Test
 public void priceTest()
 {
 assertEquals(dvd.getPrice(),6.50,0.01);
 }

 /**
 * Tears down the test fixture.
 *
 * Called after every test case method.
 */
 @After
 public void tearDown()
 {
 }
}
Compile the classes by clicking on the compile button.
We compare the double floating point number with a small delta/epsilon value. ( 0.01 ). This is the tolerance value for the delta used to compare the numbers.
Run the Tests
You can run the tests by clicking on Run tests button under Testing. Alternatively, right-click the DVD class and create a test fixture to test the class.
You can see the test result on the test result window.
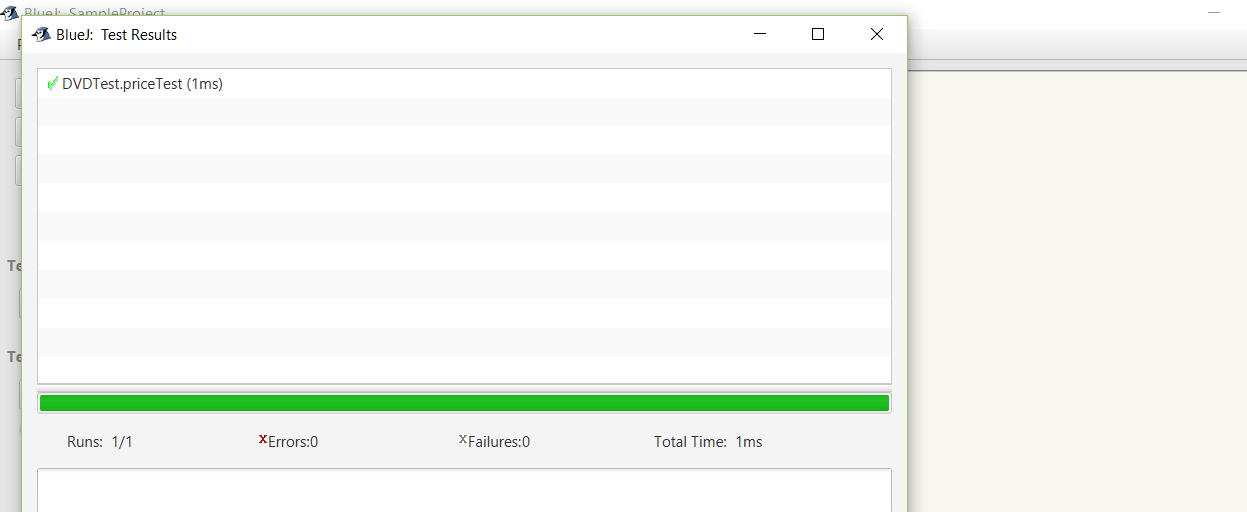
Hooray, you have successfully run a JUnit Test!! 🙂


