Create a New Build in TestLink
Overview
In this tutorial, we will learn how to create a new build in the TestLink tool. To know more about Build Management:
https://www.testingdocs.com/build-management-in-testlink/
Create a New Build
Steps to create are as follows:
Launch TestLink tool.
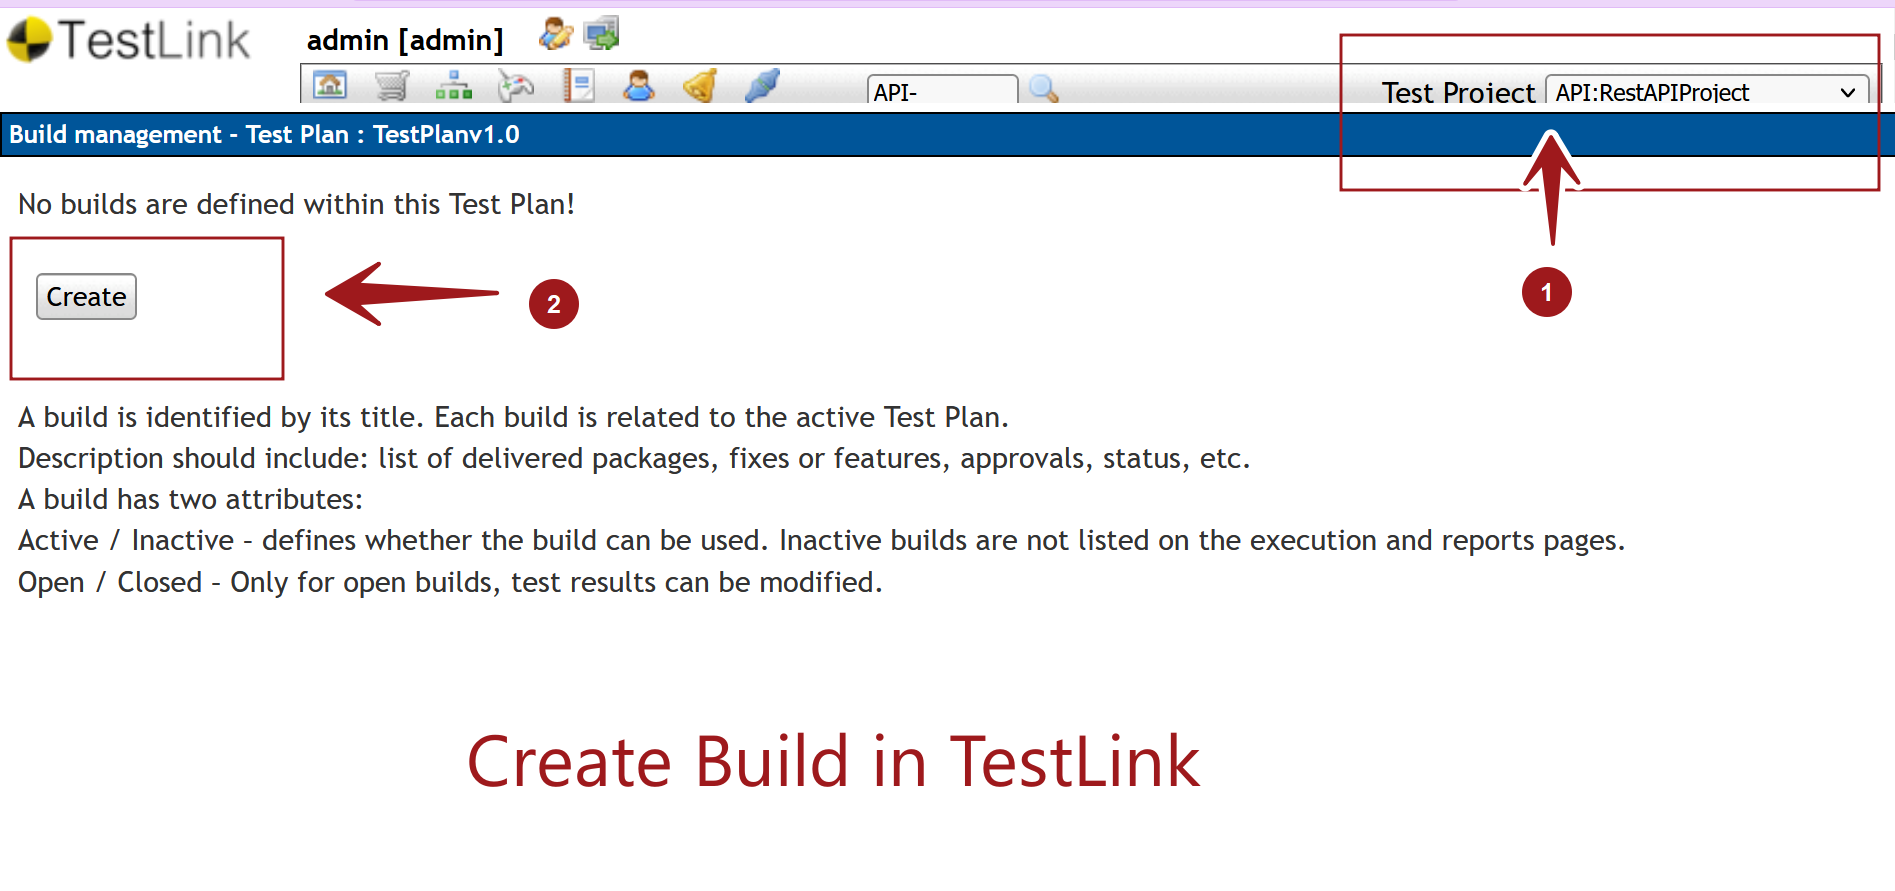
Select the Project in the drop down list.
Create a Test Plan for the project. Detailed steps to create a Test Plan:
https://www.testingdocs.com/creating-a-test-plan-in-testlink/
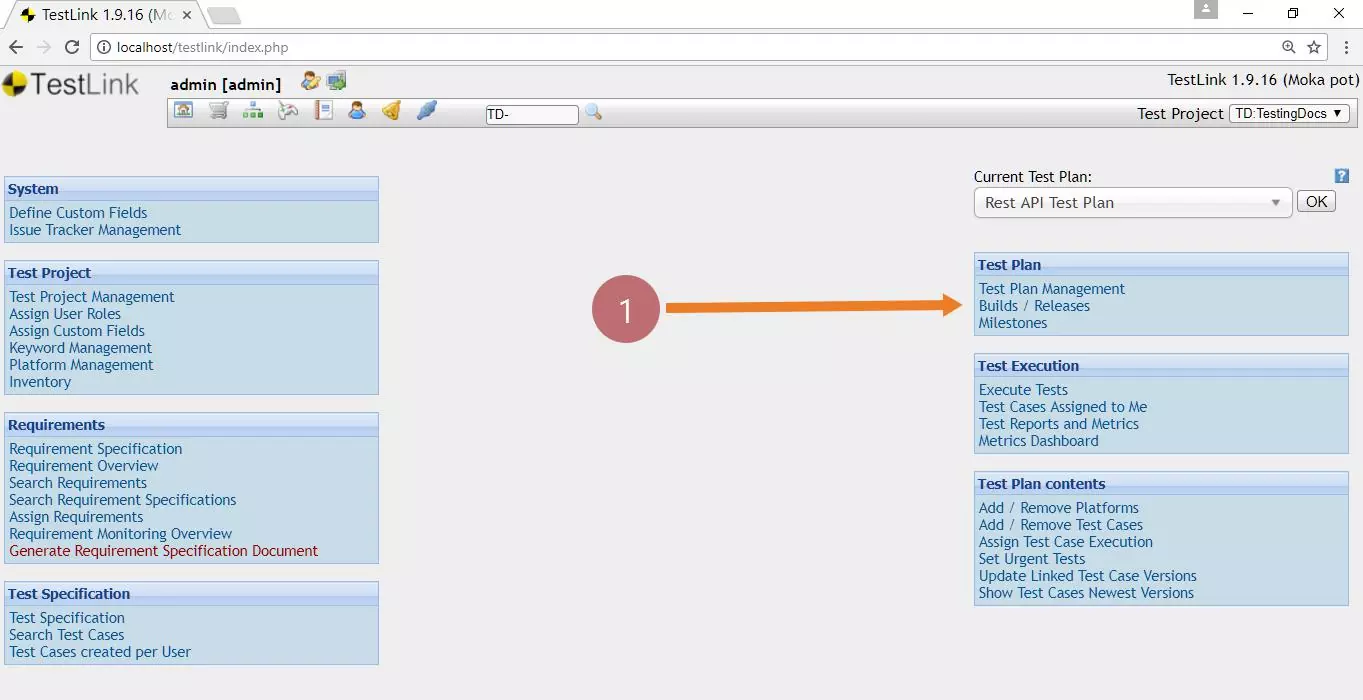
Click on the Builds / Releases in the dashboard.

This will open the Build management page.
Click on the Create button.

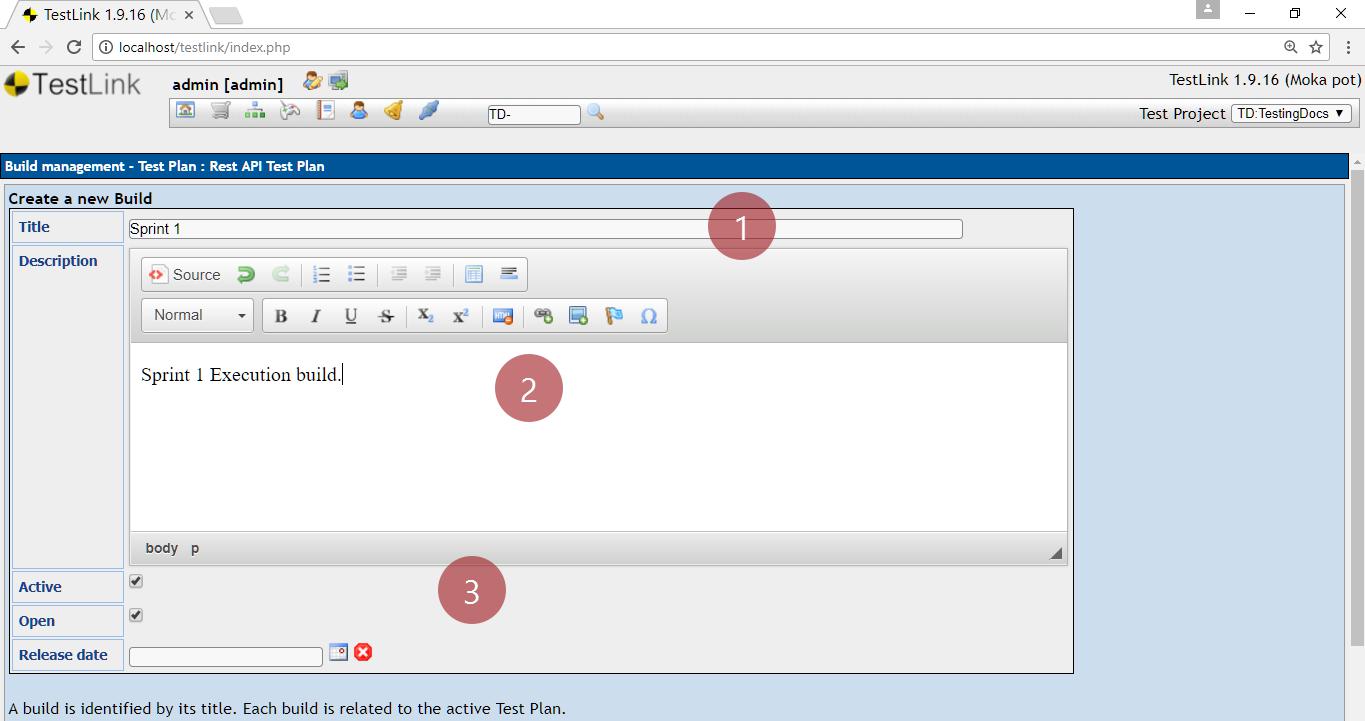
To create a new build fill the build details:
- Title – mandatory field
- Description
- Active?
- Open?
- Release Date

Build attributes
A build is identified by its Title. Each build is related to the active Test Plan. The description should include a list of delivered packages, fixes or features, approvals, status, etc.
Active / Inactive – defines whether the build can be used. Inactive builds are not listed on the execution and reports pages.
Open / Closed – Only for open builds, test results can be modified.
Click on Create button. An entry for the build will be created in the build management page for the project.
That’s it. We have successfully created a build in TestLink tool.
—
TestLink Tutorials
TestLink Tutorial on this website can be found at:
https://www.testingdocs.com/testlink-tutorials/
For more updates please like our Facebook page:
https://www.facebook.com/TestingDocs/


