Create New Java Project in Eclipse
Create New Java Project in Eclipse
This tutorial will outline steps to create a new Java project in Eclipse IDE. A project is a container for source code, class files, project configuration files, and other project artifacts.
When creating a new project, the folder will be created under the Eclipse workspace directory.
New Java Project
Choose File ->> New ->> Project from the Eclipse menu to create a new Java project.
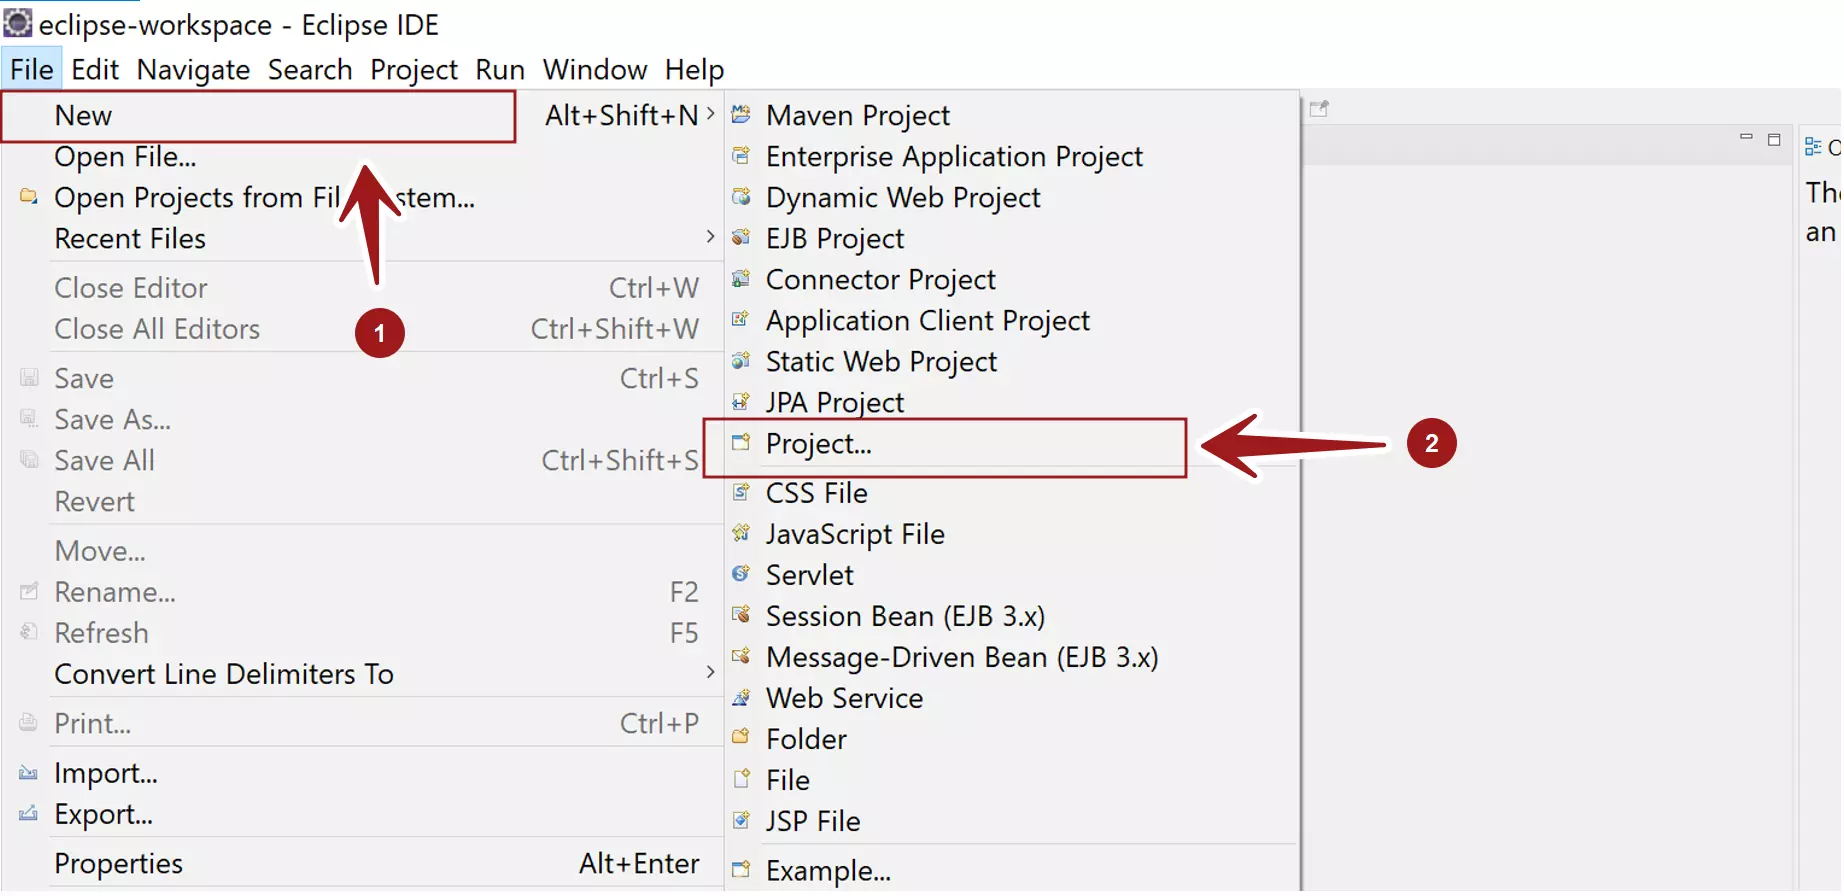
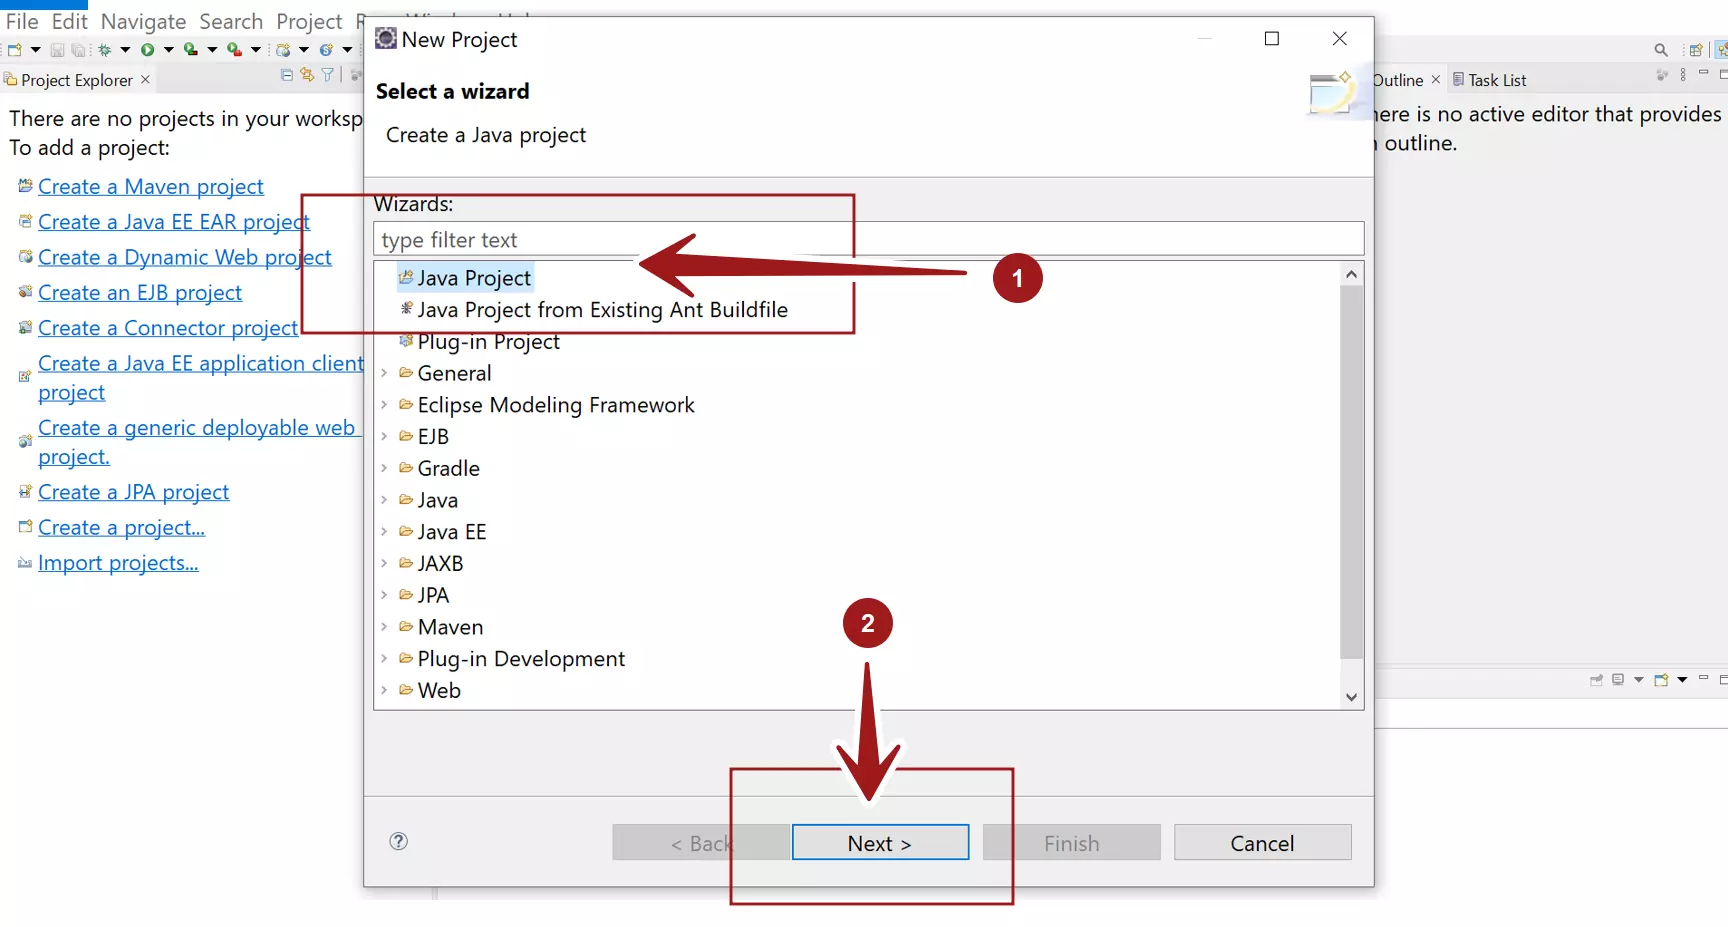
This will launch the New Project wizard. Select Java Project and click the Next > button.
Enter the Project Name. Project name
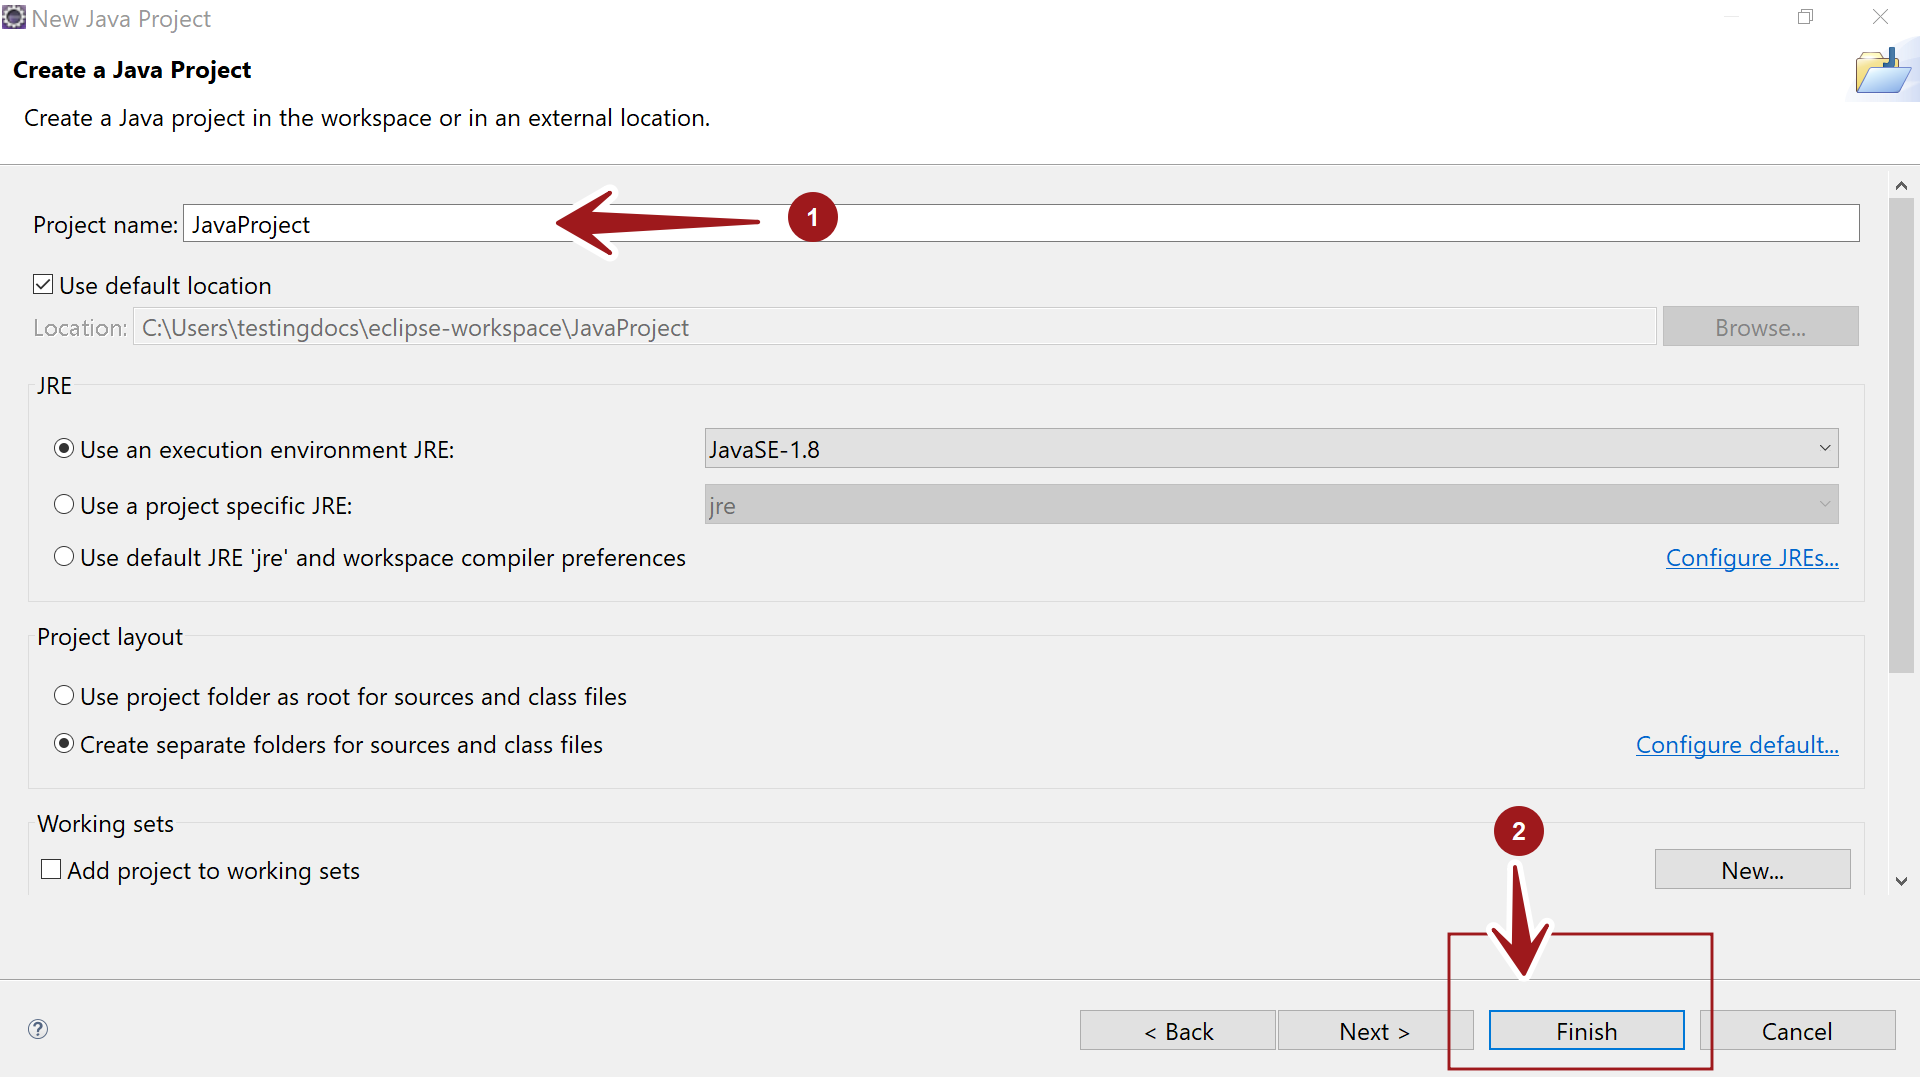
Project Location
The project folder is created under the Eclipse workspace folder by default. The project folder name and the project name are the same by default. All the project source files and class files are stored under this project folder on the machine.
We can specify the JRE(Java Runtime Environment) for the project.
We can add the project to existing Working sets. We can also create a new Working set by clicking on the New… button.
Click on the Finish button.
That’s it. We have created a new empty Java project. We can now start creating packages and adding Java classes to it.
Create a New Java Package: Create Java Package In Eclipse IDE
—
Eclipse Tutorials
Eclipse Tutorials on this website can be found at:
https://www.testingdocs.com/eclipse-tutorials
For more details on the Eclipse IDE, visit the official website

