Install Eclipse on Windows
Install Eclipse on Windows
The easiest way to install Eclipse is to install it using the Eclipse Installer. The Eclipse Installer is bundled with a JRE ( Java Runtime Environment ) for all operating system platforms.
It’s always recommended to install Java JDK on the machine:
Environment
- Windows 10 operating system
- Web browser(Chrome, Firefox, or Edge browser)
Download Eclipse Installer
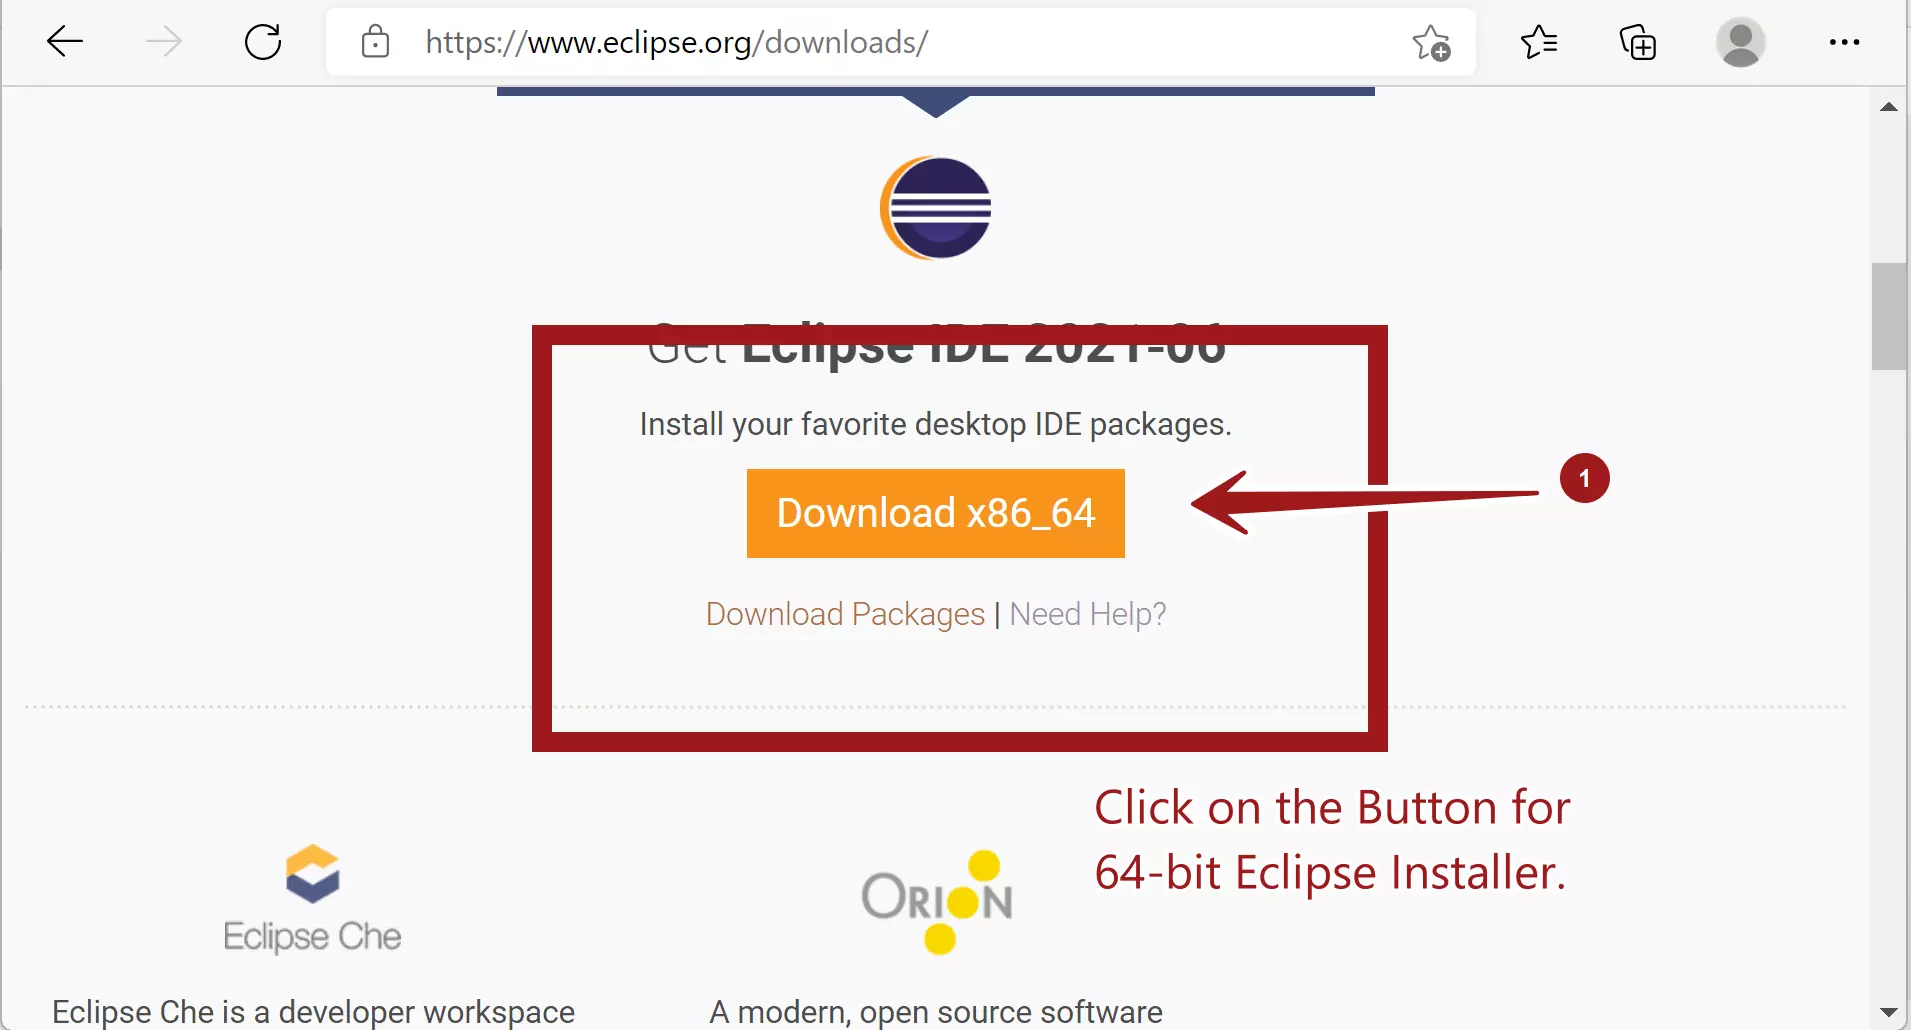
Open Edge browser and browse to the Eclipse download URL:
- https://www.eclipse.org/downloads/
Click on the Download x86_64 button.
Click on the Download button to download the Eclipse installer onto the computer.
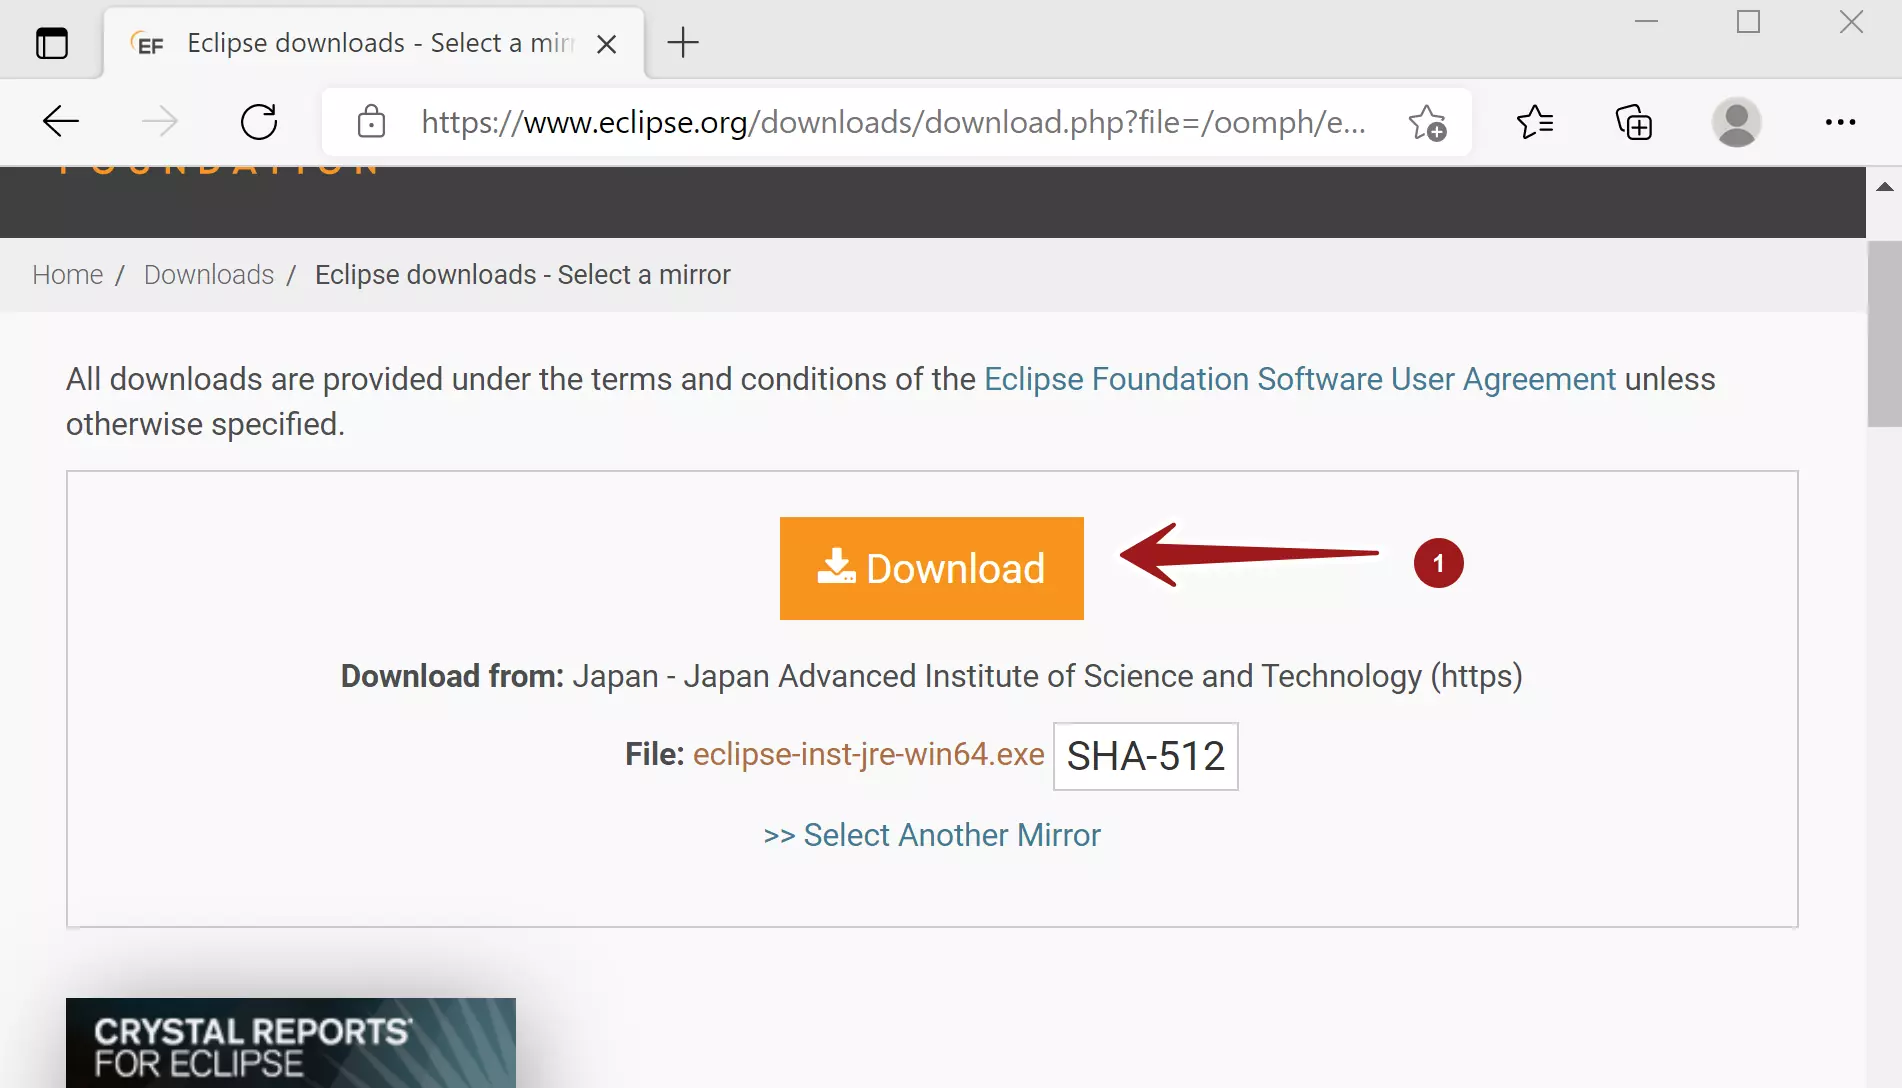
The file format of the Eclipse Installer is a .exe format.
For Example:
eclipse-inst-jre-win64.exe
Verify the Installer File
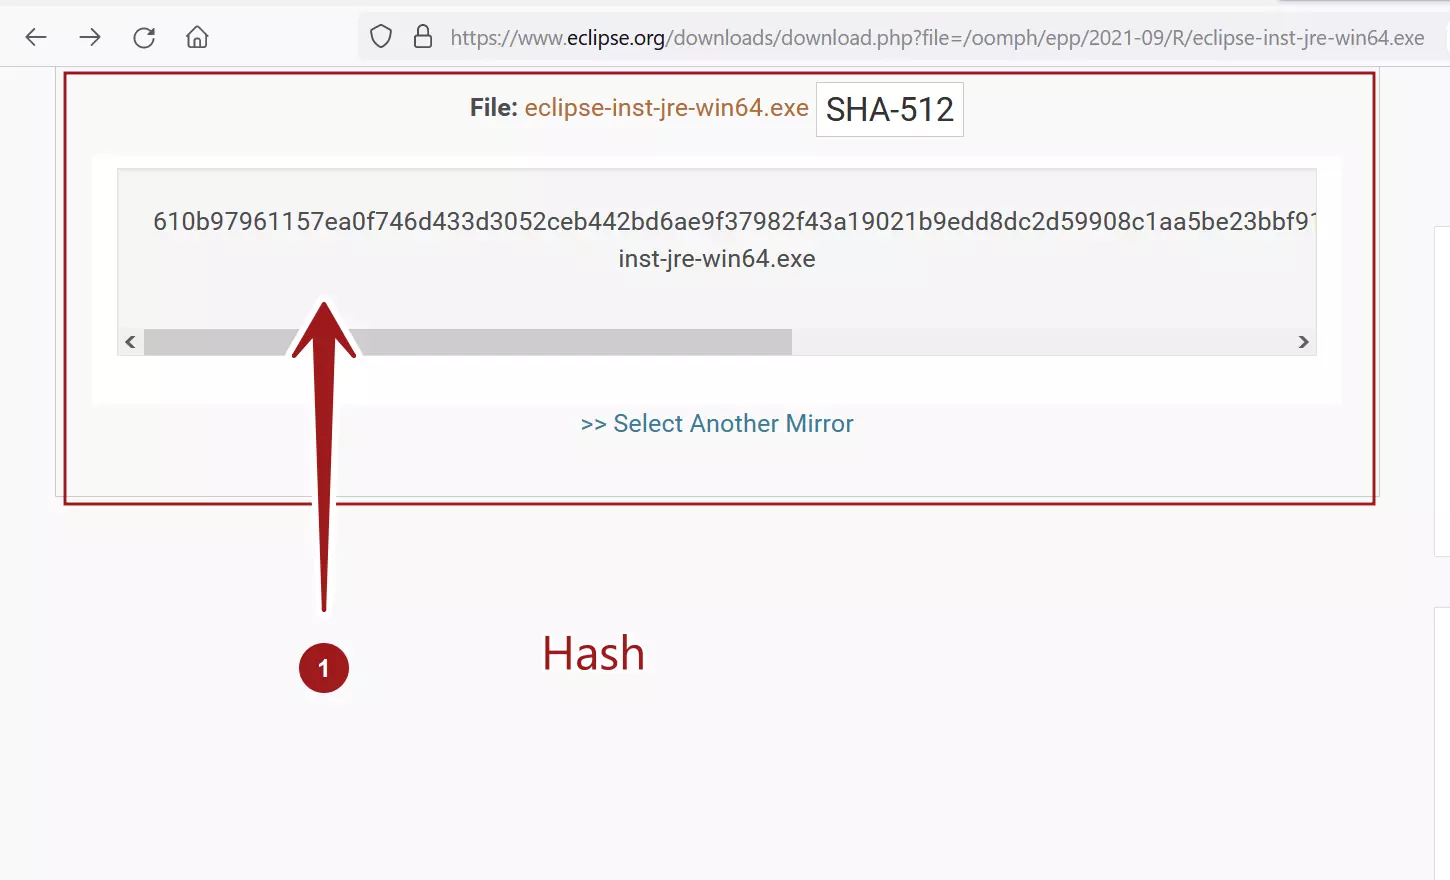
Click on the SHA-512 button on the Eclipse download web page. This would show a hash value for the installer file.
Open Command prompt and change directory to the Eclipse installer file path.
Run the following command to verify the Eclipse Installer file.
\> certutil -hashfile eclipse-inst-jre-win64.exe SHA512
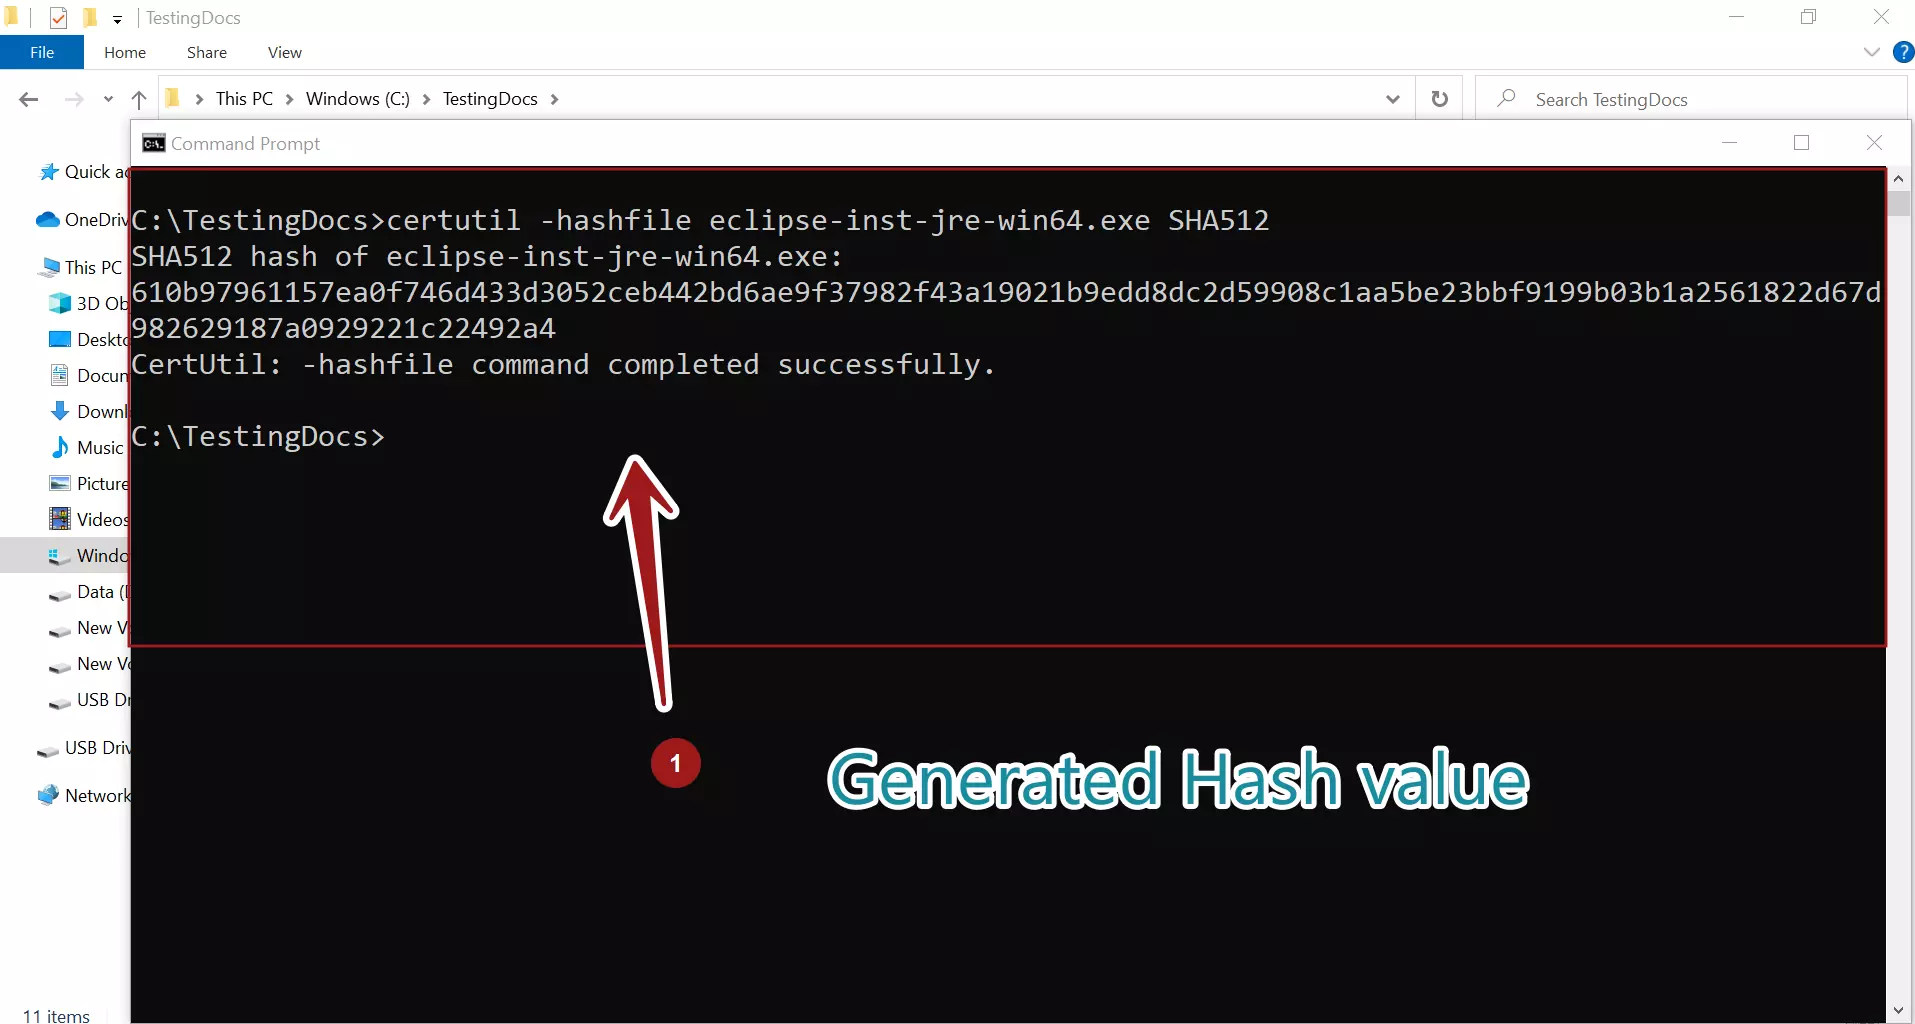
Both the hash values should match. If both the hash values match then proceed to the next step to install Eclipse. If there is a mismatch, discard the downloaded installer file.
Install Eclipse
Open the Windows Explorer, navigate to the Downloads directory or to the saved installer location, and double-click on the file.
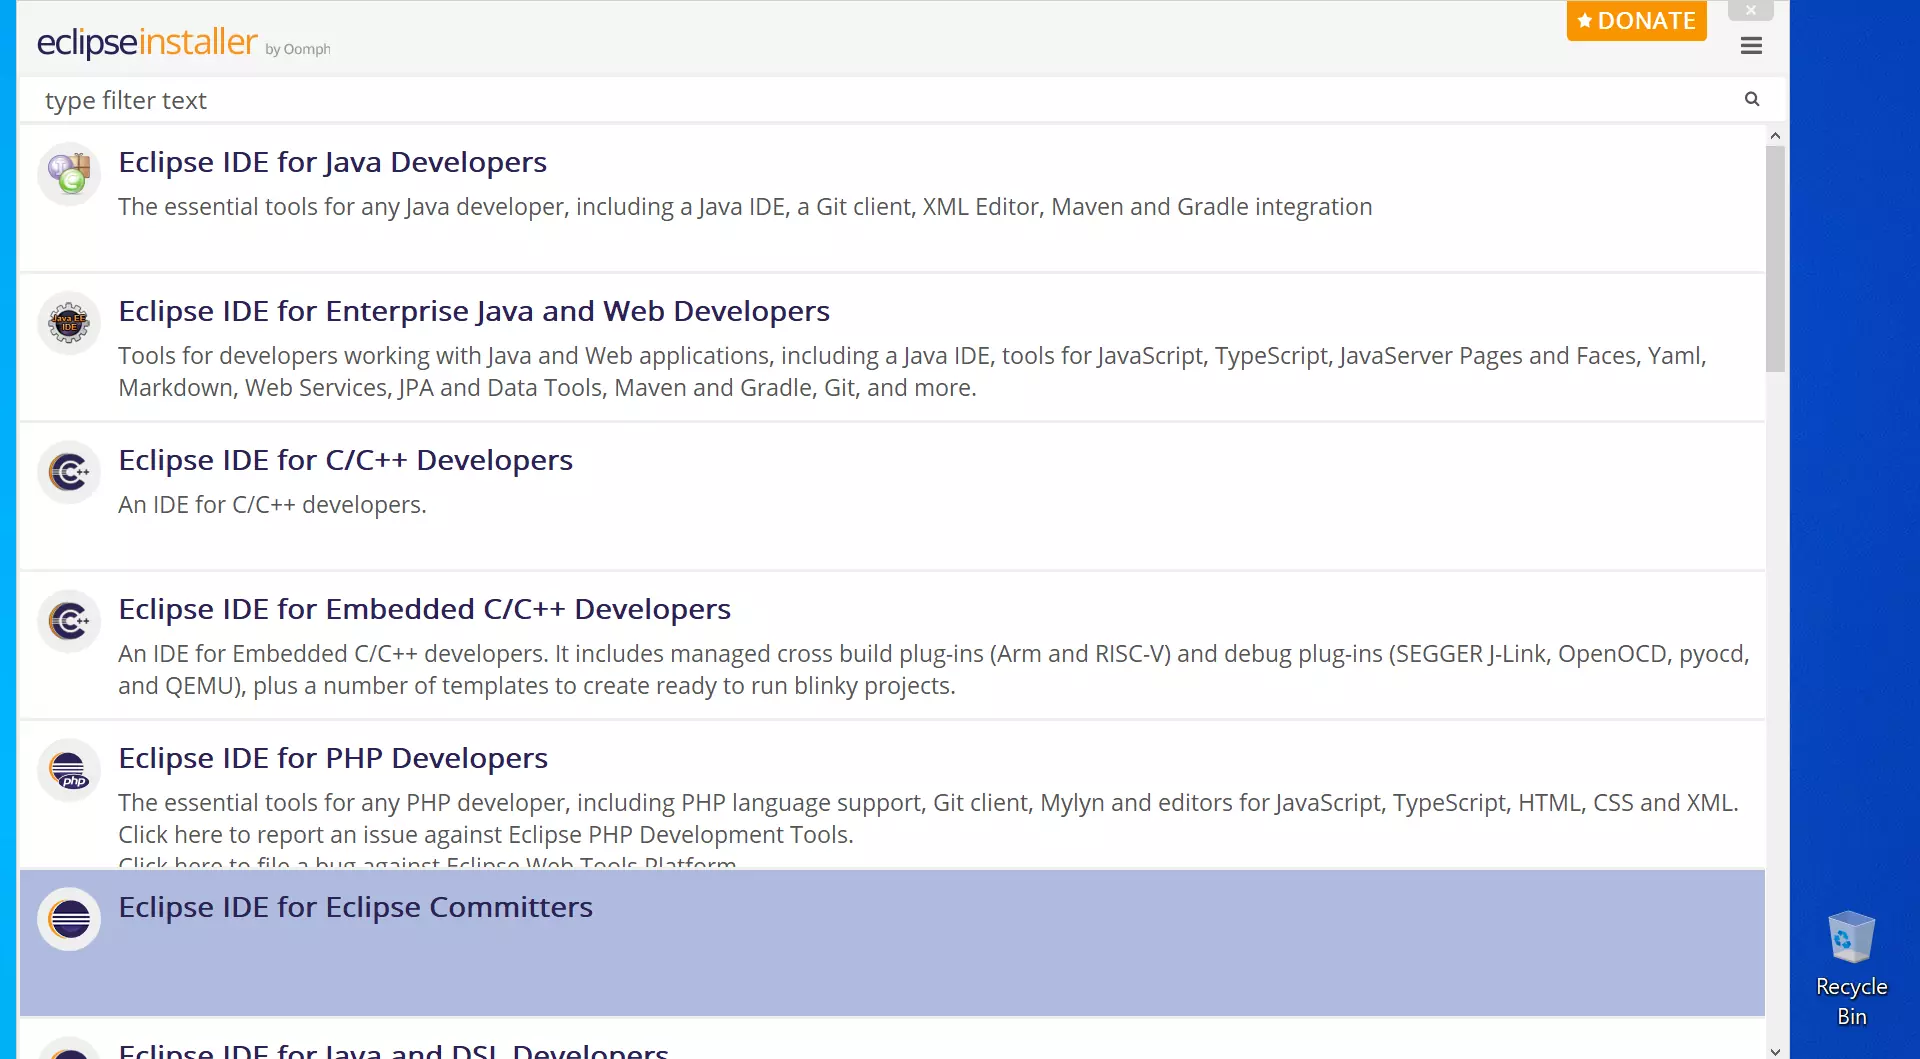
This will launch the installer options. Choose the Eclipse option that best fits your needs and click on the option.
On this screen, we can customize the Eclipse installation folder. If you choose a custom location make sure you have permissions and rights to the installation path.
Once done click on the INSTALL button to install Eclipse.

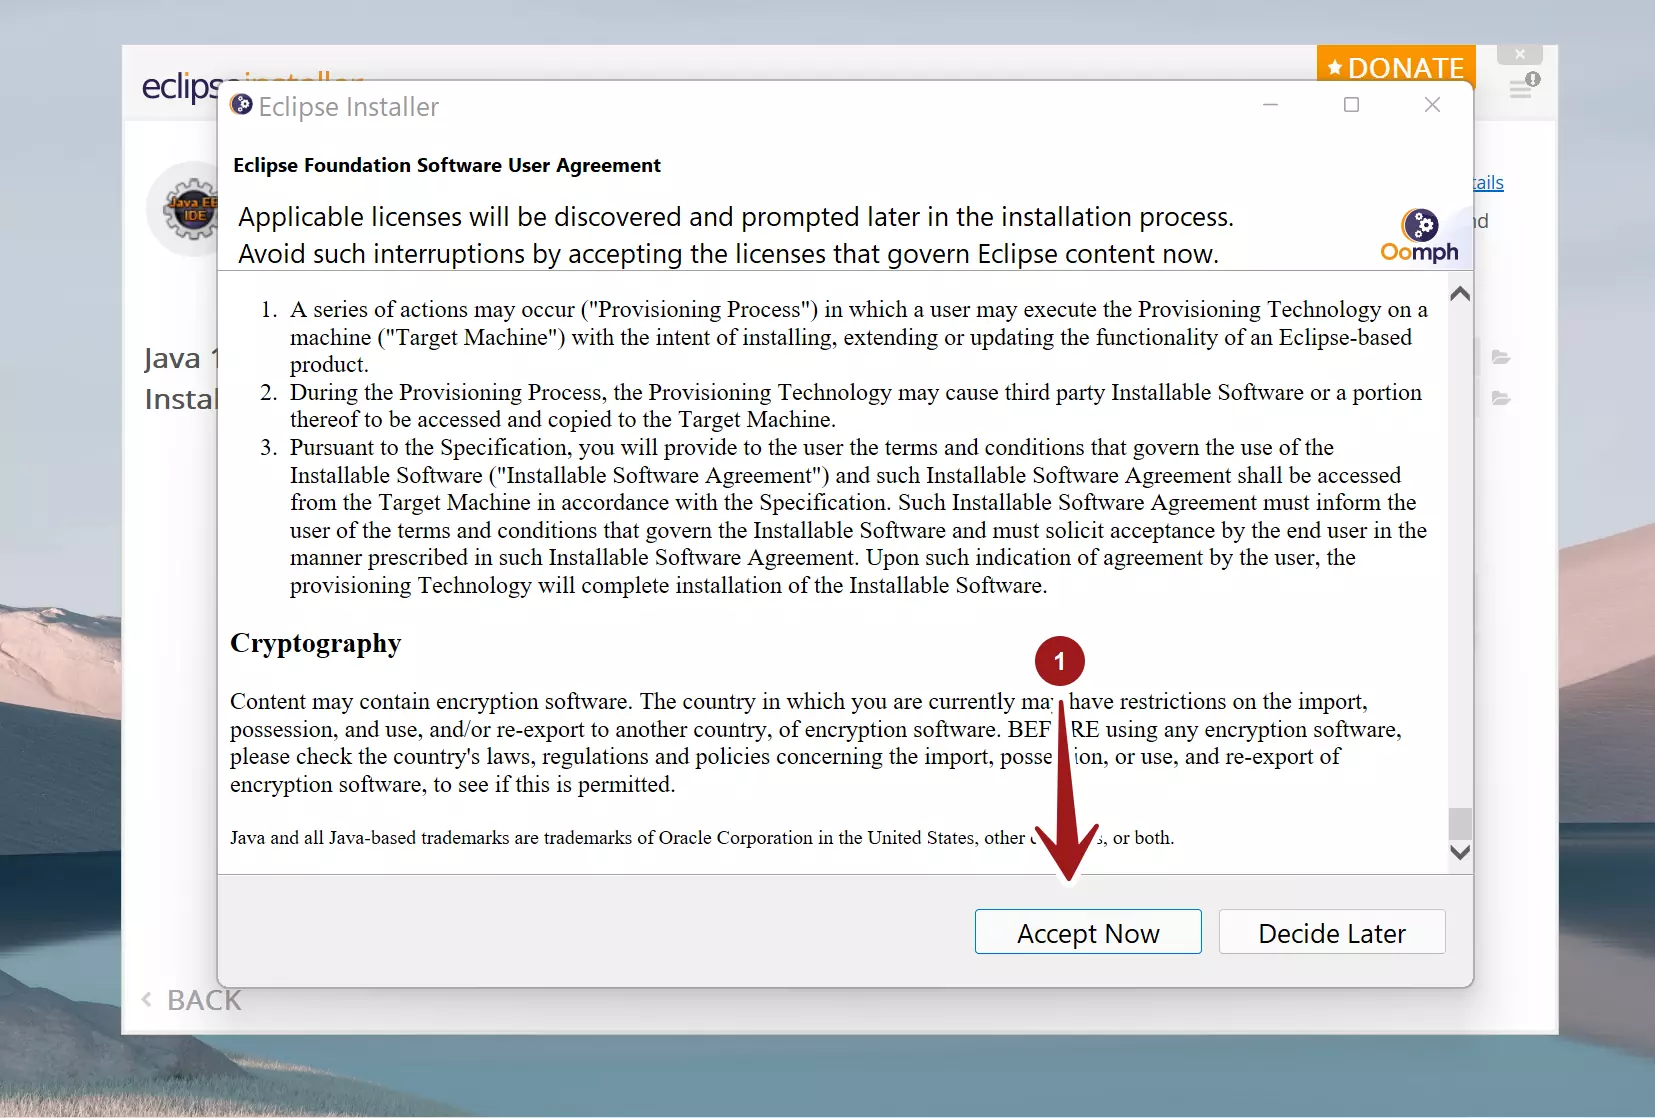
Read, understand and Accept the Eclipse License Agreement. Click on Accept Now button.
Once the installation is successful, you can launch the IDE.
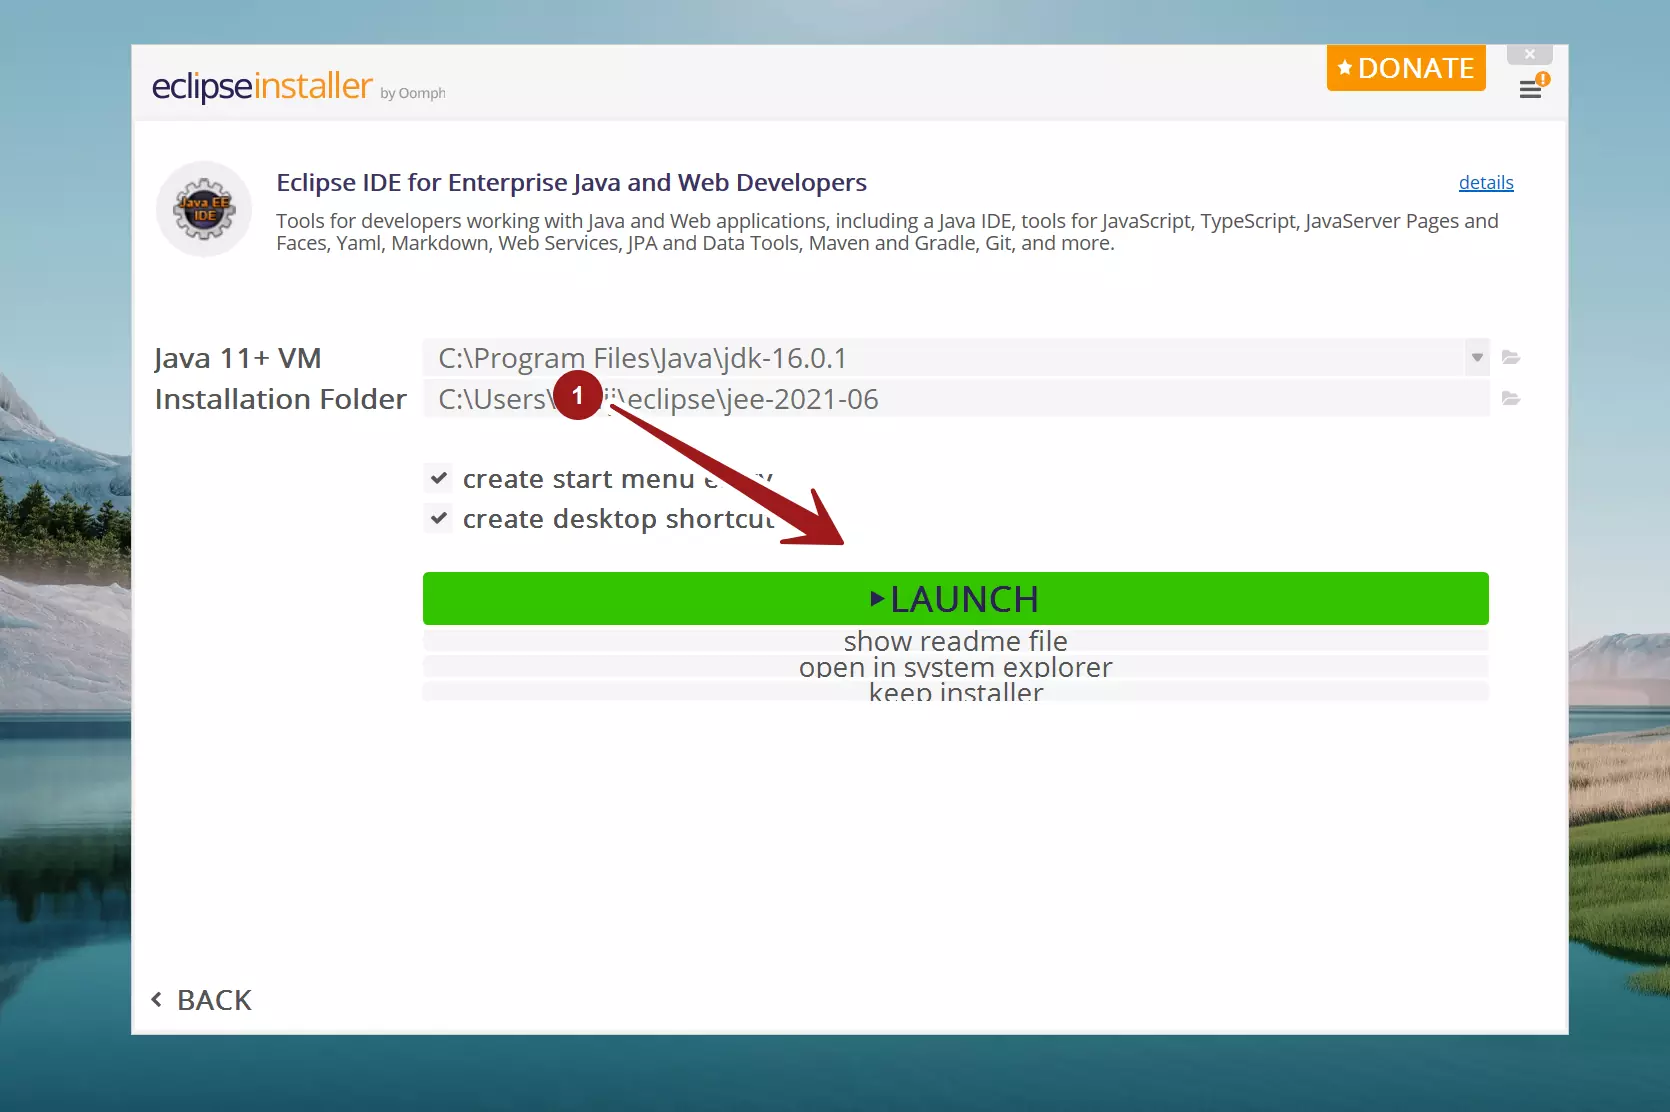
Click on the LAUNCH button to launch the IDE.
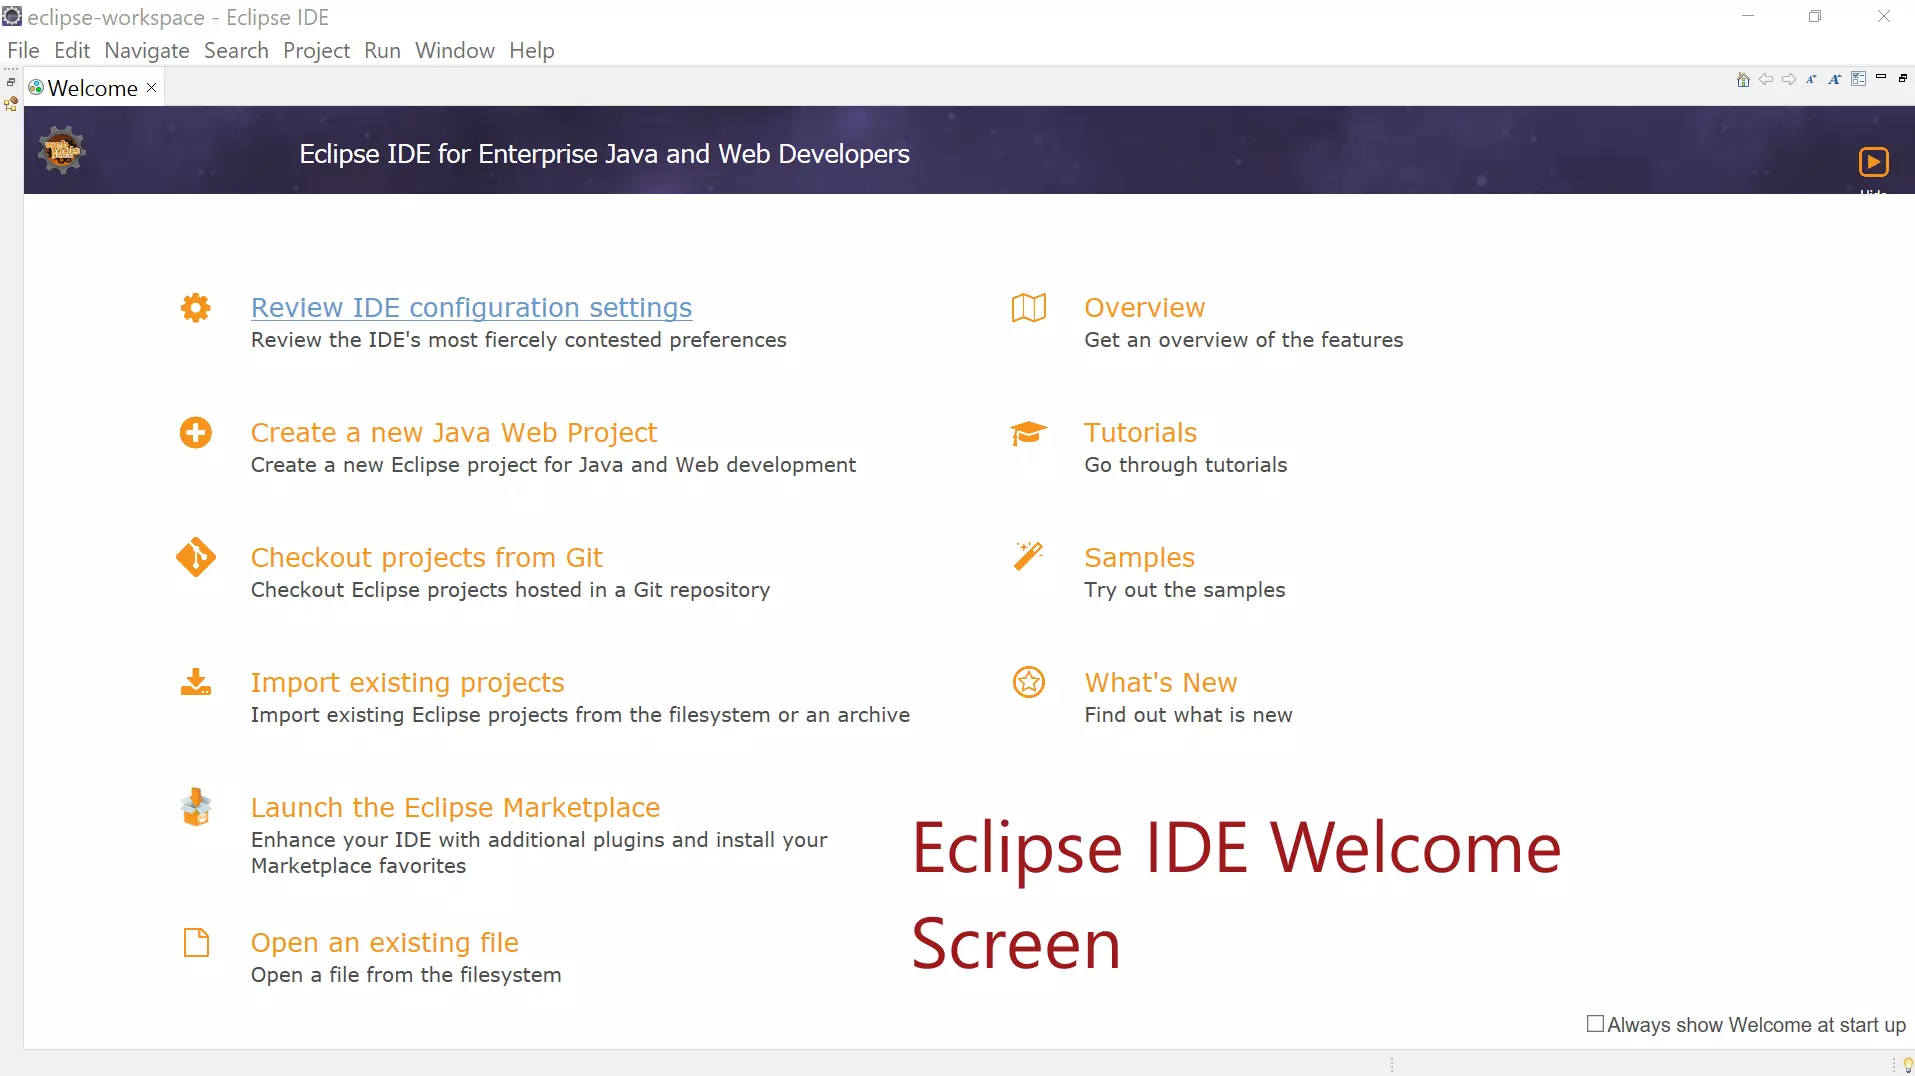
That’s it. Eclipse is successfully installed. You can start working on the IDE.
Next: Launch Eclipse
—
Eclipse Tutorials
Eclipse Tutorials on this website can be found at:

