Create a New TestLink User
Overview
Let’s look at the steps involved to Create a New TestLink User in this tutorial. By default, TestLink allows users to self-sign up for the TestLink access.
There are two approaches to create new TestLink users.
- New User – Self Sign up
- Administrator – Create New User
New User – Self Signup
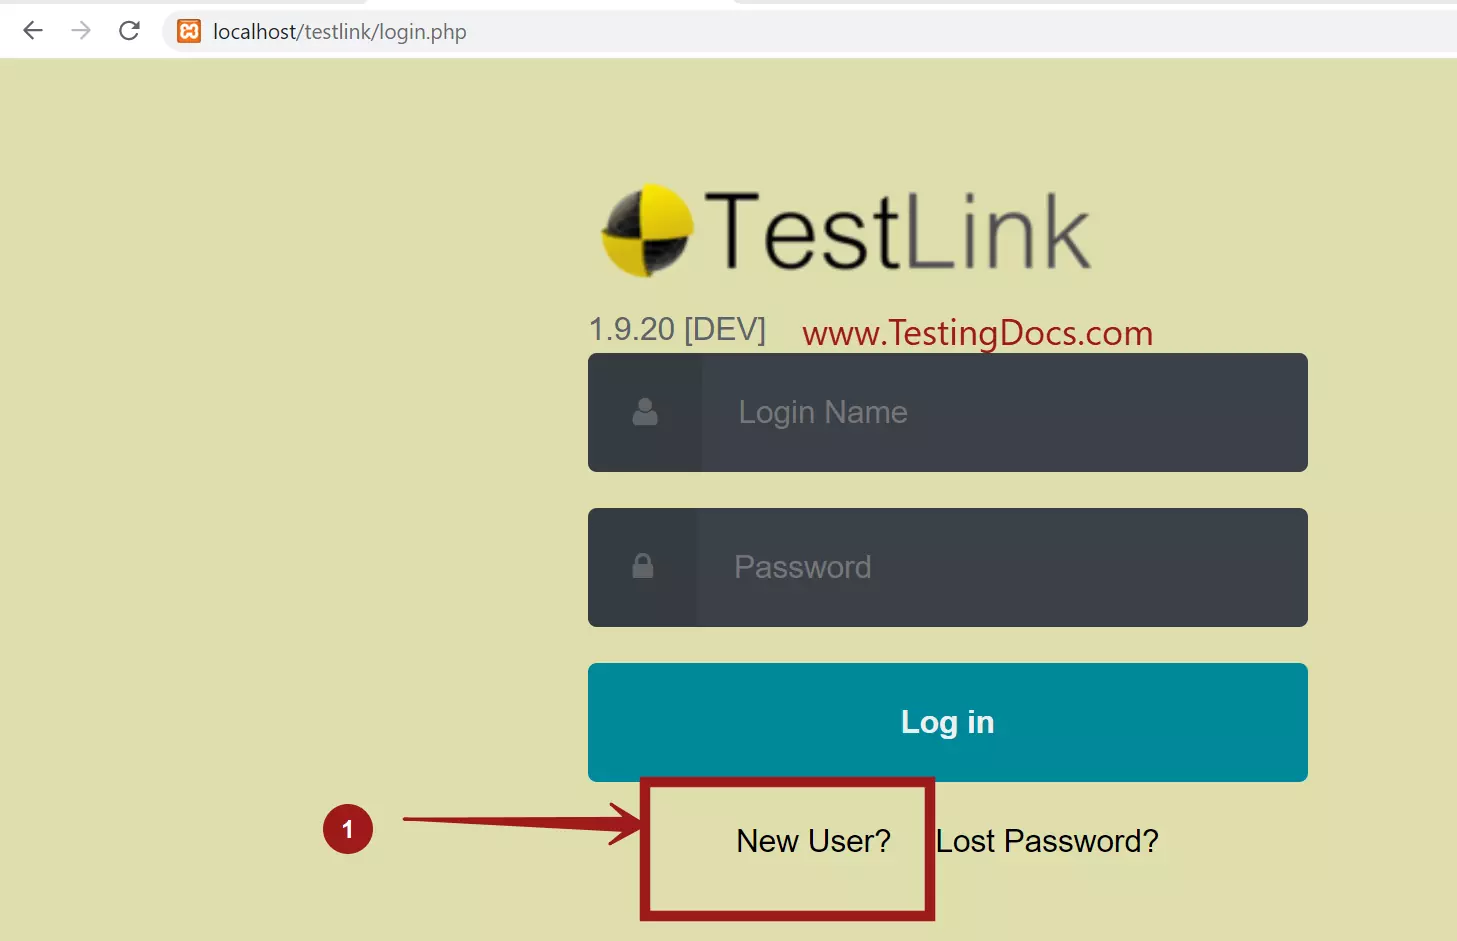
On the login page, we can find the New User? link to self-signup for TestLink access.
To Signup, click on the New User? link.

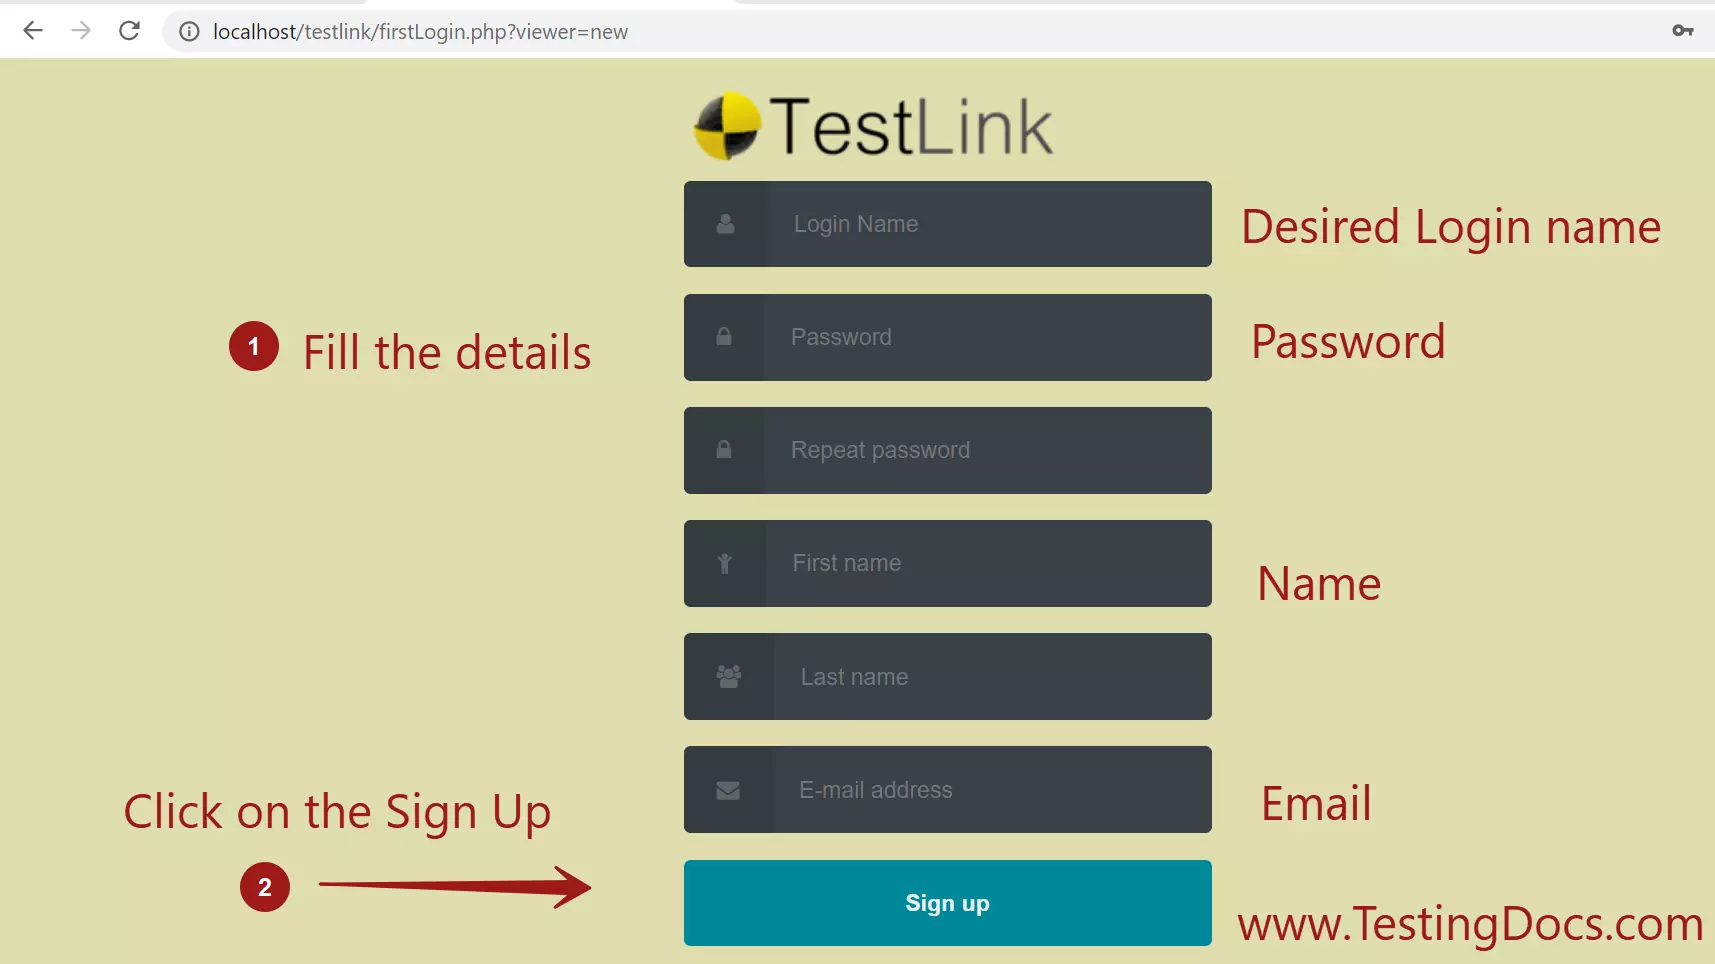
Fill the necessary details and click on the Signup button.
- Login name
- Password/Repeat Password
- First name and Last-name
- Email address.

New users created by self signup process are assigned as Guest role in the TestLink system.
Create TestLink User
On public domain TestLink administrators usually disable the user self signup process due to security reasons. A malicious user can bring down the Testlink server with a possible DoS attack on the system. Alternatively, TestLink administrator can create user on his/her behalf. User can be assigned the desired role during this process.
Disable New User Signup
As an Administrator if you want to prevent new user signup via the registration form.
https://www.testingdocs.com/questions/how-to-disable-new-user-link-in-testlink/
Create New User
TestLink Administrator can create new users on the instance. Steps to create a user by the admin are as follows:
- Log in as Admin to the TestLink.
- Click on the user icon button in the top menu.
- In the View Users screen, click on the Create button to create a new user.
Fill the necessary details for the new TestLink user.

Admin can assign a role to the user and set an expiration date for the user.
Click on the Save button to create the user.
That’s it.
—
TestLink Tutorials
TestLink Tutorial on this website:
https://www.testingdocs.com/testlink-tutorials/


