Create Requirements in TestLink
Overview
In this tutorial, let’s look at the steps to Create Requirements in the TestLink tool. We can create number of requirements using the steps outlined here.
Requirements are grouped by ‘Requirements Specification’ document which is related to Test Project in TestLink. Steps to create Requirements Specification document are listed here:
https://www.testingdocs.com/create-requirements-specification-in-testlink/
Create Requirements
Steps to create Requirements are as follows:
Choose the Test Project in the TestLink tool.
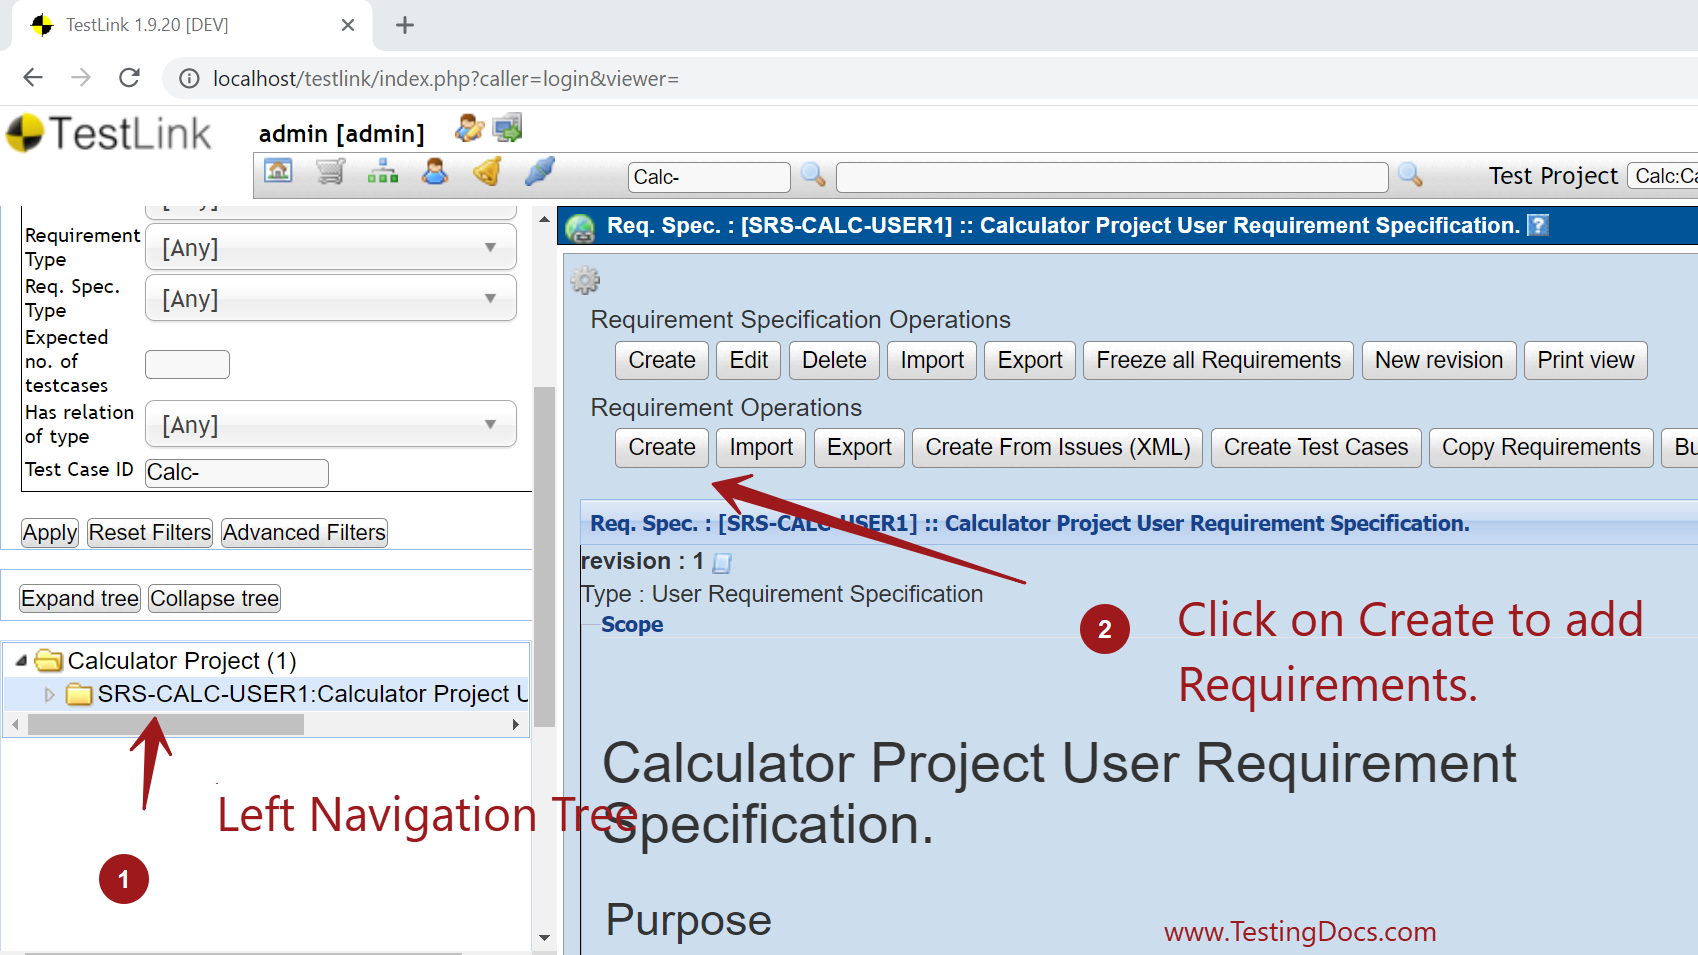
Select the Requirement Specification of the Project from the left navigation tree.
Click on the Setting Wheel Icon at the top.
Click on the Create button under Requirements Operations on the screen.

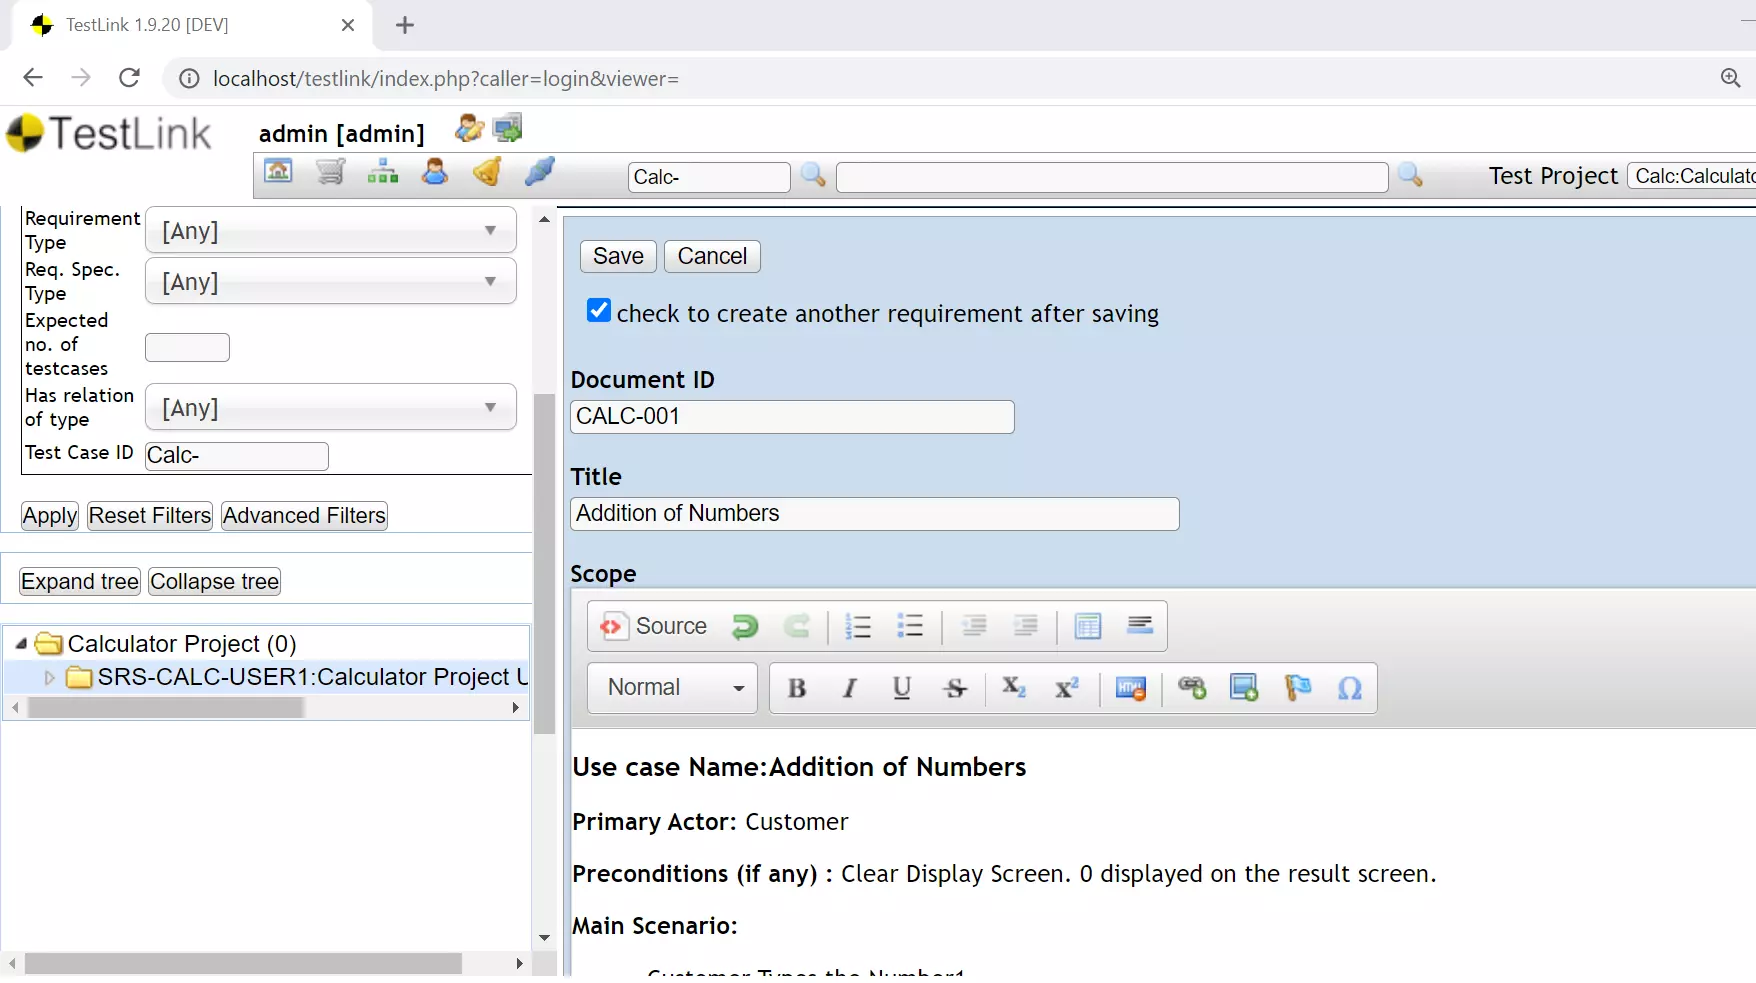
Fill the requirement details on the screen. The details include
- Document ID
- Title
- Scope
- Status
- Requirement Type
- No of Testcases needed.

Check this option ‘check to create another requirement after saving‘ to bulk add requirements one after another. This options saves time during the data entry.
Requirement type can be:
- Informational
- Use case
- Feature
- System Function
- Non functional
- Constraint
Click on the Save button to create the requirement in the TestLink tool.
Expand the requirement specification tree to validate.
That’s it. We have successfully added Requirements the project in TestLink.
—
TestLink Tutorials
TestLink Tutorial on this website:
https://www.testingdocs.com/testlink-tutorials/


