Create Class/Object in Raptor flowcharts
Introduction
In this tutorial, we will learn to create Class and Object in Raptor flowcharts. We can create an Object for a Class using the new operator. Objects are instances of the Class defined. Class definitions are like blueprints defining the state and behavior of the objects.
Create Class
Steps to create a class in Raptor flowchart.
- Launch Raptor Tool.
- Enable UML Mode and switch to UML tab.
- Right click in the UML tab and choose
- New >> Class
Create Object
We can create the object of the class by using the new operator in the Assignment symbol. new operator invokes the constructor defined in the class.
//for example creating object using no-arg constructor
Car carObject1 = new Car()

//creating an object by calling constructor with parameters.
Car  carObject2 = new Car("BMW","2019 Make",
"Metallic Grey",22000.0)

Note that, there is no need to start the object with the class name in the Assignment symbol.
The first object is created using the default no-argument constructor. The second object is created using the parameterized constructor. The second object is a more customized version of the car.
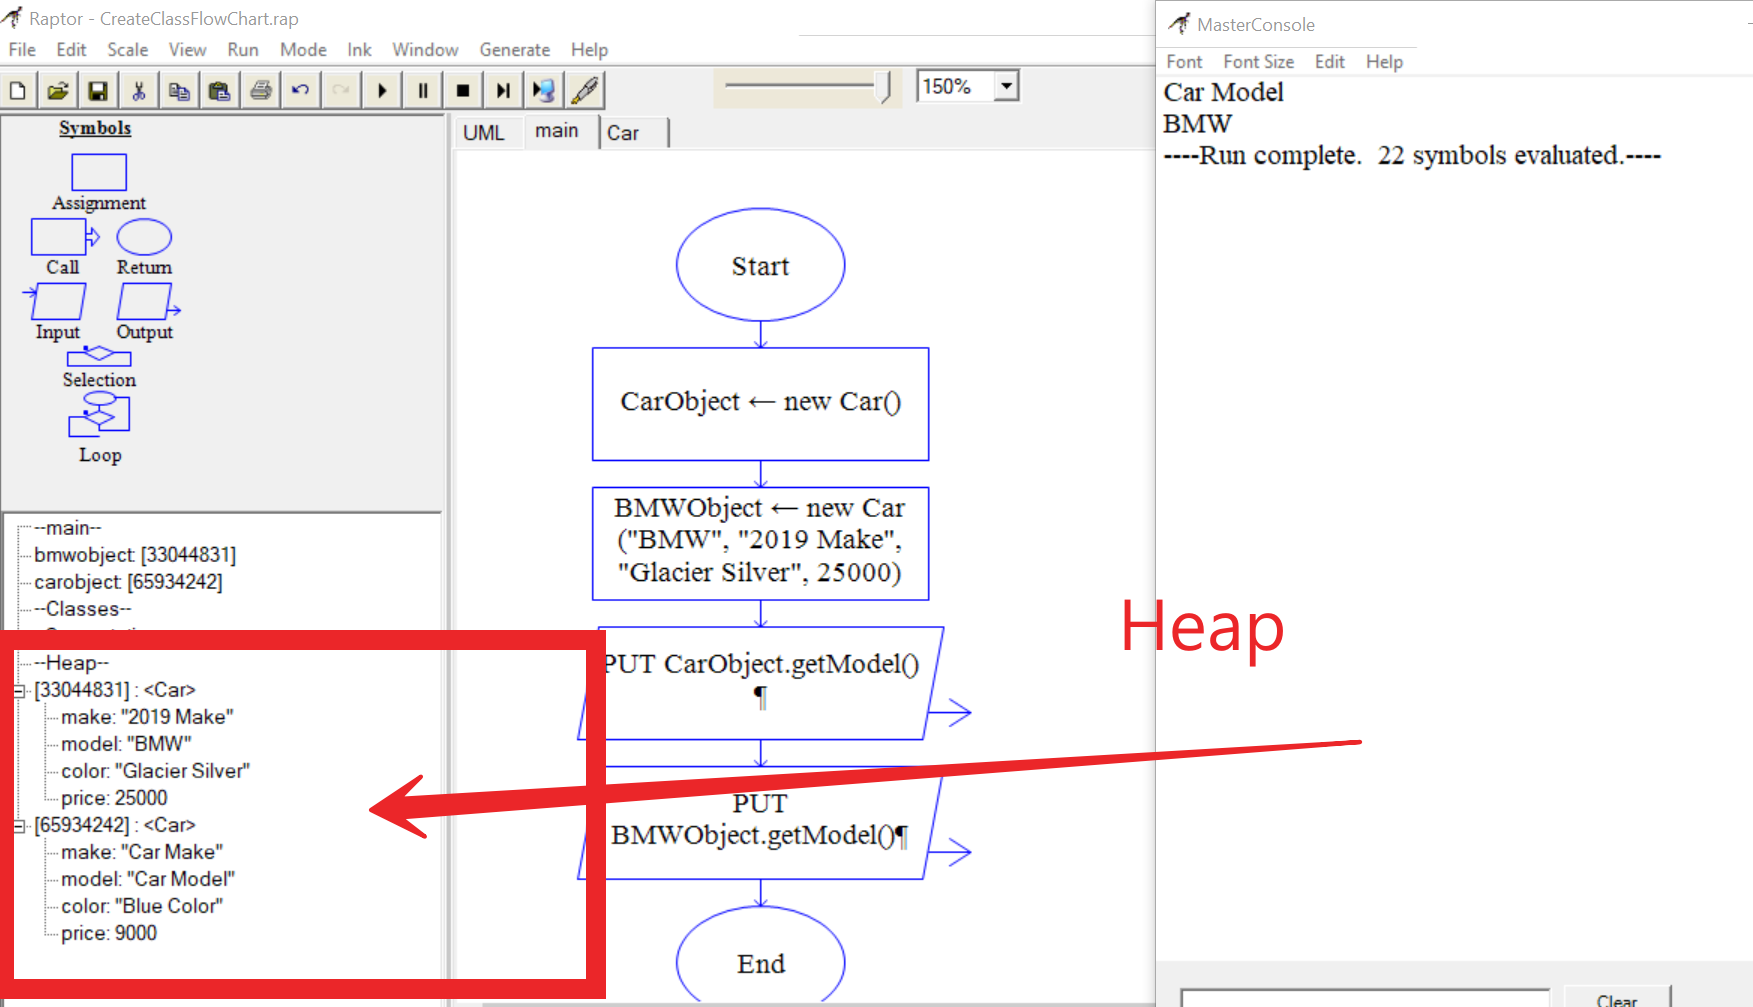
The objects are created on the Heap memory. During the run of the flowchart, we can notice the heap memory in the sidebar.
Heap

To change the state we can invoke the mutator methods defined in the class. To get the object state we can
invoke the getter methods defined in the class. We can also code behavior methods to the class.
For example, we can define speed as the car variable. Then we can add accelerate() method that changes the speed of the car!
—
Raptor Tutorials on this website can be found at:
https://www.testingdocs.com/raptor-a-flowchart-tool/
RAPTOR official website: https://raptor.martincarlisle.com/


