TestingDocs.com
Software Testing website
  • Automation
    • Selenium
    • JBehave Framework
  • Tutorials
    • MySQL Tutorials
    • Testlink
    • Maven
    • Git
  • IDEs
    • IntelliJ IDEA
    • Eclipse
  • Flowcharts
    • Flowgorithm
    • Raptor
  • About

Raptor Flowchart

Adding Fields to a Class using Raptor

Object-oriented Flowchart

Introduction

In this article, we will learn to add fields to a class using the Raptor flow chart. The class state can be defined by the values of the fields.  In this tutorial, we will add fields to Car class.

Car class

Let’s add fields of Car and the data types of the variables are shown below:

model: String

make: String

color: String

price: double

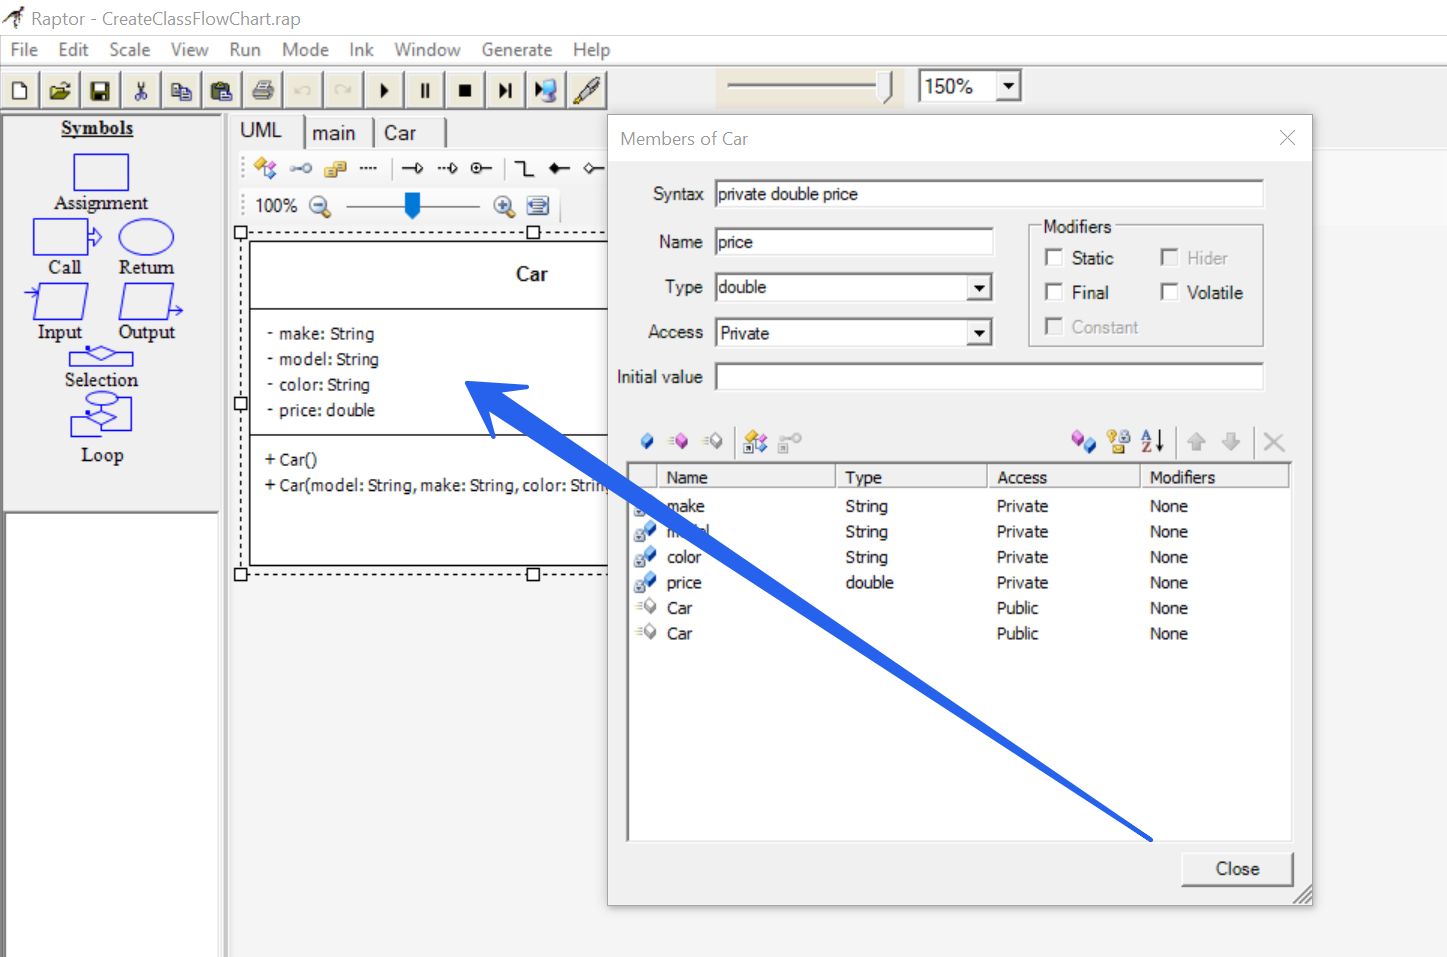
Adding a field to a Class

Right-click on the Class >> Edit members >> Click on New Field button.

Add the name, data type, and Access specifier for the field.

Private fields can only be accessed in the class

Protected fields can be accessed in the class and in the sub classes of the class.

Public fields can be accessed anywhere.

Adding fields


You can check the checkboxes static, final if you want the variable to be static and constant respectively. Repeat the steps to add all the variables to the Car class.


Raptor Tutorials on this website can be found at:

https://www.testingdocs.com/raptor-a-flowchart-tool/

RAPTOR official website: https://raptor.martincarlisle.com/

Related Posts

Install RAPTOR Avalonia CentOS

Raptor Flowchart /

Install RAPTOR Avalonia on CentOS

RAPTOR Avalonia Edition Windows

Raptor Flowchart /

Download RAPTOR Avalonia Edition on Windows

RAPTOR Editions

Raptor Flowchart /

RAPTOR Editions

RAPTOR flowcart to write to a file output

Raptor Flowchart /

Write to a file with RAPTOR flowchart

Sum of Squares Array Elements Modular Approach

Raptor Flowchart /

Sum of Squares of Given Array Elements

‹ Average of three Numbers flowchart› Create Class/Object in Raptor flowcharts

Recent Posts

  • MS Access Data Types
  • Install RAPTOR Avalonia on CentOS
  • Download RAPTOR Avalonia Edition on Windows
  • npm doctor command
  • Build & Run CLion Project
  • Create New CLion C Project on Windows
  • Configure CLion Toolchains on Windows
  • Launch CLion IDE on Windows
  • Activate CLion IDE
  • CLion IDE for C/C++ Development

Back to Top

Links

  • Contact
  • Privacy Policy
  • Cookie Policy

www.TestingDocs.com

Go to mobile version