Create Test Suite in TestLink
Create a Test Suite in TestLink
In this post, we will learn the steps to create a Test Suite in TestLink. Test cases are created under a Test Suite which is associated with a Project.
Let’s understand what is a test suite.
What is a Test Suite?
In automation testing, a Test Suite is a collection of test cases that are logically grouped together to verify a specific functionality, feature, or system behavior. Test suites make it easier to manage and execute multiple test cases at once, often running them sequentially or in parallel within an automation framework. For example, a test suite might include all test cases related to user authentication (e.g., login, logout, password reset).
Steps to create Test Suite
Follow the below steps to create a Test Suite:
In the top menu, you will see the option Test Specification.
Click on this menu option.
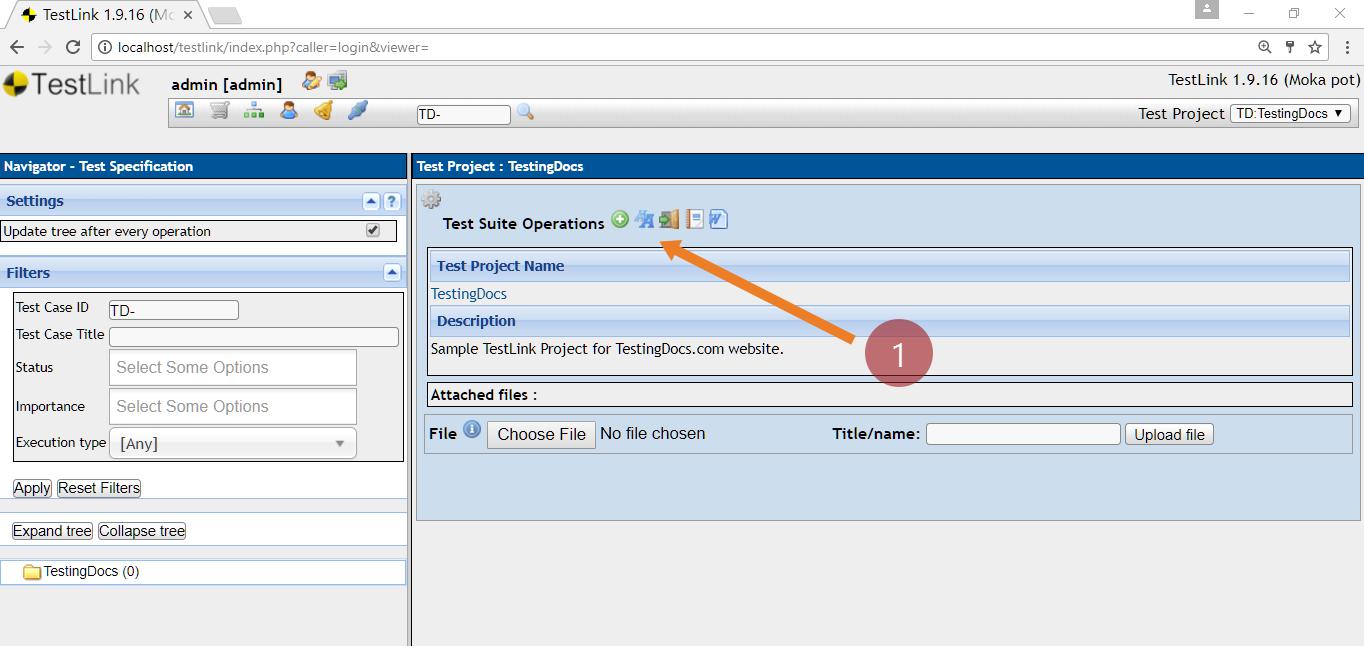
On the left, you have the navigator, with the settings, filter, and the tree of test suites and test cases. Click on the Actions gear icon to see the test suite operations as shown in the picture.
Test Suite Details
Click on the plus symbol to create Test Suite as shown above.
You can enter the name, details, and click on the Create button to create Test Suite.
That’s it.


