Link Jira Issues to TestLink Test Cases
Overview
This tutorial will teach us how to link Jira Issues to TestLink Test Cases. During the test execution phase, an Existing Jira Issue can be linked to a Failed Test case result.
Jira TestLink Setup
If Jira is configured and connected to TestLink, we can link the existing Jira issues. We need to integrate the Jira bug-tracking system with TestLink.
Jira TestLink Integration steps are outlined here:
https://www.testingdocs.com/jira-testlink-integration/
Link Jira Issues
Select the Test Project in the drop-down list.
Choose the Current Test Plan.
Click on the Execute Tests link.
Let’s assume that a test case got failed. Select the Test case and mark the test case result as Failed.
Login to Jira Instance.
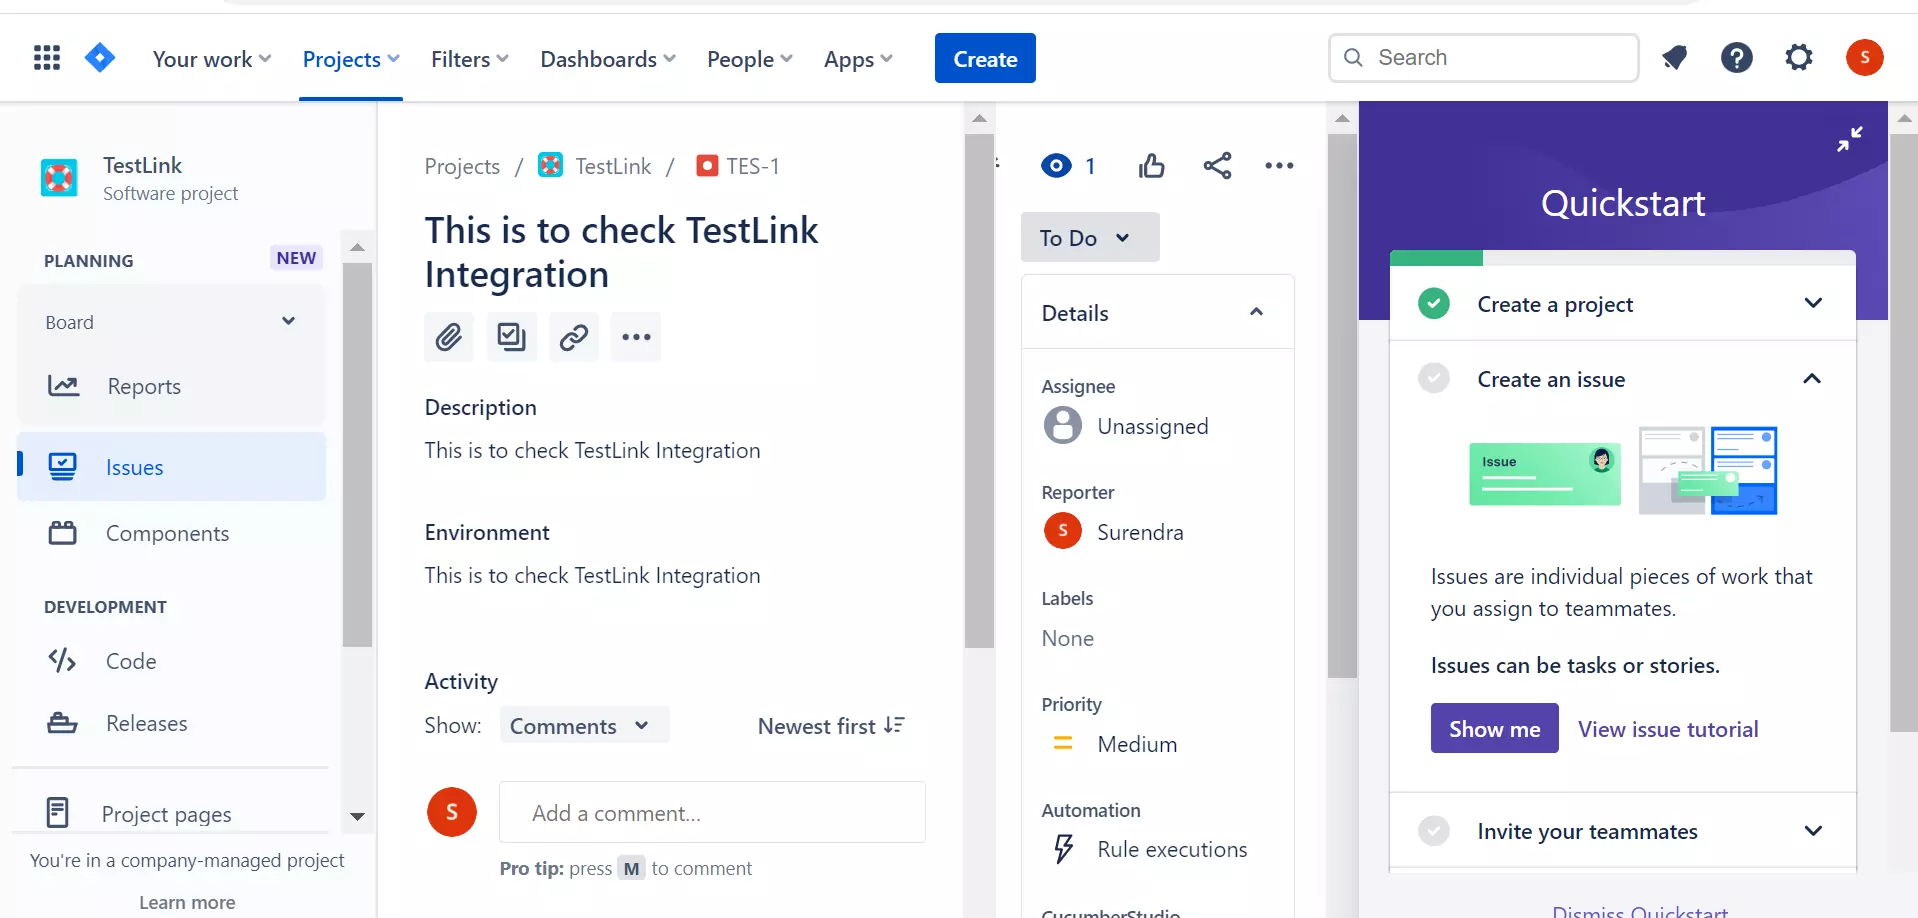
Create an Issue/bug in Jira.
For example, a sample issue was created on the Jira Cloud instance. The Jira Issue ID is TES-1

Copy the Jira Issue or Bug Id.
Click on the green bug Link Existing Issue link.
![]()
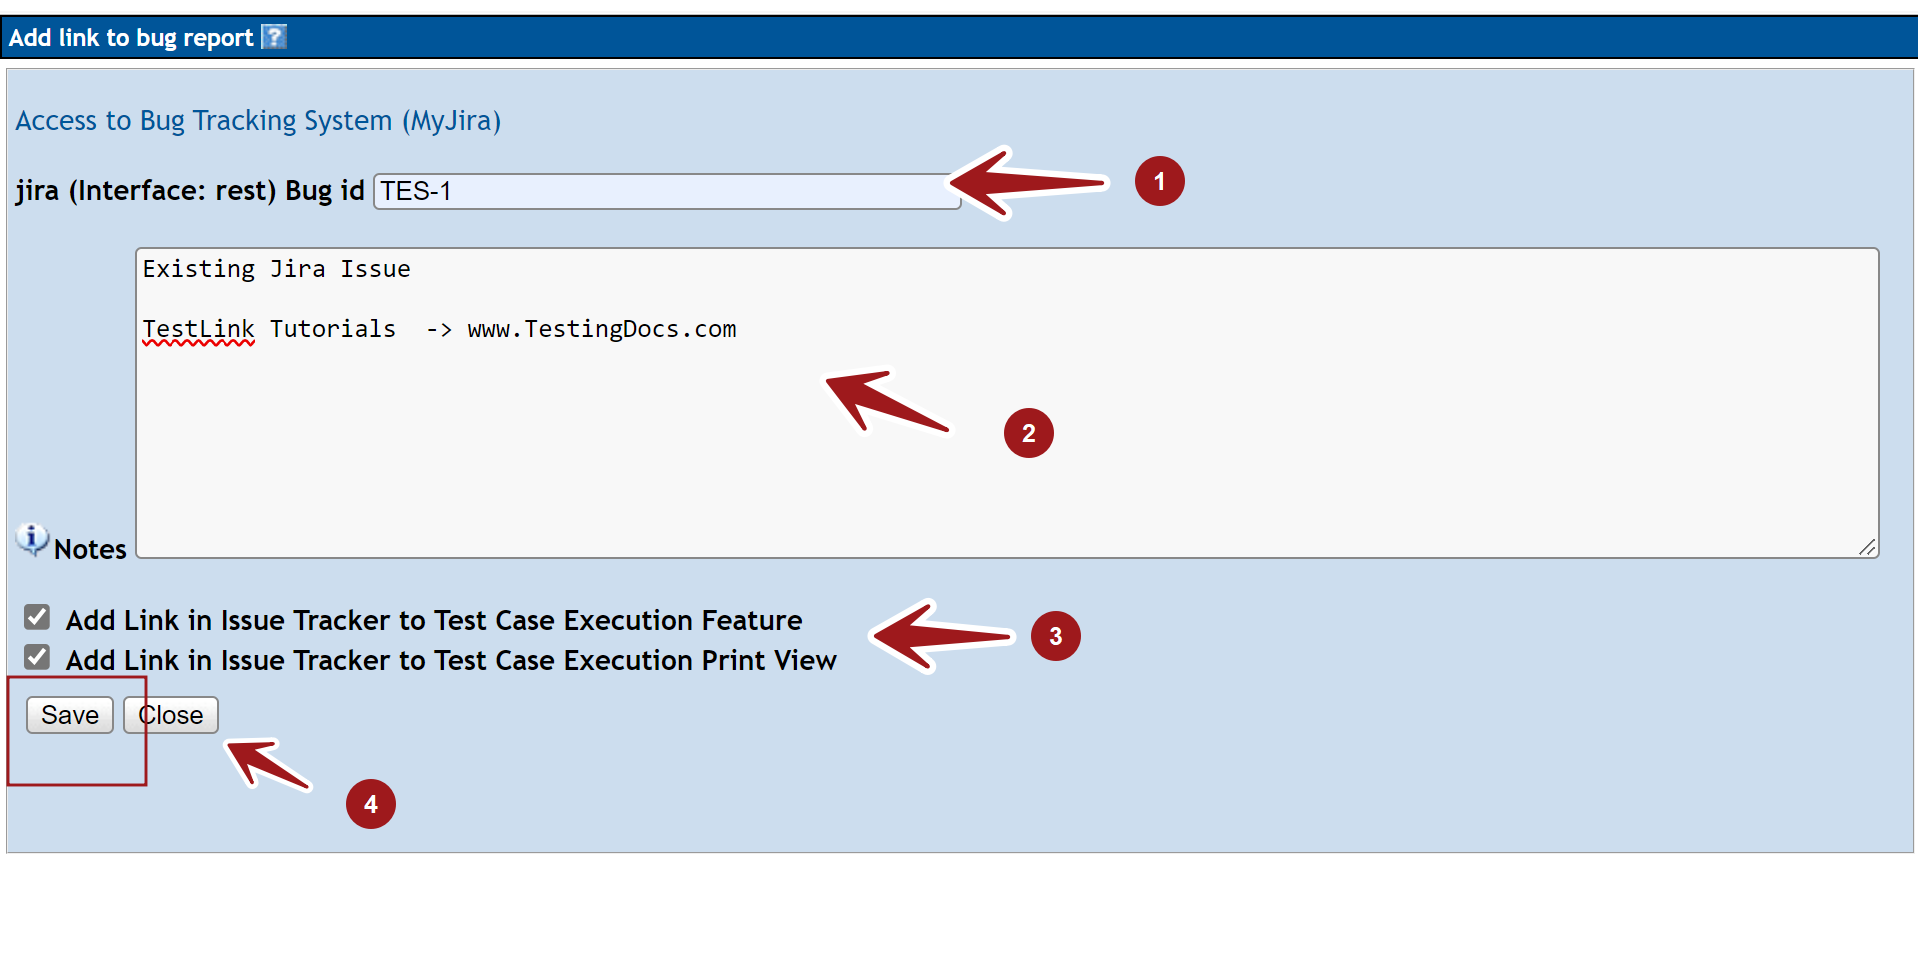
A new Add link to bug report window opens up.
Add the Jira Bug Id in the text box.
Enter Bug Notes in the text area.

Check the checkboxes:
Add Link in Issue Tracker to Test Case Execution Feature
Add Link in Issue Tracker to Test Case Execution Print View
And click on the Save button. Close the window.
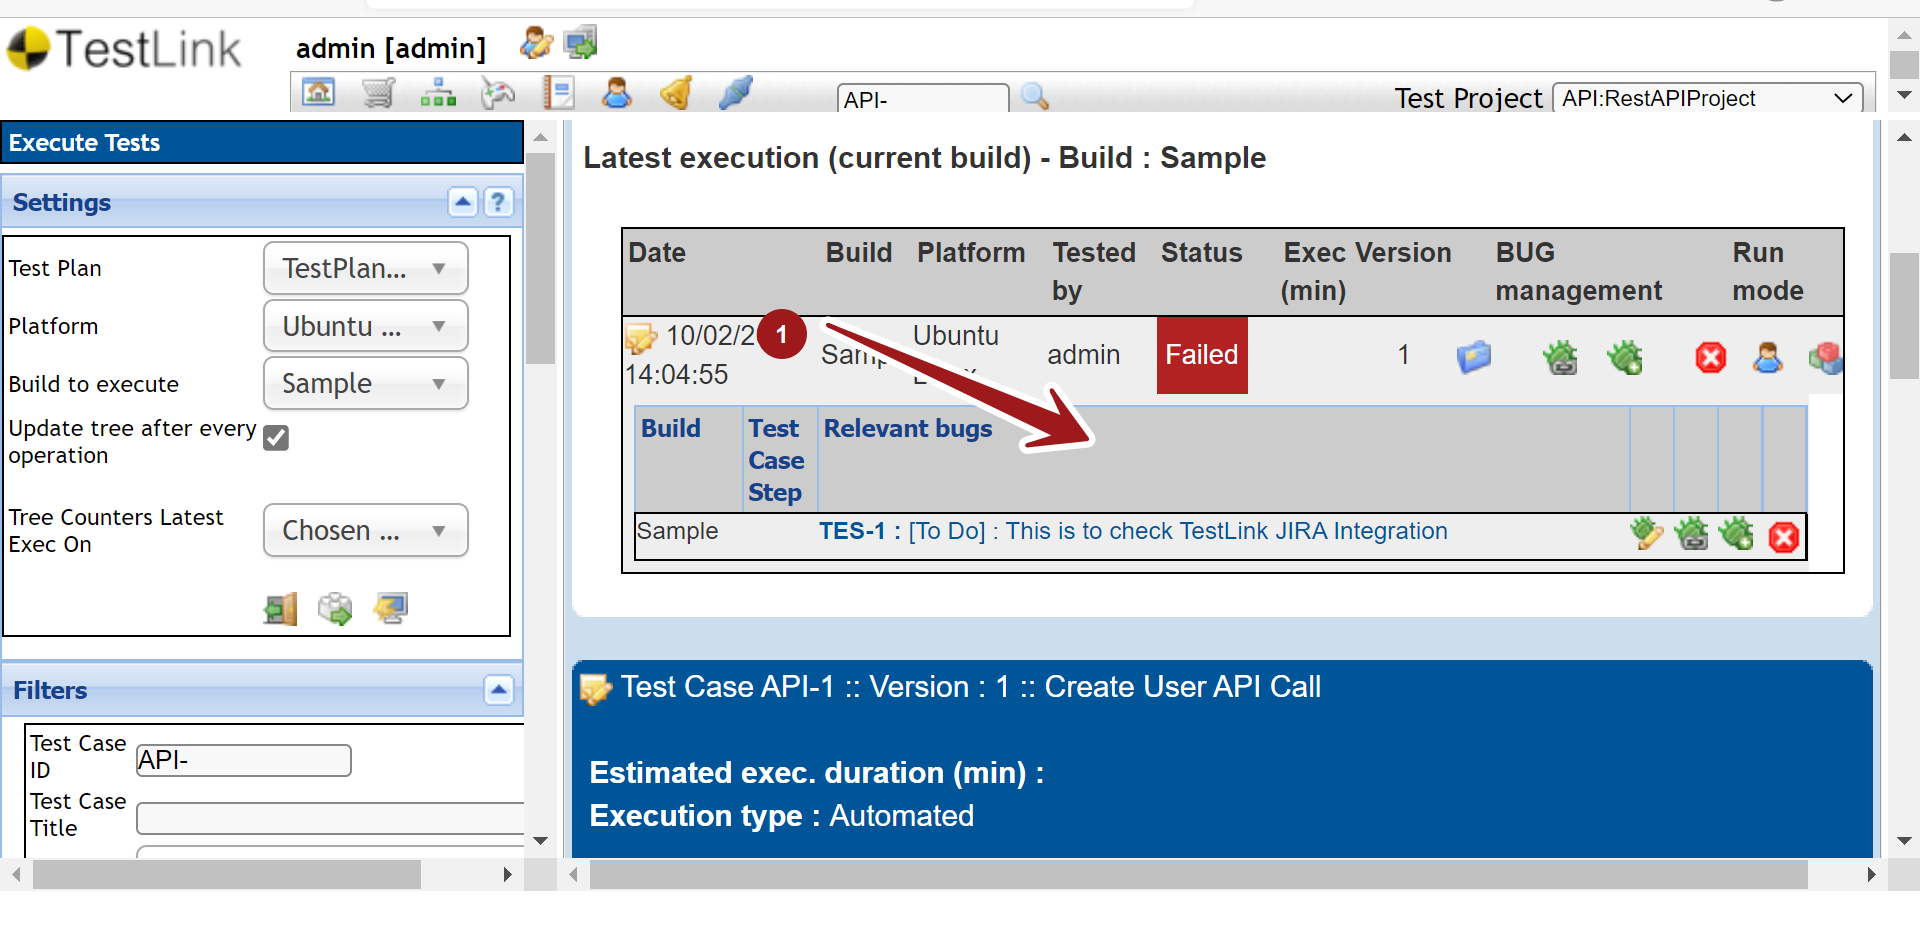
After closing the add bug page, we will see relevant bug data on the test execution page. The specified Jira issue would be added to the Test Execution. The system retrieves the bug description, link to visit, and link to edit the Jira Issue.

That’s it. We have successfully linked an existing Jira Issue or bug to the TestLink Test result.
—
TestLink Tutorials
TestLink Tutorial on this website can be found at:
https://www.testingdocs.com/testlink-tutorials/


