Class Diagram using Raptor
Overview
In this tutorial, we will learn the steps involved in creating Class diagram using Raptor Flowchart tool. Class diagrams help the developers to get initial design ideas of an object oriented system under development. Class diagrams show how classes in the system relate to other classes in the system.
Class
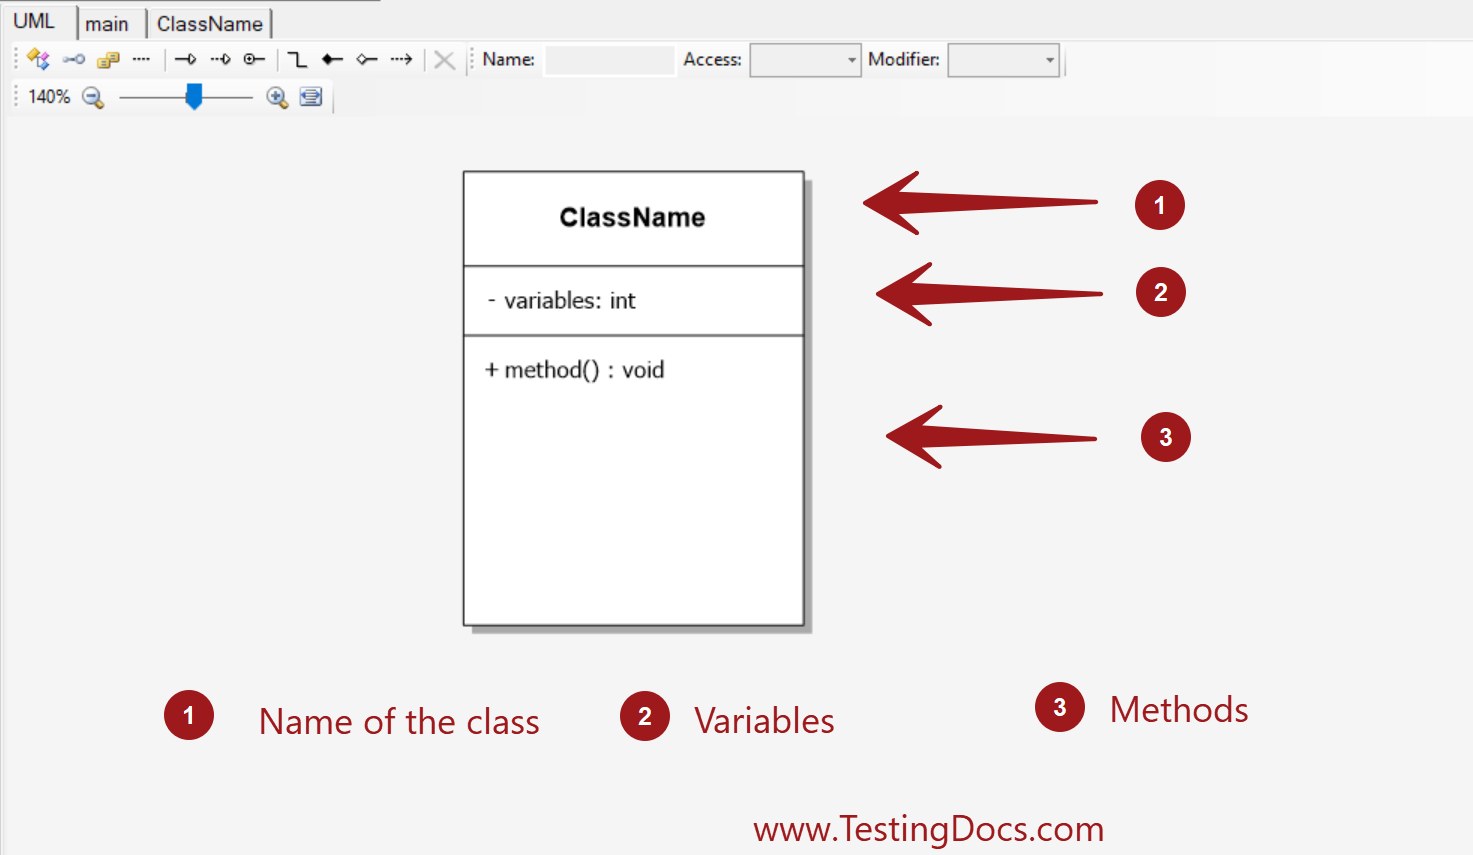
A class is represented using a rectangle and split into multiple sections. The sections of the class in the diagram are:
- Class name
- Instance variables or attributes
- Methods

Class can have multiple attributes and methods.
UML Notation
A variable and the type are separated with colon(:)
<variable name>:<datatype>
static variables are underlined in the class diagram.
Method syntax in the diagram.
methodName(paramter1: datatype,parameter2:datatype,..) : methodReturnType
Abstract methods are italicized in the class diagram. Constructors do not have return types.
Class Relationships
Class relationships in the class diagram can be shown in many ways using lines and arrows. We will talk in detail in upcoming posts.
Raptor Tutorials on this website can be found at:
https://www.testingdocs.com/raptor-a-flowchart-tool/
RAPTOR official website: https://raptor.martincarlisle.com/


