How to update TestNG Plugin
Overview
In this post, we will see how to update TestNG Plugin in Eclipse IDE. Steps to update the TestNG plugin are shown below:
Check for Updates
Launch your eclipse
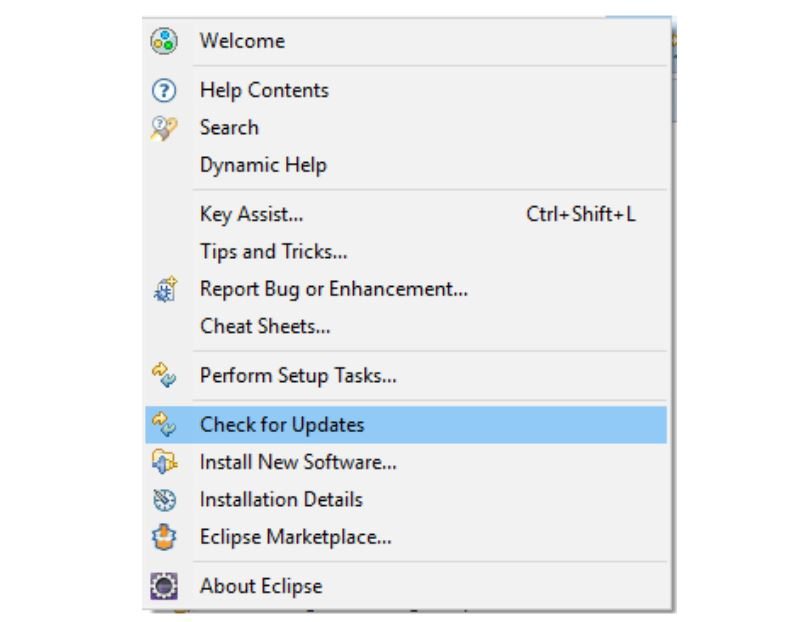
Go to Help and click on Check for the updates menu item as shown in the below screen.
Help>> Check for updates.

Choose Components
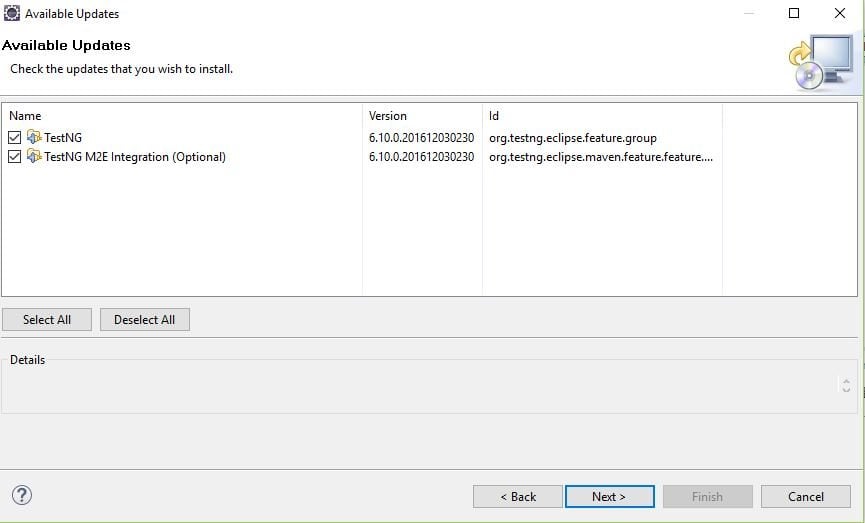
Select the TestNG components and click on next as shown in the below screen. You might get other plugin updates as well. You might choose them to update as well.

Accept EULA
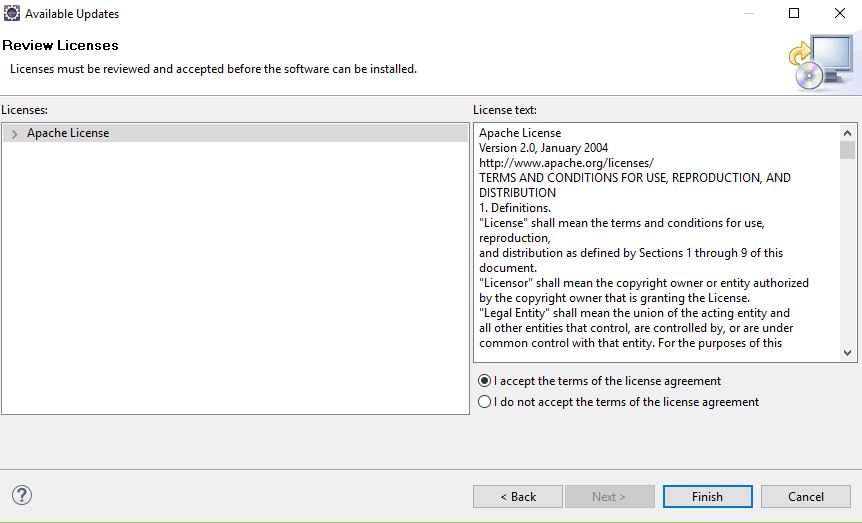
Read and accept EULA and click on Finish button as shown below:
The update will trigger once you click on the Finish button.

You might even choose to run in the background.
Restart Eclipse
You will need to restart Eclipse for the changes to into effect.
You are done with the update process. We can set the Automatic settings.
Click on Windows >> Preferences >> Install /Update
We can set download options and update schedules on this screen. We can set to automatically download the new updates and notify them when ready. On this screen, we can set eclipse to look for updates every time eclipse is started. However, this will have an impact on Eclipse load time. Restore defaults would reset the settings to the factory.
—
TestNG Tutorials on this website can be found at:
https://www.testingdocs.com/testng-framework-tutorial/
For more details on the TestNG Framework, visit the official website of TestNG at:


