Procedure in Raptor flowcharts
Procedure in Raptor flowcharts
In this post, we will learn to use a procedure in Raptor flowcharts. A procedure is a series of steps, to achieve some desired result or to perform a specific task. We rely on the procedure to perform the task and don’t worry about internal details or the implementation. This is called Procedural abstraction. Procedural abstraction hides the internal details or working from the caller.
Procedure vs Function
It’s important to note the difference between a Procedure and a function. A Procedure does a set of actions and doesn’t return any value to the caller. A Function is like a Procedure but returns a value to the caller or the main flowchart.
For example, RAPTOR in built function sqrt() returns a value i.e the square root of the number passed to the function.
The values passed to the procedure or function are called as arguments or parameters.
Flowchart Example
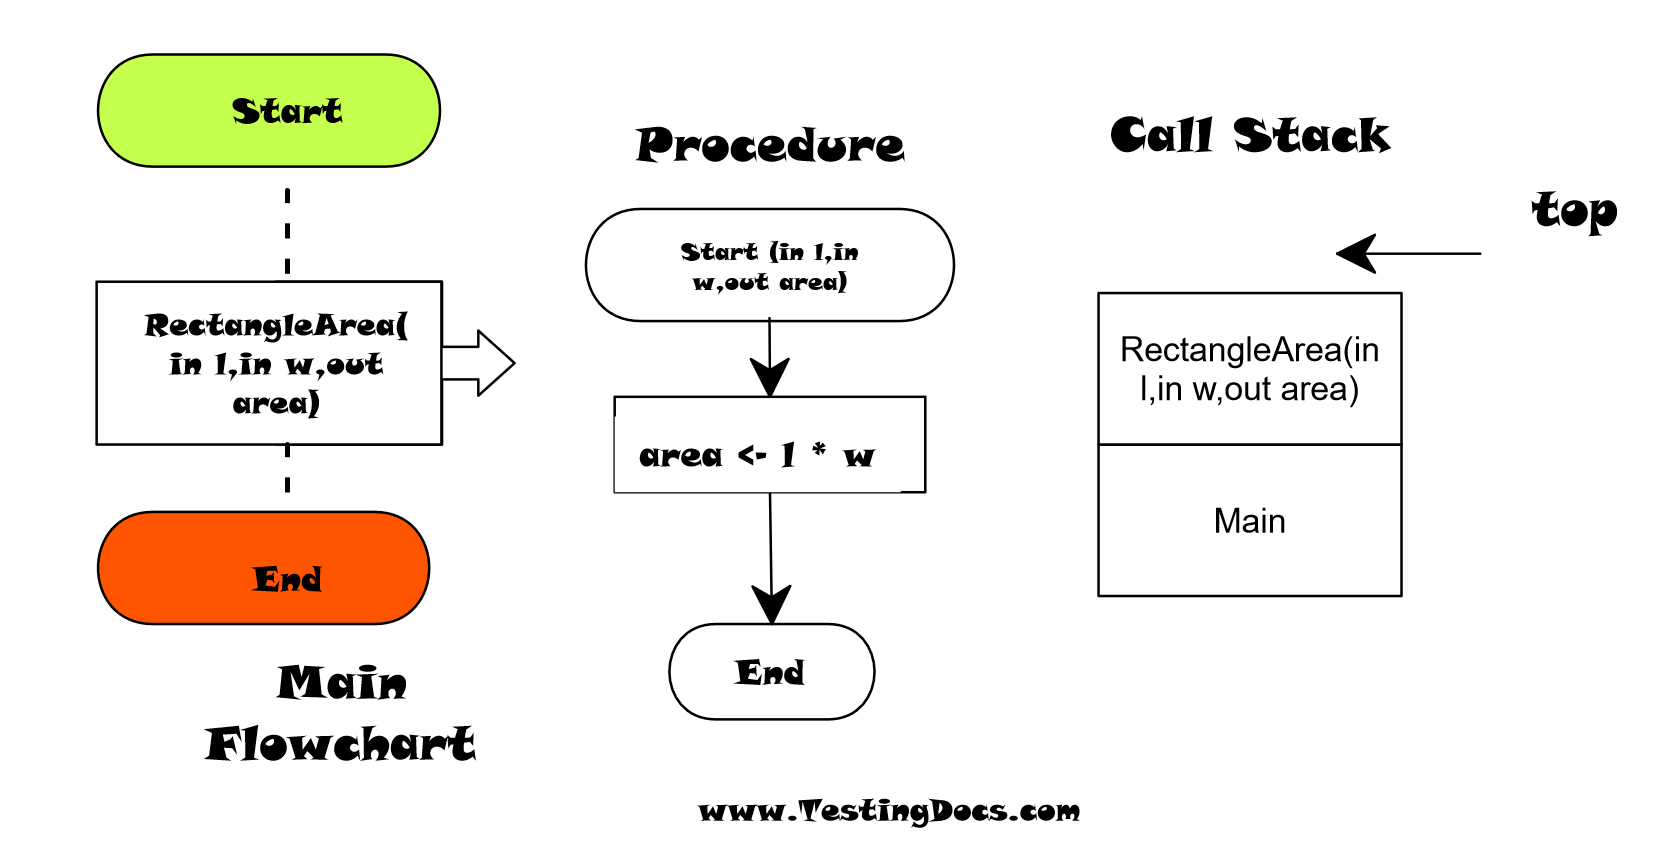
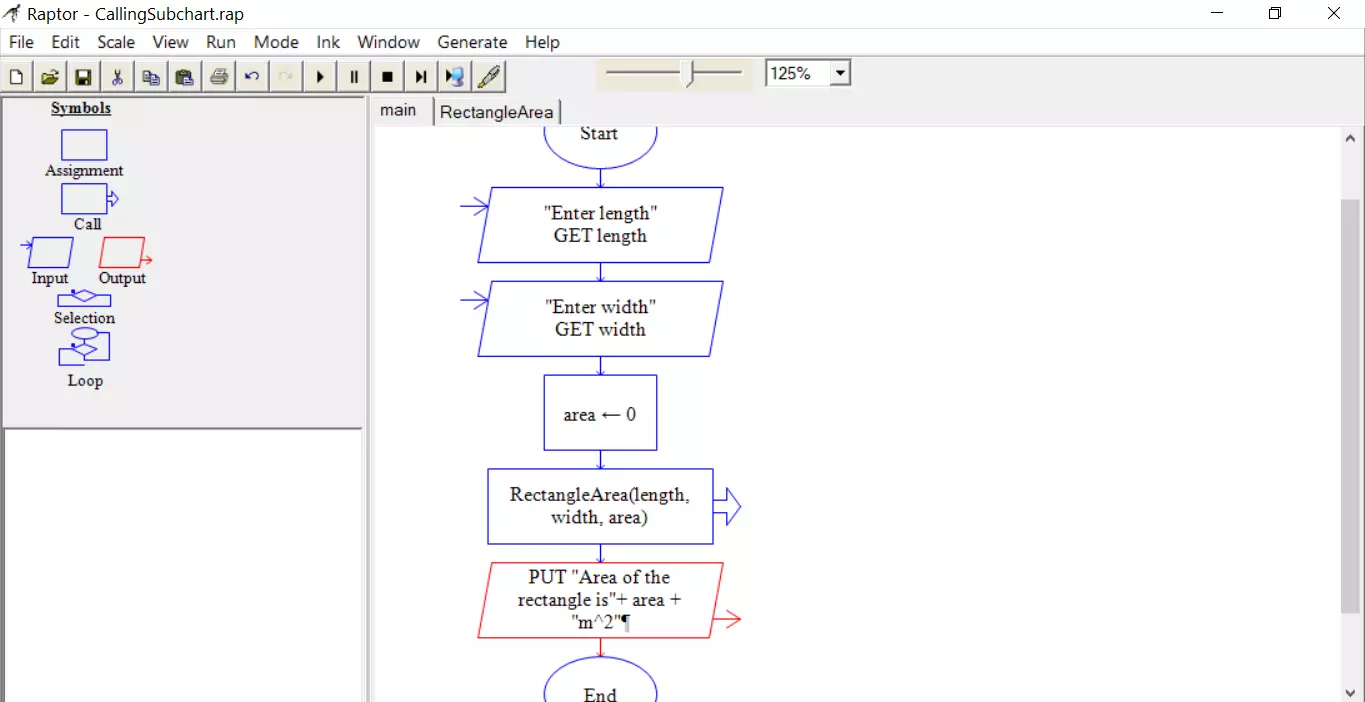
In this example, we will create a procedure to calculate the area of a rectangle. We will pass the length and width in meters as parameters to the procedure from the main flow chart. The procedure calculates the area of the rectangle the value is used in the main flow chart.
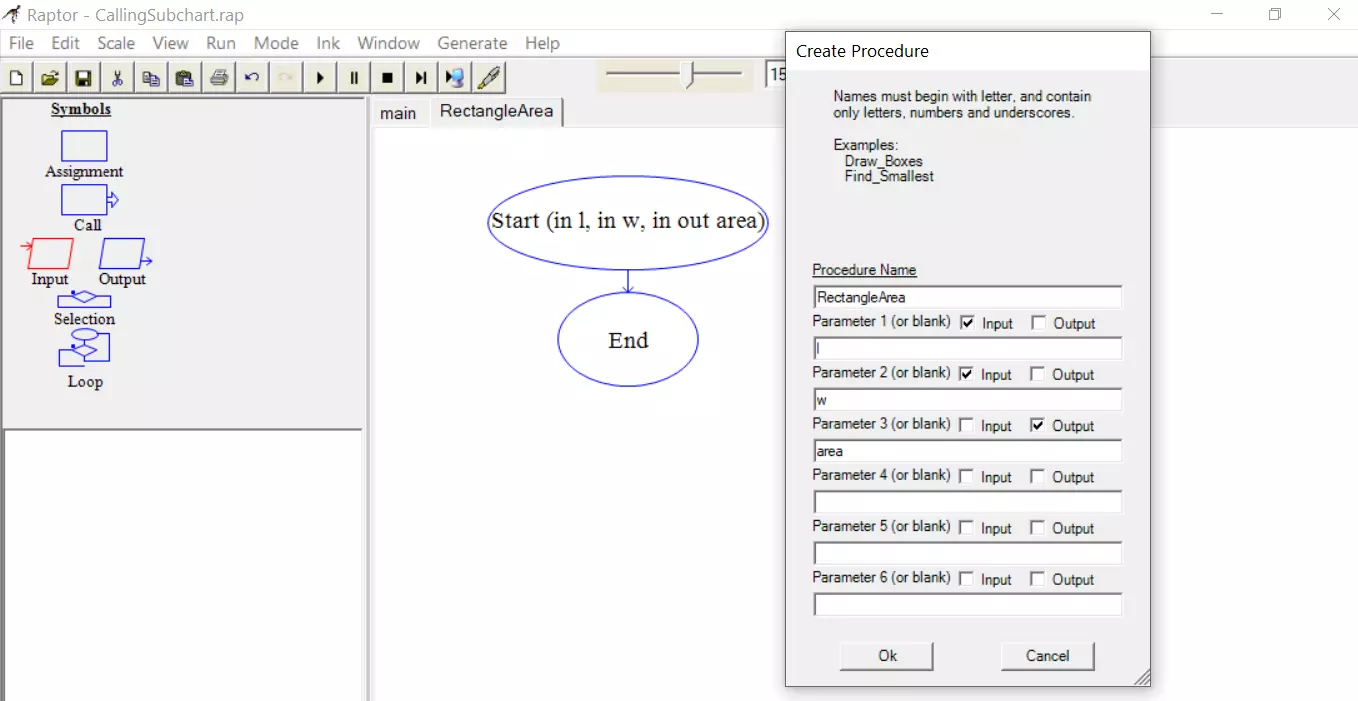
Create a RAPTOR Procedure
- Launch Raptor.
- Drag two input symbols for length and width.
- We will pass the parameters, length, and width of the rectangle to the procedure in the flow chart.
- Create a procedure. Right-click on main >> Add procedure.
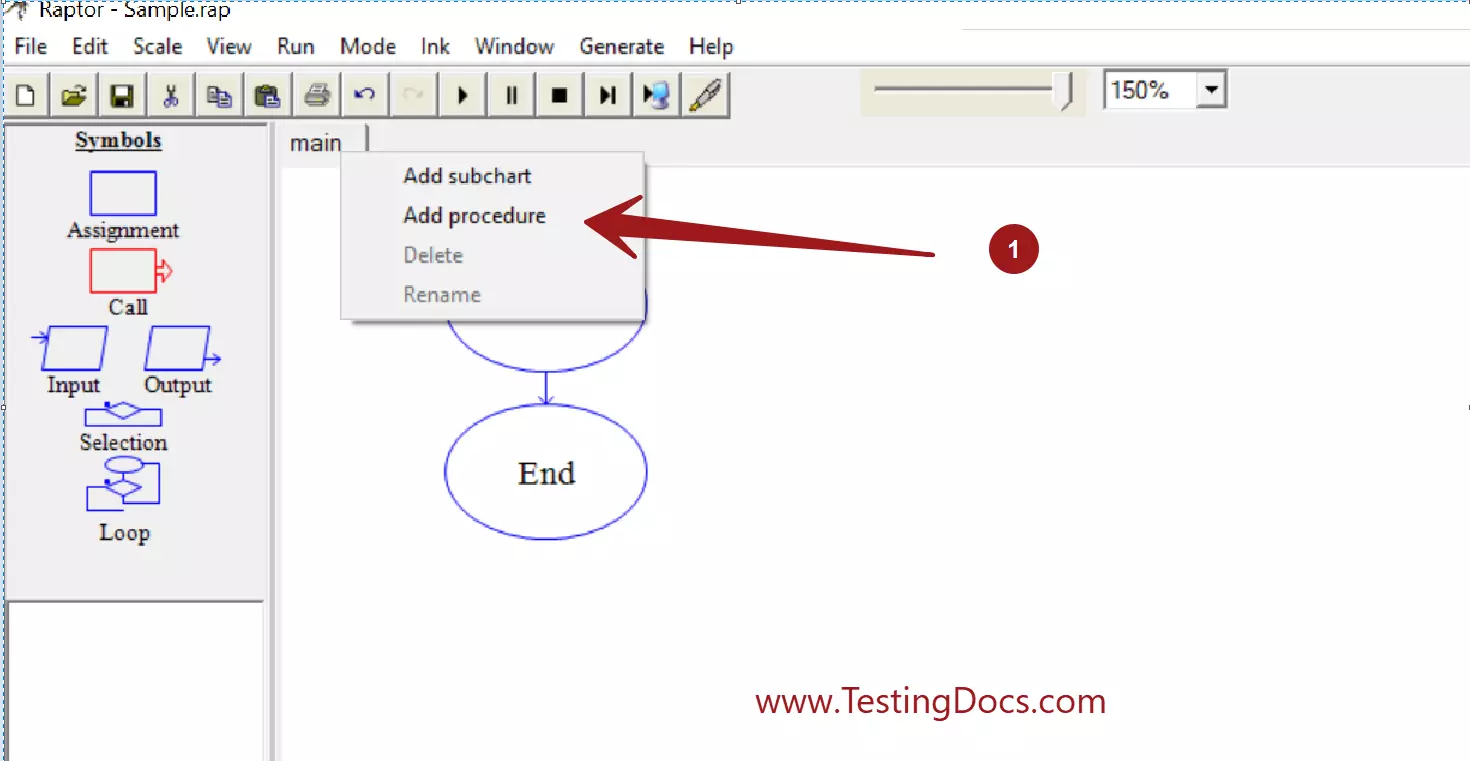
In the Raptor flowchart, we add both Procedure and Function using the same menu option.
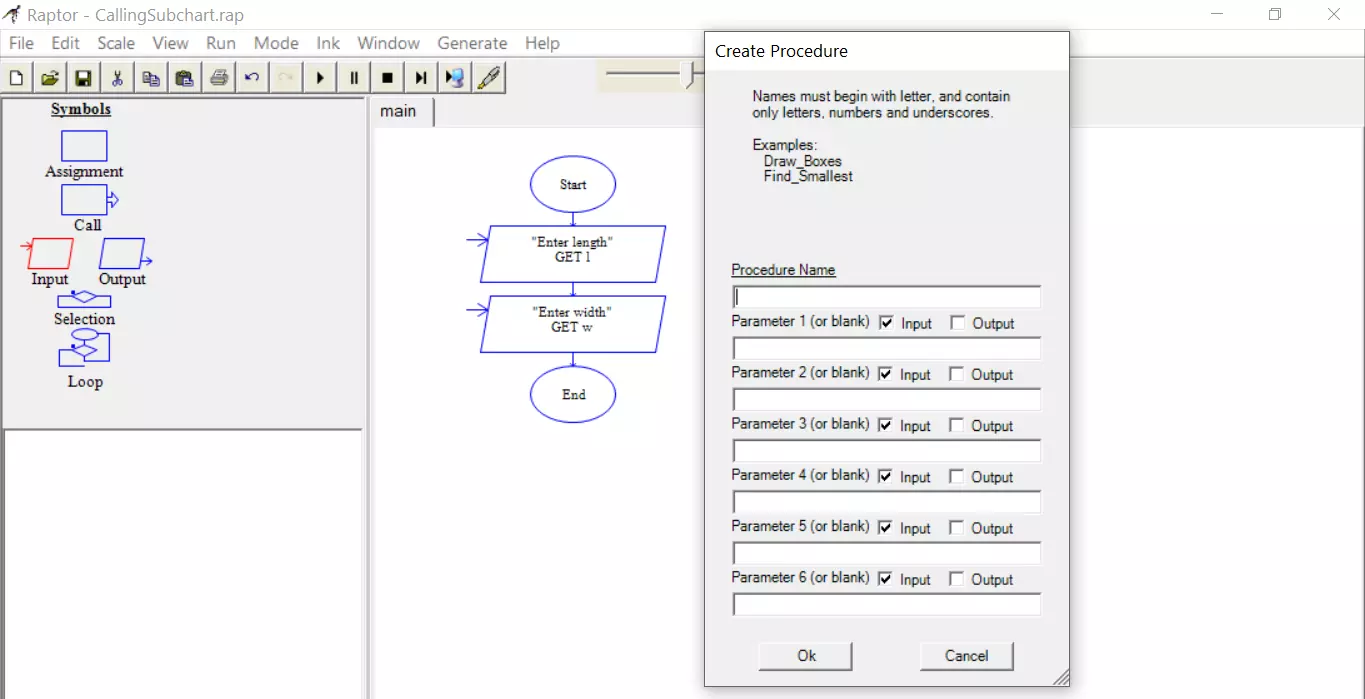
- Add Procedure name.
- We need two input parameters for length and width.
- One output parameter to return the area of the rectangle to the main flow chart.
- Check two input parameters and one output parameter.
Procedure parameters
There are two types of parameters that we can specify to a Raptor procedure. Input and Output parameters.
https://www.testingdocs.com/parameter-scope-in-raptor-procedure/
Invoke the Procedure
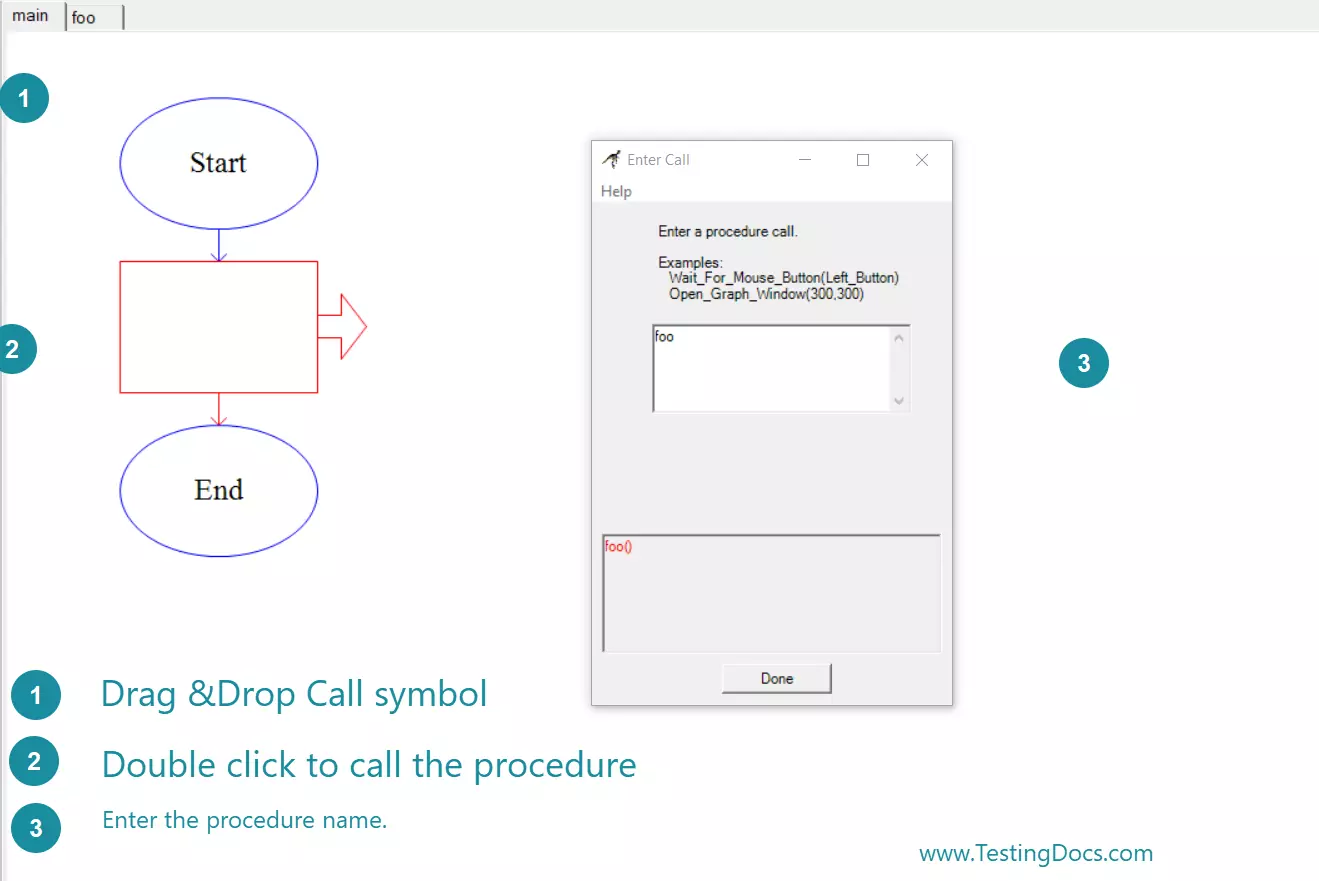
We can invoke the procedure in the flowchart using the Call symbol. To call the procedure drag the Call symbol in the main flow chart. Since procedures do not return value they can only be invoked using the Call flowchart symbol. Pass the parameters.
RectangleArea(length,width,area)
Math Formula
The area of a rectangle is
Area= length * width
The output parameter area is computed in the procedure.
area <- l*w
Drag an output symbol to display the area in the main flow chart.
Click on the execute button to test the flow chart.
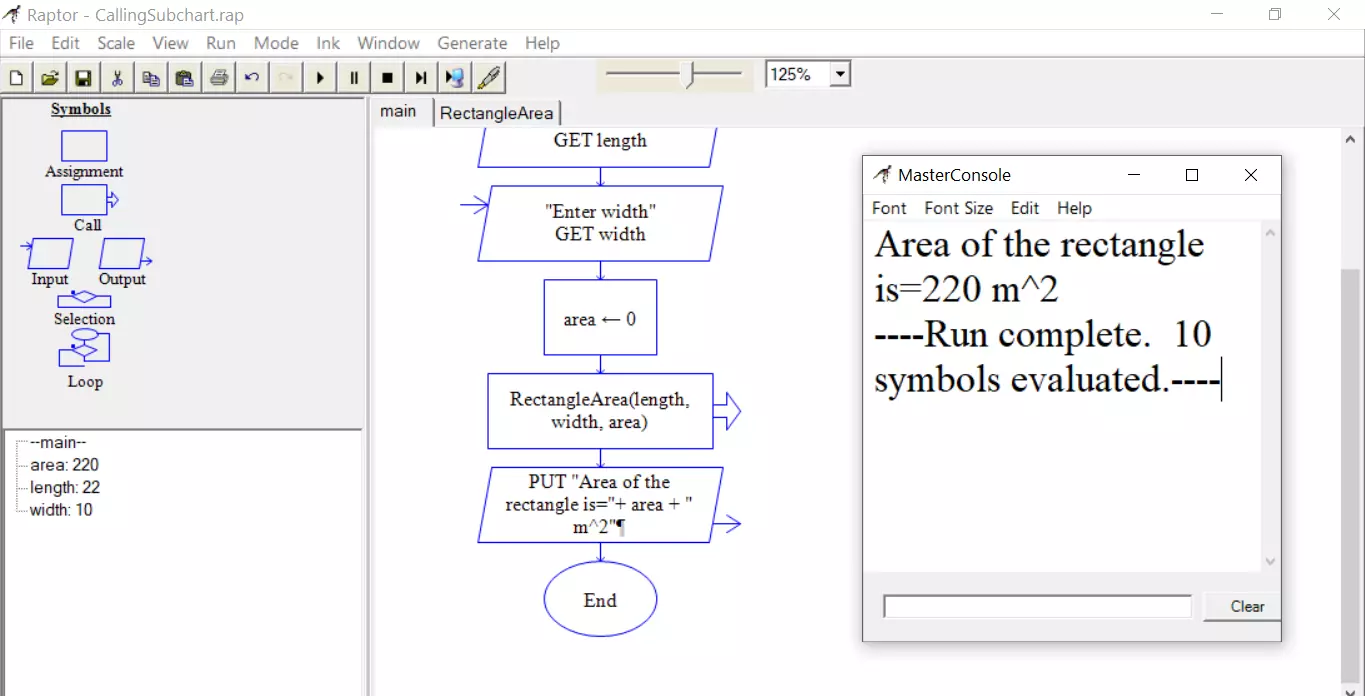
You can see that we have calculated the area of the rectangle using a Procedure in the flow chart.
Sample Procedure Use-case
We can implement a large flowchart or program into a modular sub-modules using procedures and functions. Each procedure body is small and performs a specific task when invoked. Let’s take a telephone directory as an example. There are many features of a telephone directory system.
Some of the main features are adding, listing, searching, modifying and deleting telephone directory-related records. A record contains the information of a person’s name, phone number and address etc. All these operations can be performed by using different procedures in the flowchart.
We can develop Procedures for:
- Add_Telephone_Record(Person p)
- Modify_Telephone_Record(Person new)
- Search_Telephone_Record(String keyword)
- Delete_Telephone_Record(Person p)
- Display_Records()
Advantages of using Procedures
- Flowcharts with procedures are easier to understand.
- Using procedures we can break a complex large flowchart into manageable modules or components.
- Procedures improve the structure and Look & feel of the flowchart. A single large flowchart
looks clumsy and cumbersome. - Procedures make debugging of the flowchart easy.
- Procedures are the basic steps to move to Object-oriented flowcharts. Objects have behavior that
are simulated using instance methods.
RAPTOR Tutorial Page:


