Create New Java Class in Eclipse [ 2024 ]
Create New Java Class in Eclipse
This tutorial will show you how to create a new Java class in a Project using Eclipse IDE. Classes can be defined inside a project. Steps to create a new project are outlined here:
Environment
- Windows 10 Operating System
- Eclipse IDE
- JDK
What is a Java class?
A class is a blueprint or prototype for the objects. Individual objects are instances of the class. The class definition consists of fields and methods. The fields represent the object’s state and the methods define the object’s behavior or interactions with other types.
New Java class
Launch the Eclipse IDE. Right-click on the project in the Package Explorer and choose New ->> Class.

This will launch a New Java Class Wizard. We can set multiple things in this wizard screen. Some are optional as well.
Specify the package name for the class in the Name: textbox. If we don’t specify the package name the class would created in the default package under the src directory. This is not recommended.
Enter the name of the class. We need to follow naming conventions to name the Java class and package. For example, it is discouraged to have a class name that begins with a digit.
Super class
We can also specify the parent class for the current class in the Super class textbox. The default value is the java.lang.Object class. We can have only one class as the Superclass. Java doesn’t support multiple class inheritance.
We can add Interfaces to the class. Click on the Add… button and choose the Interface. A class can implement multiple interfaces.
To add the main method to the class, check the main method checkbox.
public static void main(String[] args)
This method will allow you to run the Java application.
To generate comments check the Generate comments checkbox.
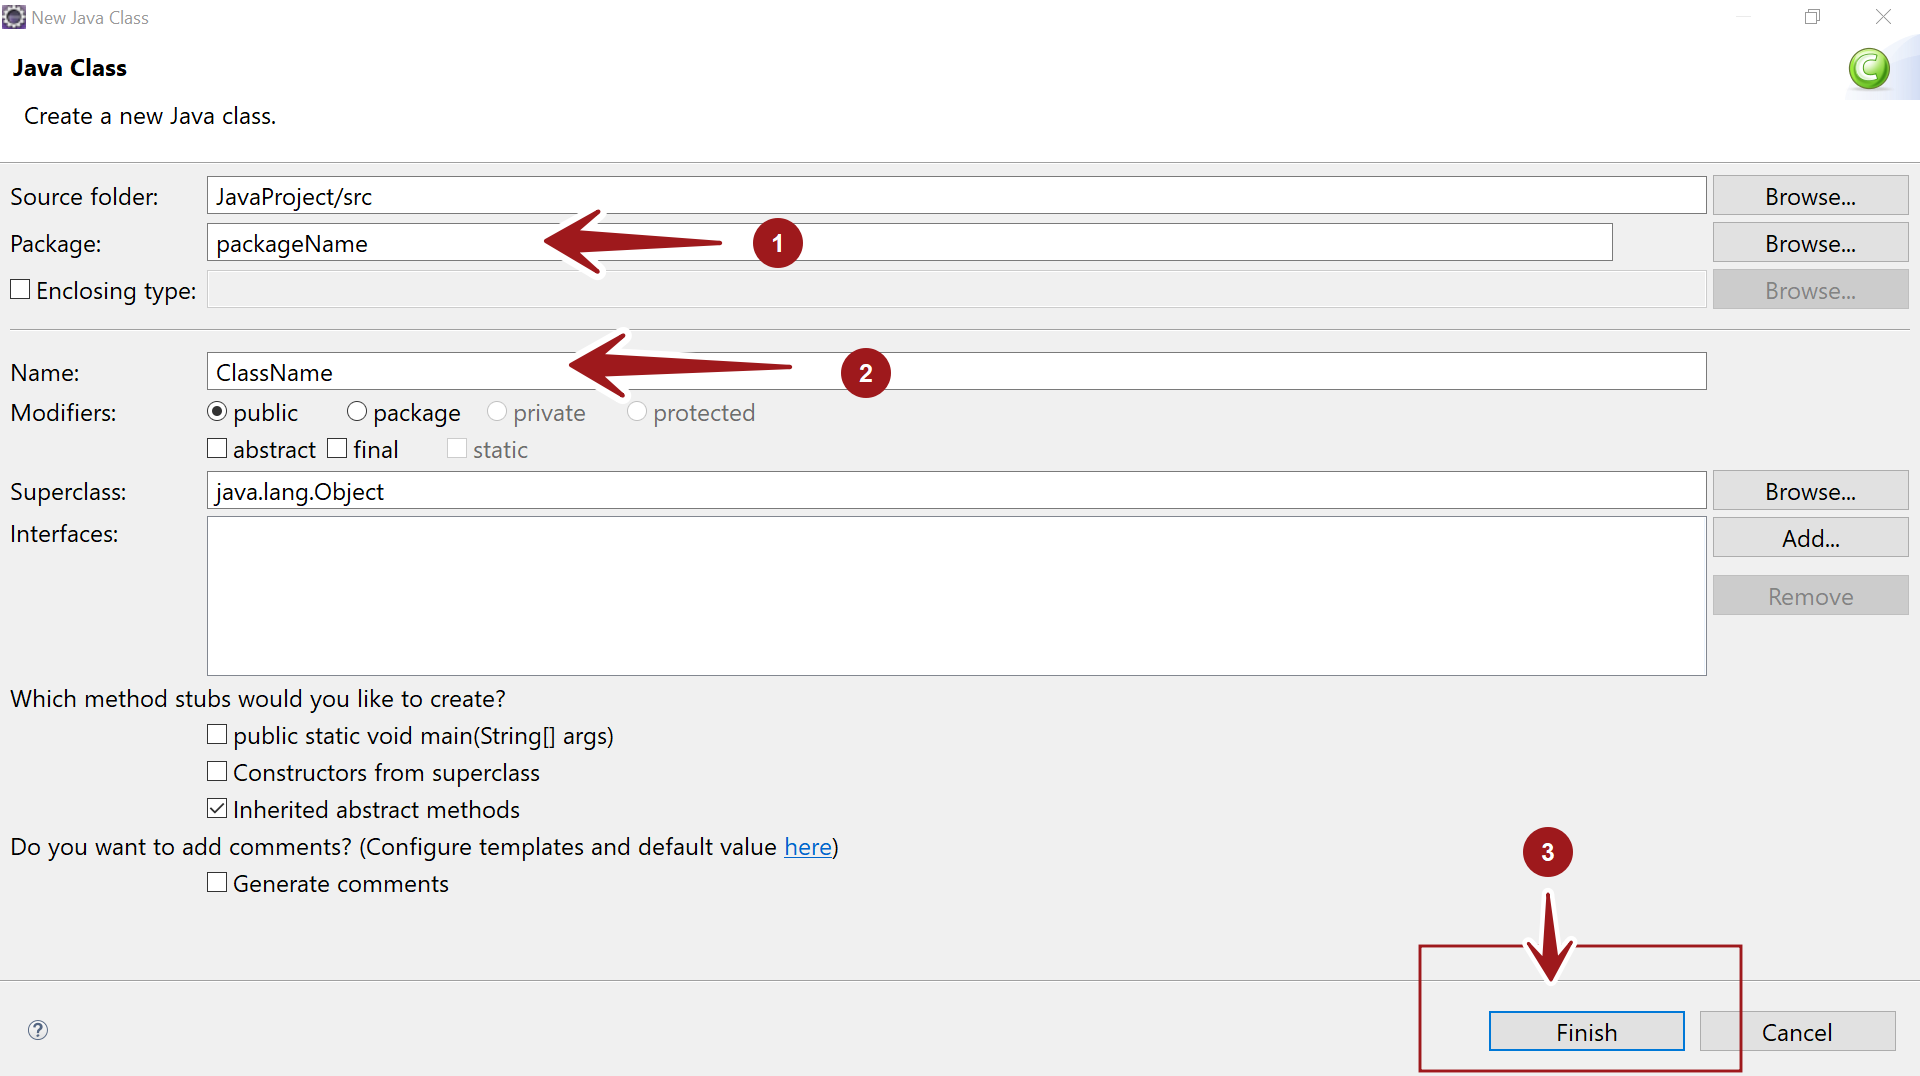
Click on the Finish button.
The class would be created and added to the project. The Workbench will update itself with the newly created class.
That’s it. We have successfully created a class using Eclipse IDE.
Eclipse Tutorials
Eclipse Tutorials on this website can be found at:
For more details on the Eclipse IDE, visit the official website

